www.gateway.com
57
12 Reconnect all external cables and the power cord.
13 Return your computer to the upright position.
14 Turn on your computer and open the BIOS Setup utility.
15 In the BIOS Setup utility, restore any settings that you
wrote down previously.
16 Save all your settings and exit the BIOS Setup utility.
Replacing the power supply
To replace the power supply:
1 Remove the side panel by following the instructions in
“Opening and closing the case” on page 37.
2 Remove the bezel by following the instructions in
“Removing and installing the front bezel” on page38.
3 Disconnect the power supply cables from all
components (such as hard drives, CD or DVD drives, and
the system board), noting their locations and
orientation. (You will reconnect the cables after you
install the new power supply.)
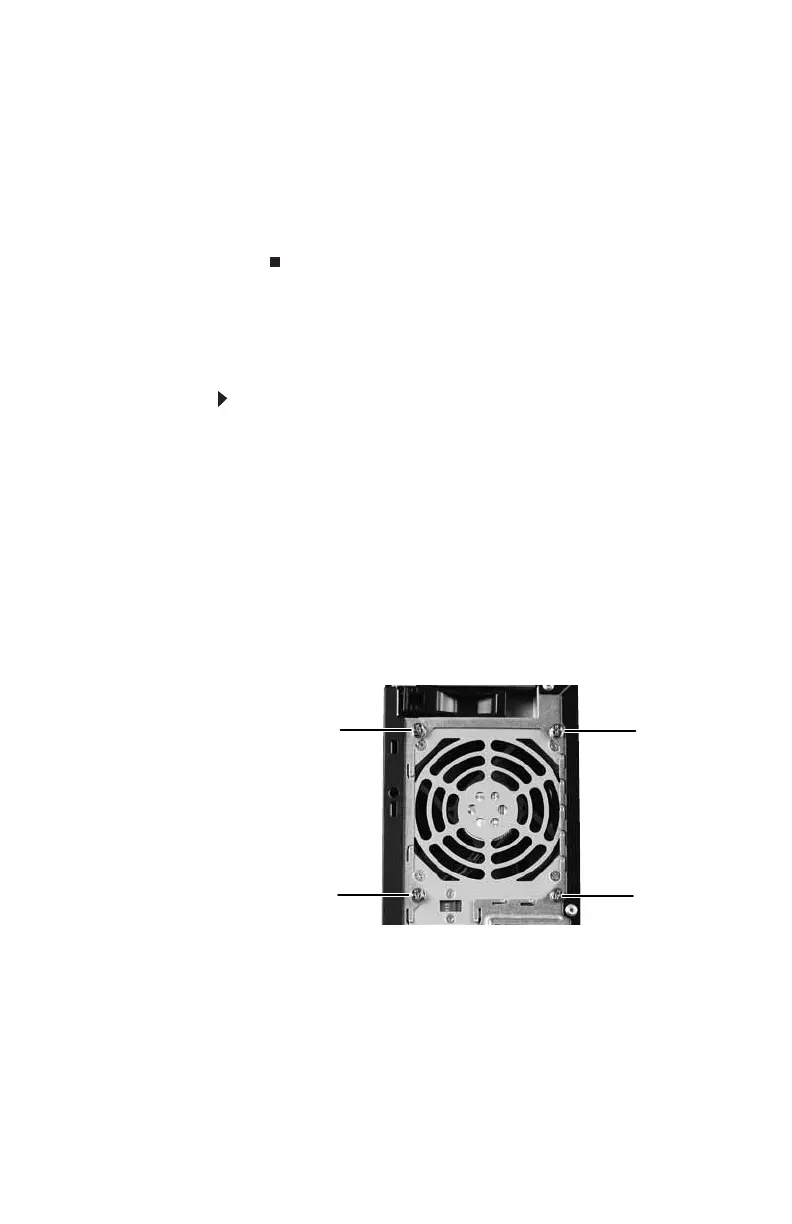
4 Remove the four screws that secure the power supply to
the computer.
Screw
Screw
Screw
Screw
8512732.book Page 57 Thursday, September 27, 2007 11:33 AM