EasyManuals Logo

Gateway Notebook User Guide & Code Book

Gateway Notebook
128 pages
To Next Page IconTo Next Page
To Previous Page IconTo Previous Page
Page #70 background imageLoading...
Page #70 background image
64
www.gateway.com
Chapter 6: Upgrading Your Notebook
7 Remove the battery. For more information, see “Changing batteries”
on page 53.
8 Remove the hard drive bay cover screw, slide the hard drive bay
cover, then remove it.
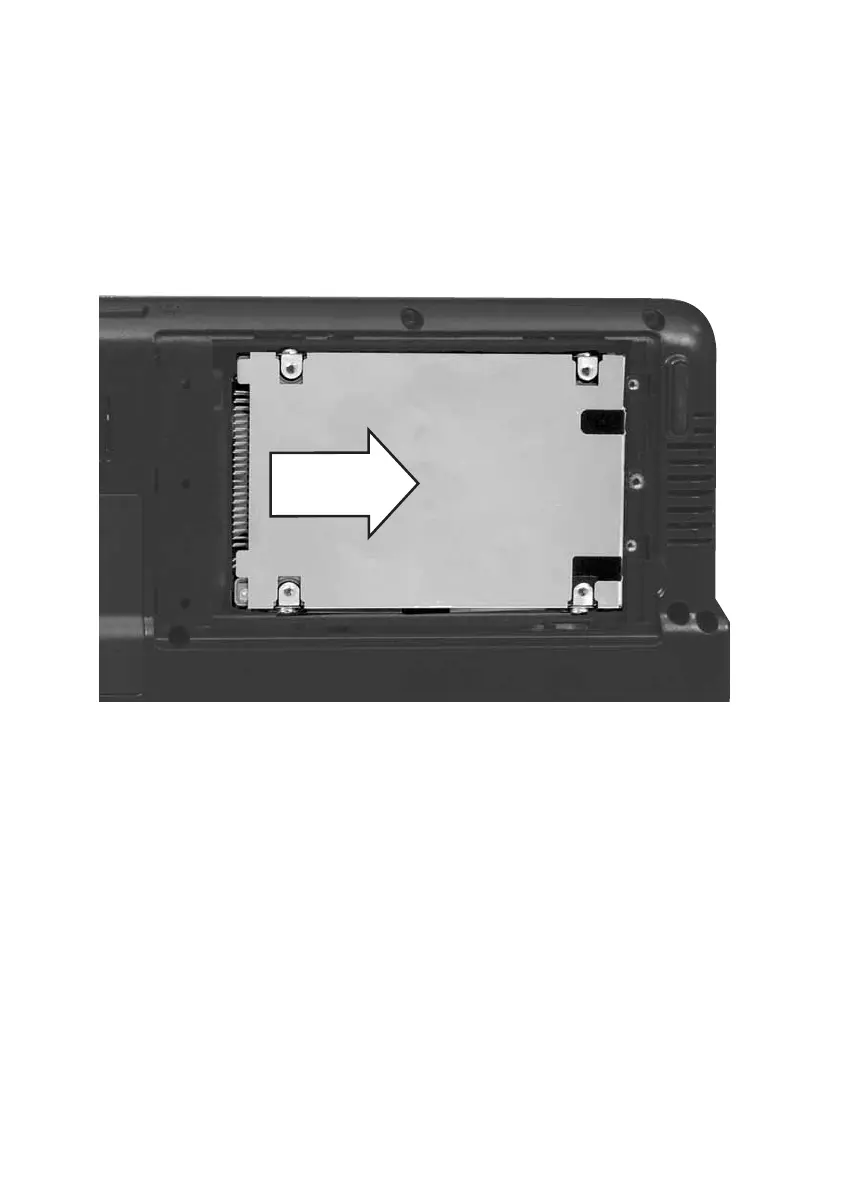
9 Remove the two screws securing the hard drive kit to the notebook,
slide the old hard drive kit away from the hard drive connector, then
lift the hard drive kit out of your notebook.
10 If your new hard drive already includes the hard drive kit bracket,
go to Step 15.
-OR-
If you need to move the hard drive kit bracket from your old hard
drive kit to your new hard drive, go to Step 11.
11 Remove the screws that secure the hard drive to the hard drive kit
bracket.
12 Remove the bracket from the old drive.
13 Insert the new drive into the bracket so the screw holes line up.
14 Replace the screws that secure the bracket to the drive.

Table of Contents

Other manuals for Gateway Notebook

Questions and Answers:

Question and Answer IconNeed help?

Do you have a question about the Gateway Notebook and is the answer not in the manual?

Gateway Notebook Specifications

General IconGeneral
BrandGateway
CategoryLaptop
ProcessorVaries by model (Intel Celeron, Pentium, Core i3, Core i5, AMD Ryzen)
RAMVaries by model (8GB, 16GB)
StorageVaries by model (256GB SSD, 512GB SSD, 1TB HDD)
DisplayVaries by model (14-inch, 15.6-inch, FHD)
Operating SystemWindows 10 or Windows 11
GraphicsIntel UHD Graphics
BatteryVaries by model
WeightVaries by model

Related product manuals