PanaFlow™ LC User’s Manual 19
Chapter 2. Installation
2.8.1 Installing the Fixture
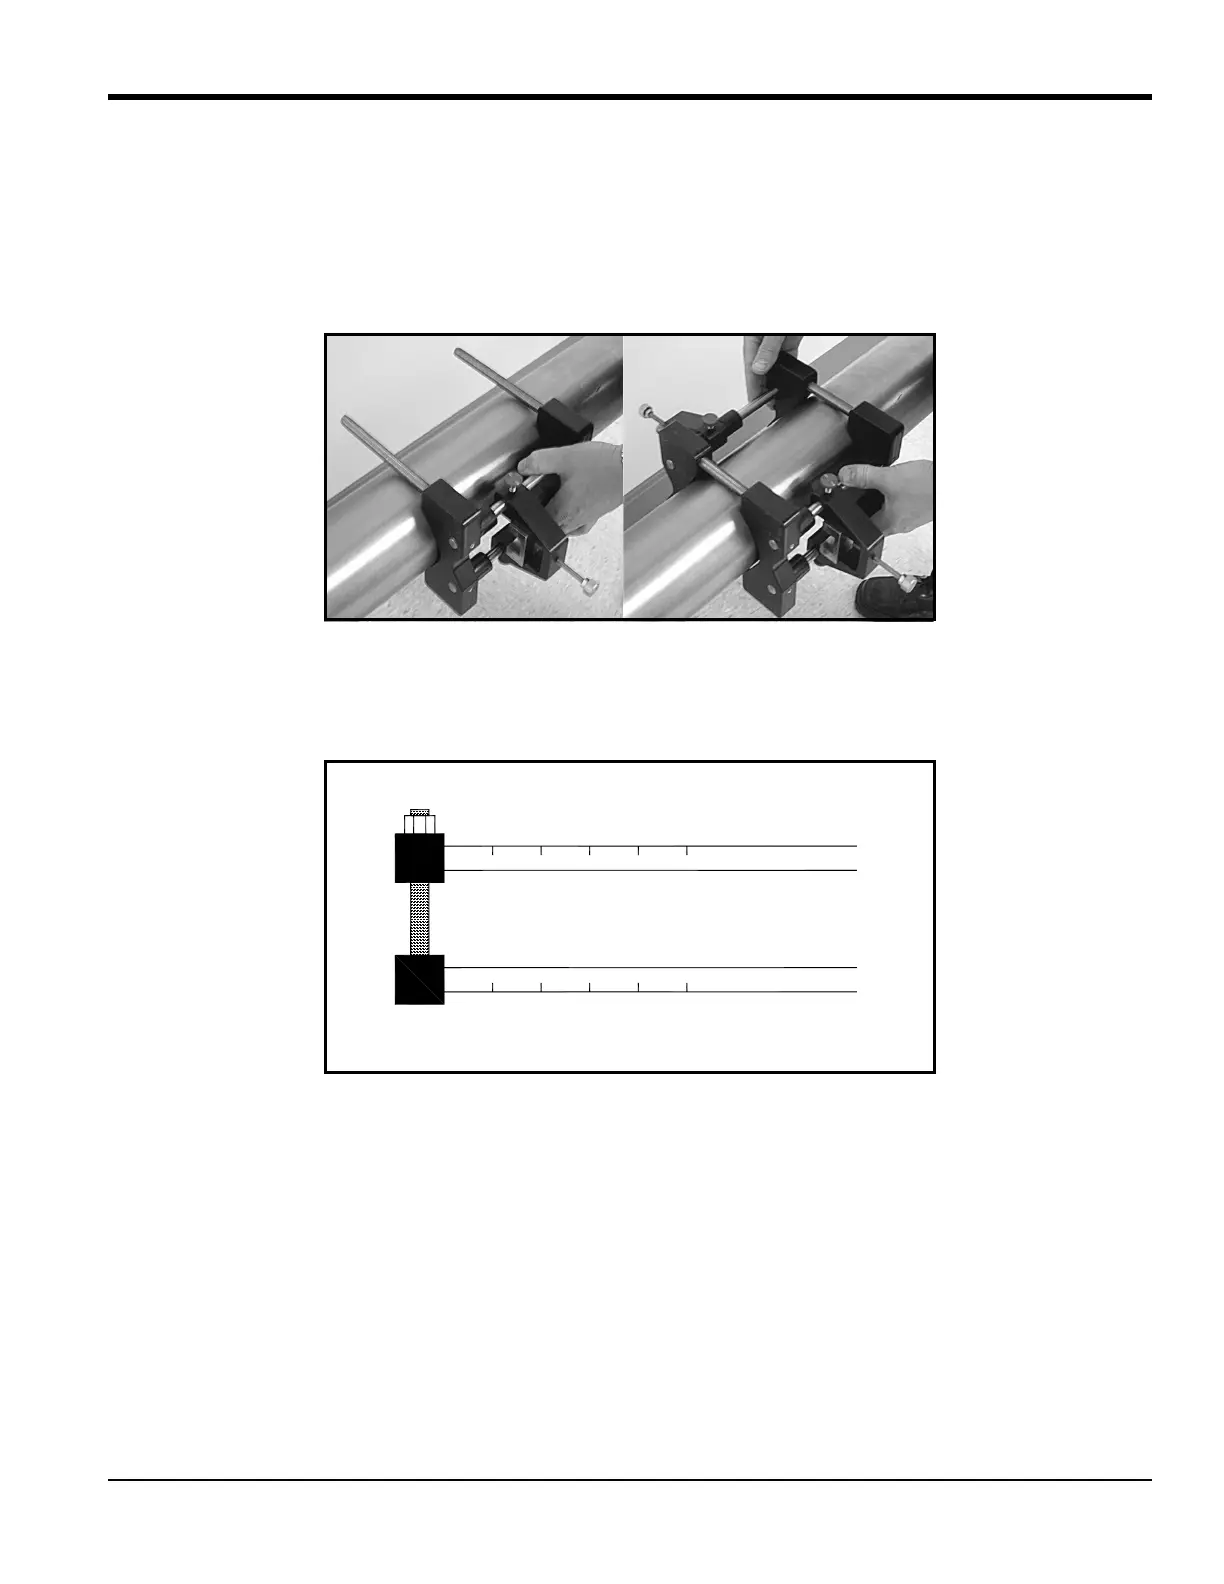
1. Position the half of the clamping fixture with the threaded rods around the pipe, as shown in
Figure 23 below. Orient the fixture in the 3 o’clock position on a horizontal pipe.
2. Position the mating half of the fixture over the threaded rods in the 9 o’clock position. Figure 23
below shows the two mounted halves.
Figure 23: Mounting the Two Halves of the Fixture
The two fixture halves have measuring scales; ensure that the scales are on the same side of the fixture, so
that both zeros start at the same origin, as shown in Figure 24 below.
Figure 24: Fixture with Scale Origins Properly Aligned
3. Install the four nuts onto the threaded rods with the convex side of the nut facing the fixture. Hand
tighten the nuts on each V block evenly, as shown in Figure 25 on the next page. Do not use a cross
tightening pattern on the four installation nuts.

 Loading...