PanaFlow™ LC User’s Manual 107
Appendix B. Using the Clamping Fixtures
B.2 Using the General Clamping Fixture - GCF
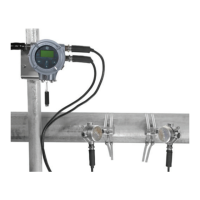
The General Clamping Fixture (GCF) acts as a permanent transducer holder. The fixture has two blocks (see
Figure 96 below) that are used for both even-traverse and odd number of-traverse methods. Steel straps
secure the blocks to the pipe for a permanent installation. To install the GCF, the blocks must first be
positioned using the spacing dimension (
S) calculated by the flowmeter. Then, the transducers are mounted
into the blocks.
Figure 96: General Clamping Fixture Block
Proceed to the appropriate section for instructions on either the even-traverse or odd number of-traverse
method.
B.2.1 Even Traverse Method
Note: The instructions in this section can also be used for a multiple-traverse method. However, you must use
an
EVEN number of traverses. The distance the signal travels from one side of the pipe wall to the
opposite side of the pipe wall is considered one traverse. For installations with more than two traverses,
contact BHGE for assistance.
There are two advantages to using the even number of-traverse method:
• Measurement accuracy is improved because the ultrasonic signal is in the fluid longer than with a
odd number of-traverse method.
• If there is enough pipe length available, the even-traverse fixture is easier to install.
The procedure for mounting the GCF involves setting the transducer spacing and fastening the fixture on the
pipe.
The installation procedure for transducers using the even number of-traverse method is as follows:
1. Ensure the location of your clamping fixture has been properly scoped out following the criteria in
Section 2.6: Precautions.
2. Prepare the pipe where you intend to place the clamping fixture by making sure it is clean and free of
loose material. Sanding, though usually not required, may be necessary to remove any high spots.
However, be careful to preserve the original curvature of the pipe.
3. Use a level to find the top of the pipe and then draw a line parallel to the centerline of the pipe.
 Loading...
