EasyManuals Logo

GE LOGIQ E9 User Guide

GE LOGIQ E9
256 pages
To Next Page IconTo Next Page
To Previous Page IconTo Previous Page
Page #158 background imageLoading...
Page #158 background image
After the Exam is Over
3-32
LOGIQ E9
User Guide
Direction 5454884-100 English
Rev. 1
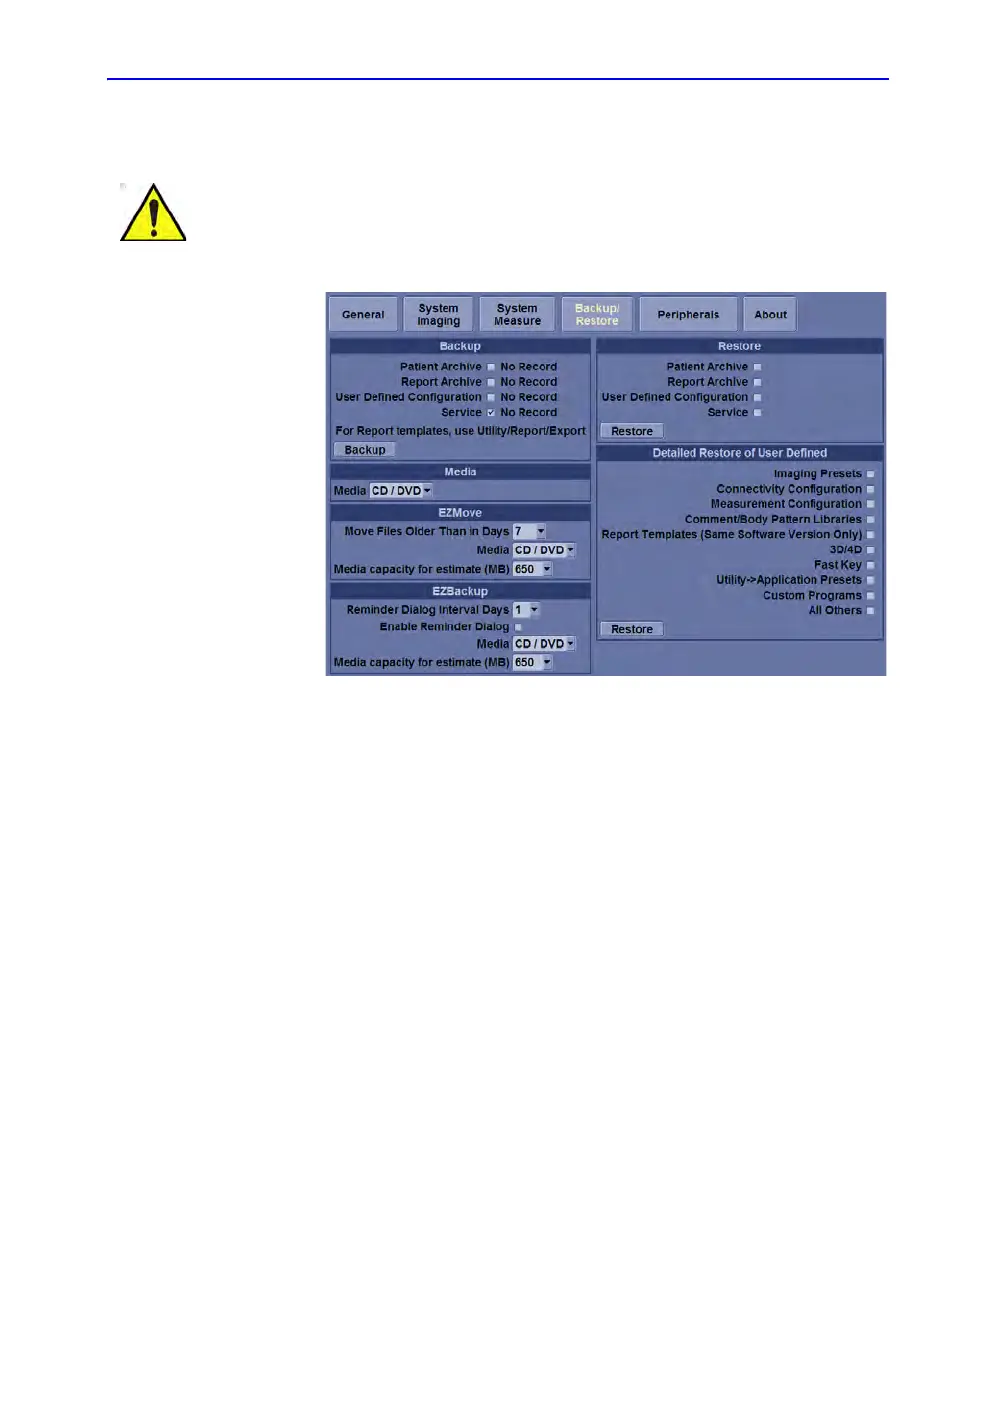
Backup procedure: user-defined configurations
Figure 3-13. System/Backup/Restore Preset Menu
1. Insert media into the media drive.
2. On the Touch Panel, press Utility.
3. On the Utility Touch Panel, press System.
4. On the monitor display, select Backup/Restore.
The Backup/Restore screen is displayed.
NOTE: If you are not logged in with administrator privileges, the
Operator Login window is displayed. Log on with
administrator privileges.
5. In the Backup list, select User Defined Configuration.
6. In the Media field, select a media.
7. Select Backup.
The system performs the backup. As it proceeds, status
information is displayed on the Backup/Restore screen.
8. After the backup is complete, press F3 to eject the CD.
CAUTION
To avoid the risk of overwriting the local patient and report
archives on the system to update, DO NOT check Patient
Archive when making a backup of configuration settings.

Table of Contents

Other manuals for GE LOGIQ E9

Questions and Answers:

Question and Answer IconNeed help?

Do you have a question about the GE LOGIQ E9 and is the answer not in the manual?

GE LOGIQ E9 Specifications

General IconGeneral
TypeUltrasound System
3D/4D ImagingYes
Transducer Ports4 active ports
ConnectivityDICOM, USB, Ethernet
ApplicationsAbdominal, Vascular, Musculoskeletal, Small Parts, Urology, Pediatric, Cardiac, Obstetrics/Gynecology
TransducersLinear, Convex, Phased Array, Volume
Doppler ModesColor Doppler, Power Doppler, Pulsed Wave Doppler, Continuous Wave Doppler
ElastographyYes
Advanced FeaturesB-Flow, Volume Navigation
PortabilityCart-based system
Display19-inch high-resolution LCD monitor

Related product manuals