EasyManuals Logo

GE LOGIQ E9 User Guide

GE LOGIQ E9
256 pages
To Next Page IconTo Next Page
To Previous Page IconTo Previous Page
Page #55 background imageLoading...
Page #55 background image
Probes
LOGIQ E9
User Guide
1-43
Direction 5454884-100 English
Rev. 1
Preparing for a Biopsy
Displaying the Guidezone
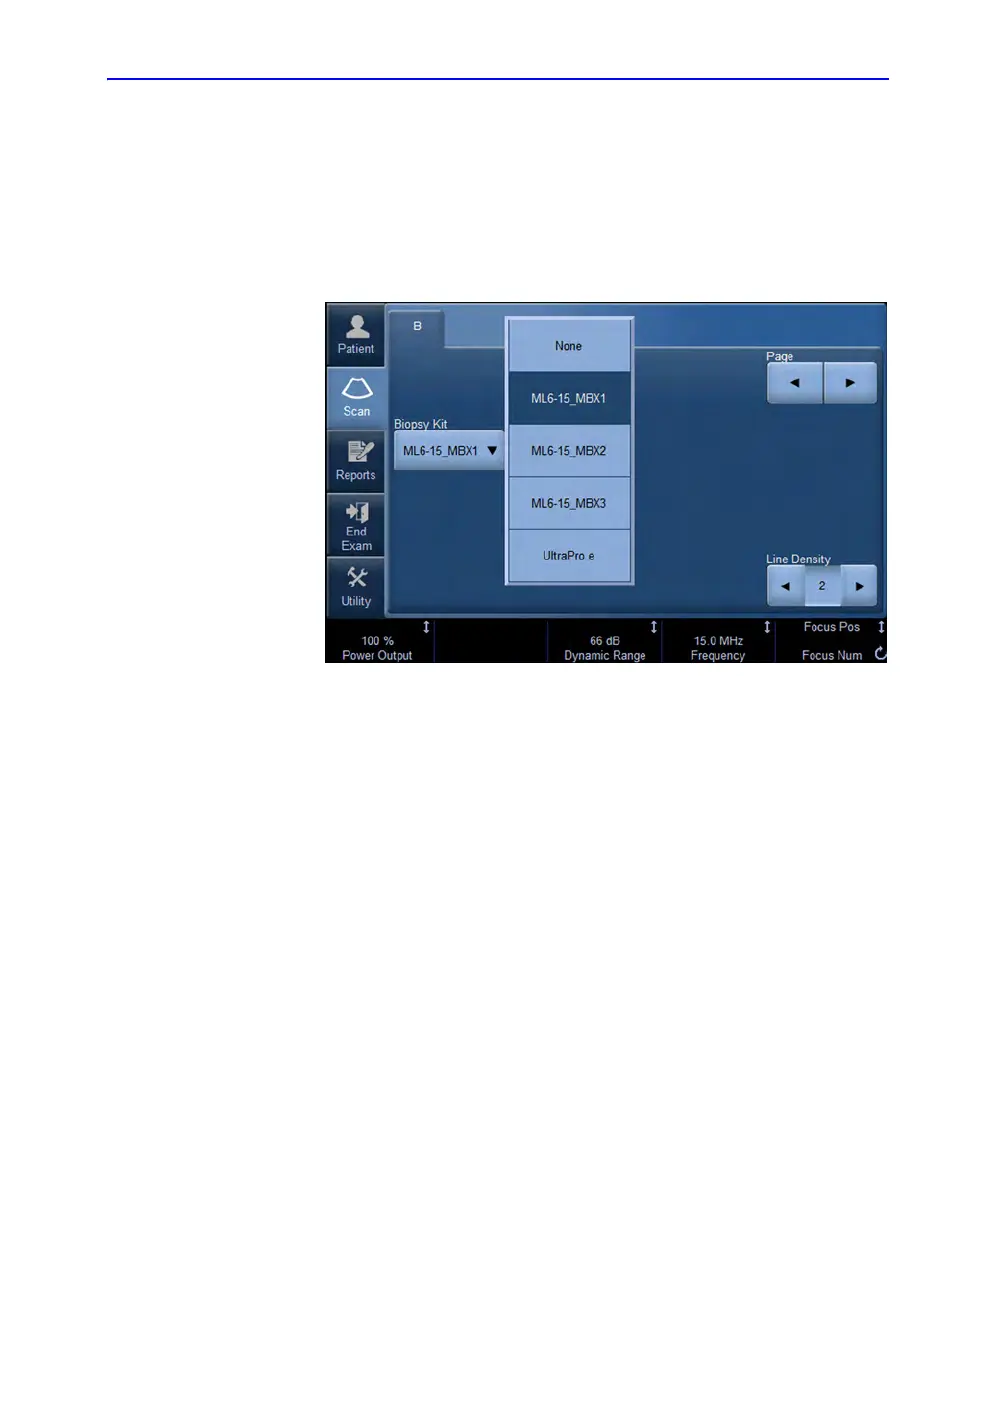
Activate the Biopsy Kit by selecting it from the B-Mode Touch
Panel.
Figure 1-18. B-Mode Touch Panel Menu
The available biopsy options appear when Biopsy Kit is
selected. There are fixed and adjustable angle biopsy kits and
plastic/disposable and reusable biopsy guides available with the
LOGIQ E9 depending on the probe. Select the desired biopsy
kit.
NOTE: You can display the biopsy guideline on the CFM image in
simultaneous mode. Select the Show Biopsy Mark on CFM
simultaneous Mode preset in the Utility -> System -> System
Image -> Biopsy Guide screen.

Table of Contents

Other manuals for GE LOGIQ E9

Questions and Answers:

Question and Answer IconNeed help?

Do you have a question about the GE LOGIQ E9 and is the answer not in the manual?

GE LOGIQ E9 Specifications

General IconGeneral
TypeUltrasound System
3D/4D ImagingYes
Transducer Ports4 active ports
ConnectivityDICOM, USB, Ethernet
ApplicationsAbdominal, Vascular, Musculoskeletal, Small Parts, Urology, Pediatric, Cardiac, Obstetrics/Gynecology
TransducersLinear, Convex, Phased Array, Volume
Doppler ModesColor Doppler, Power Doppler, Pulsed Wave Doppler, Continuous Wave Doppler
ElastographyYes
Advanced FeaturesB-Flow, Volume Navigation
PortabilityCart-based system
Display19-inch high-resolution LCD monitor

Related product manuals