Getting Started
1-14
LOGIQ E9
–
User Guide
Direction 5454884-100 English
Rev. 1
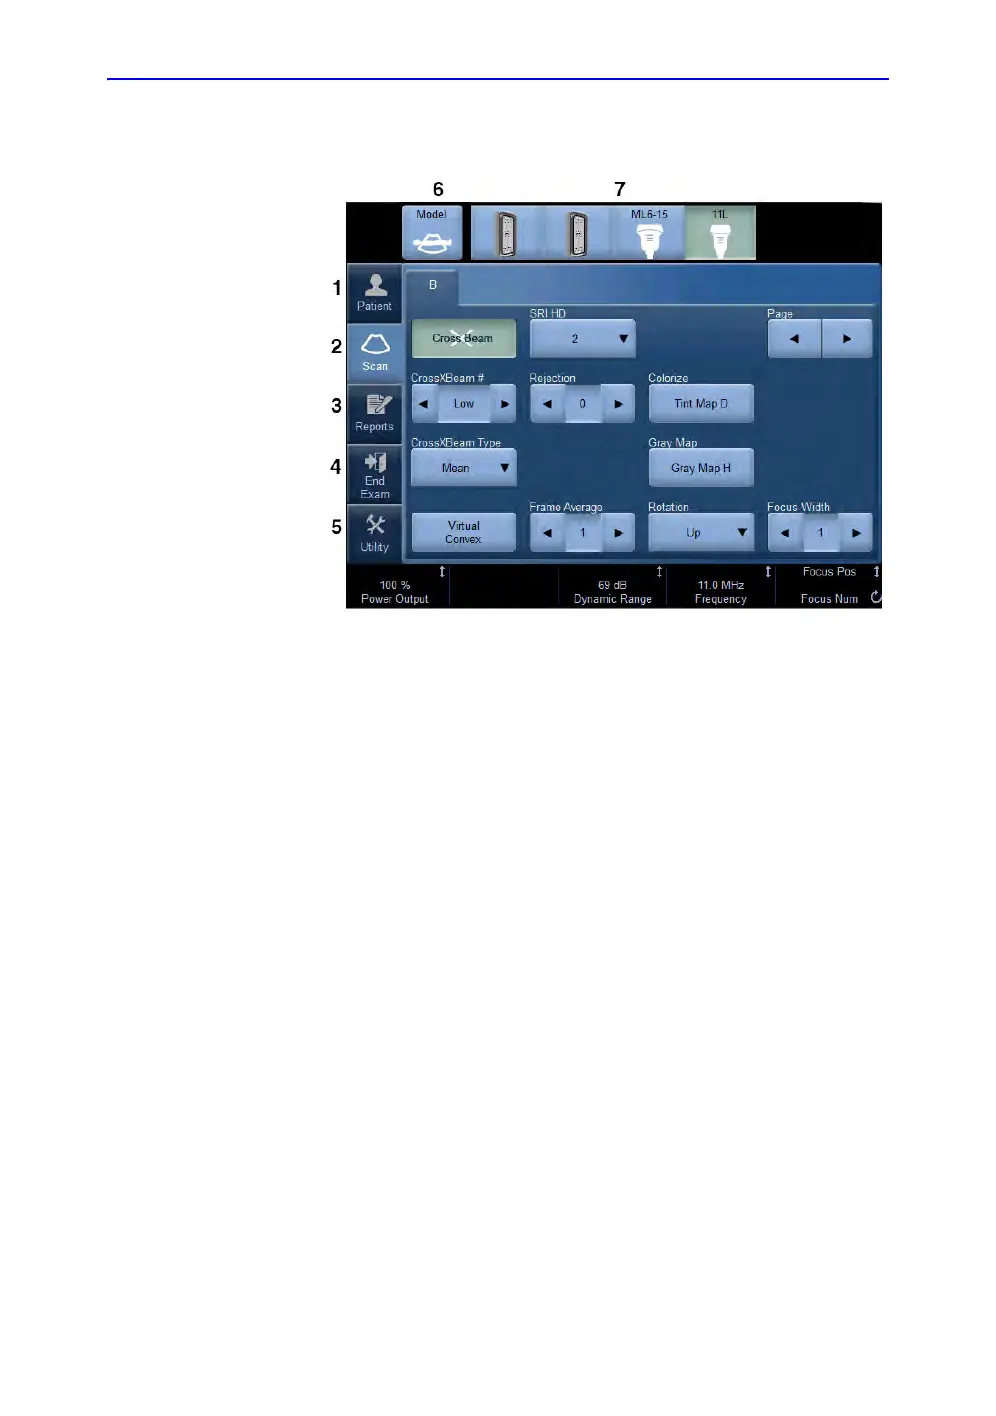
Touch Panel
Figure 1-6. Exam Function Controls
NOTE: Different menus are displayed depending on which Touch Panel
is selected.
At the bottom of the Touch Panel, there are five combination
rotary dials/push buttons. The functionality of these rotaries
changes, depending upon the currently-displayed menu. Press
the button to switch between controls, or rotate the dial to adjust
the value, or move the control left/right or up/down to adjust the
value.
1. Patient: Enters Patient screen
2. Scan: Enters scanning mode screen
3. Reports: Activates default report and Touch
Panel of report choices.
4. End Exam: Activates Image Management and
Touch Panel with end of exam options.
5. Utility: Activates system configuration menus.
6. Model: Selects the application to use.
7. Probe Indicator: Indicates and selects the
probes.