AutoVu SharpX mobile installation
tip.genetec.com | AutoVu Hardware Guide for SharpX Mobile Installation
EN.410.018-XS(6) | Last updated: October 6, 2016 45
Drilling the mounting and cabling holes for your wheel imaging camera
When you have selected the location for the wheel imaging cameras, drill the required holes using
the camera base as a template.
Before you begin
• For side-mount installations, remove the tail light assembly so that you can access the inside of
the panel. Ensure that nothing will be damaged when you drill the mounting holes. You may also
need to remove the liners from inside the trunk and drill an additional 19 mm (3/4”) hole in the
liner in order to pass the camera cable.
• For trunk-mount installations, remove any liners inside the trunk lid. Ensure that nothing will be
damaged when you drill the mounting holes.
What you should know
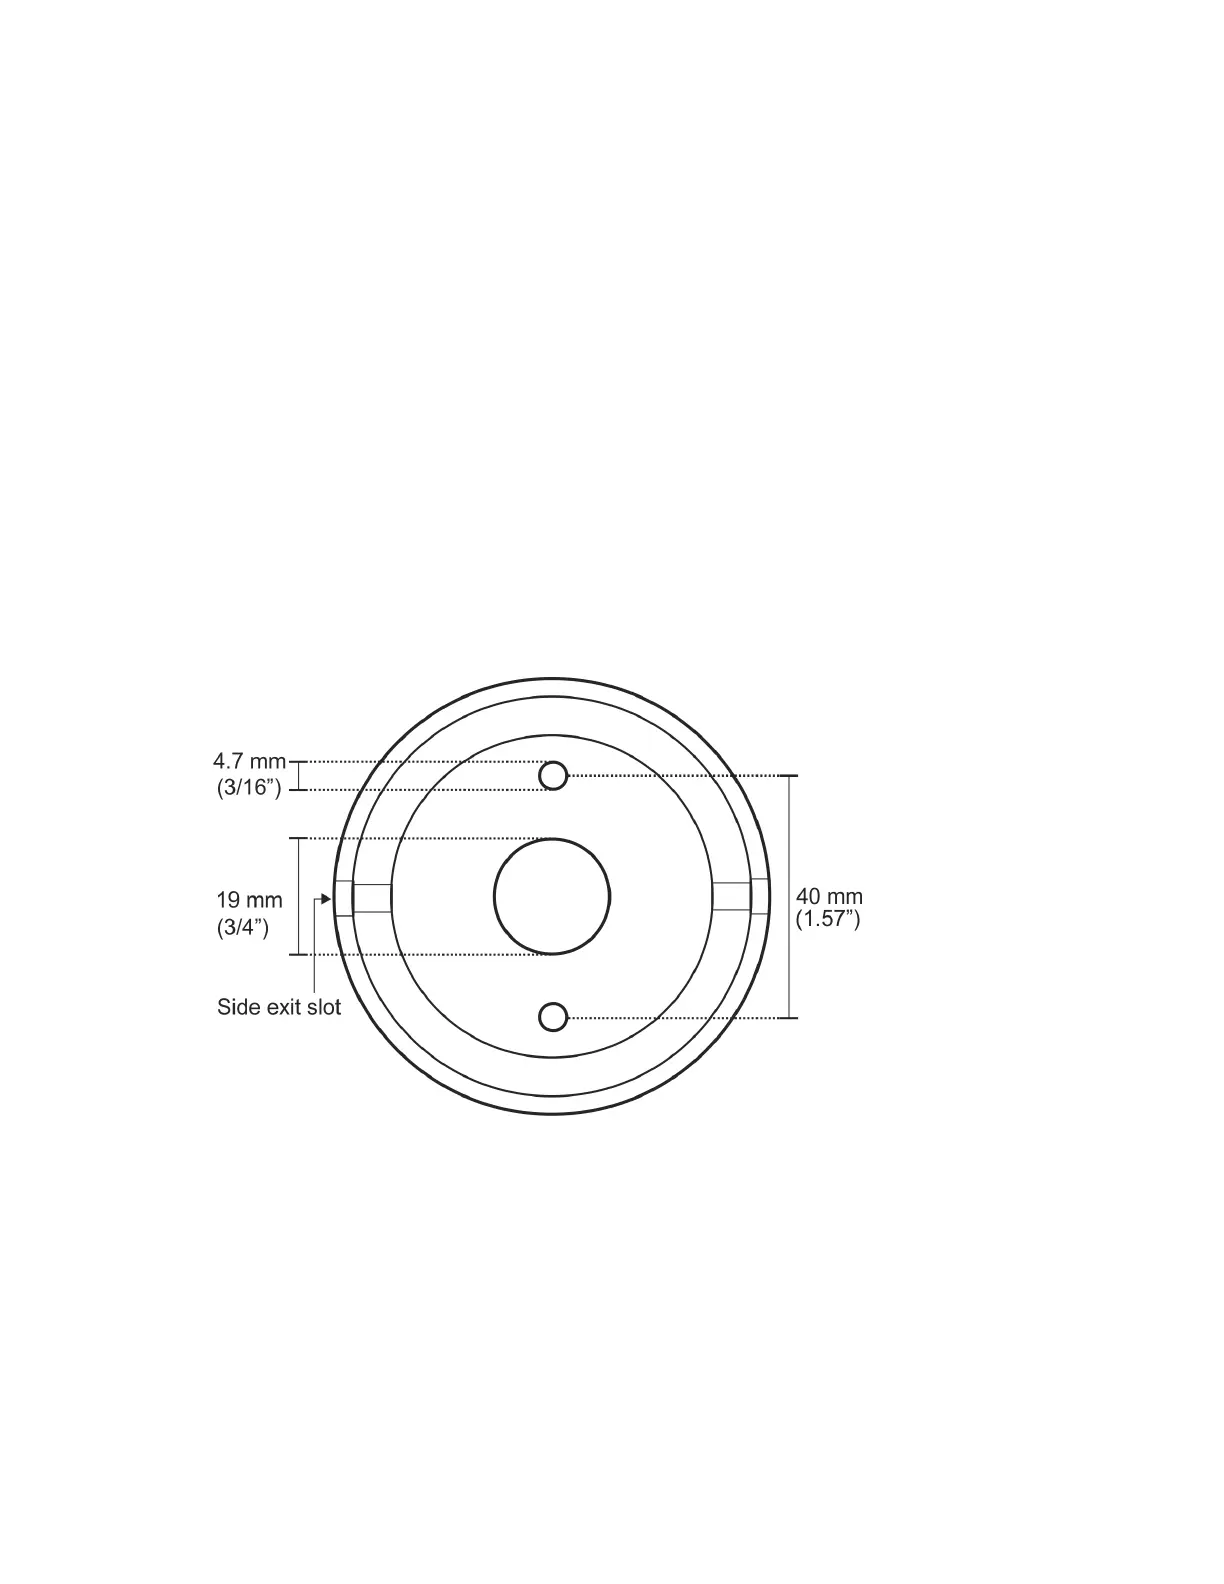
• Two 4.7 mm (3/16”) holes are required for mounting the camera.
• One 19 mm (3/4”) hole is required to pass the camera cable.
IMPORTANT: If you plan to pass the cable through the side exit slot of the camera body, you do
not need to drill a hole for the camera cable.
(Side-mount) To drill the mounting holes:
1 Using the camera base as a template, mark and drill the mounting holes.
TIP:
• Use a grease pencil to mark the center location of the mounting location.
• If required, use your tape measure as a straight edge and mark a vertical line to help align the
mounting holes.
2 Use a center punch to mark the center of the mounting screw holes as well as the cable hole.
IMPORTANT: Before drilling any holes, ensure that there are no obstacles, wires, or braces that
will prevent the installation of the camera.