AutoVu SharpX mobile installation
tip.genetec.com | AutoVu Hardware Guide for SharpX Mobile Installation
EN.410.018-XS(6) | Last updated: October 6, 2016 46
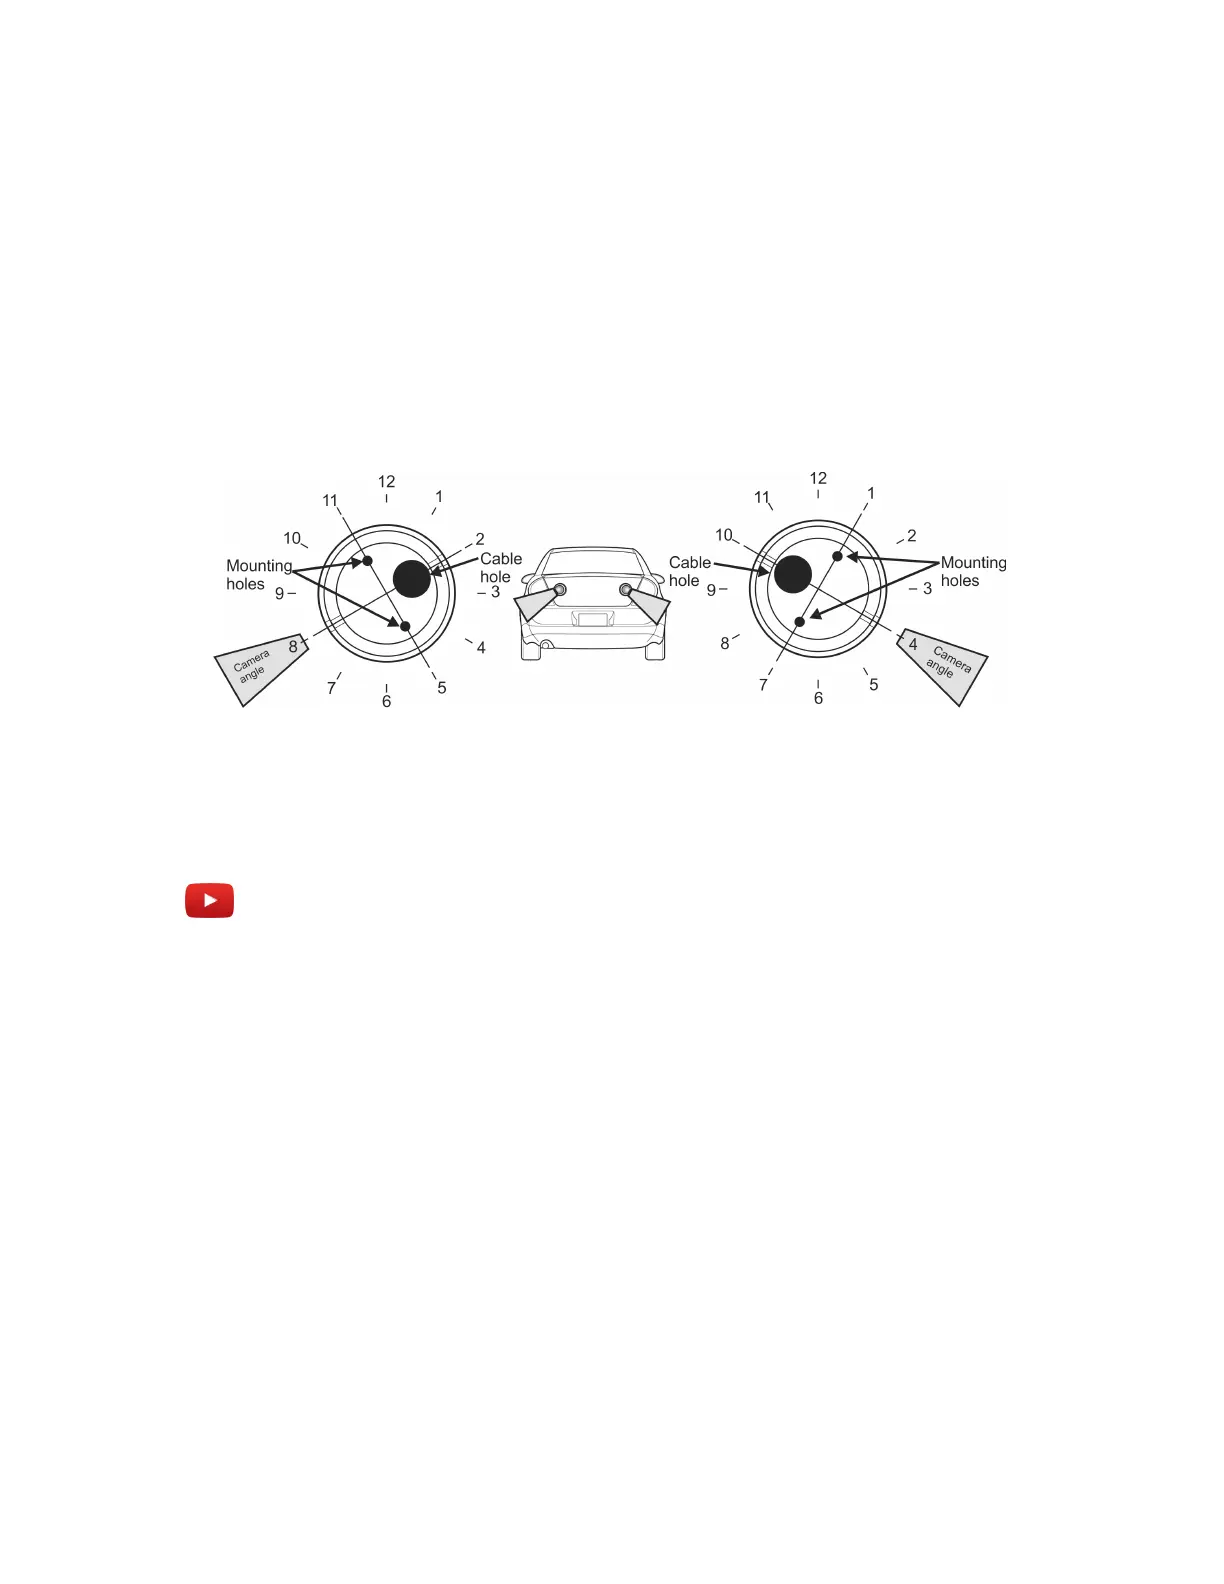
(Trunk-mount) To drill the mounting holes:
1 NOTE: For trunk-mounted cameras, the camera ball must be rotated to an extreme angle within
the camera housing. Mounting the camera base as follows will help to reduce stress on the
camera cable.
Drill the mounting holes using the following suggested camera angles (shown as clock positions).
NOTE: These angles are only as starting point. The camera alignment will be fine-tuned after the
camera is mounted.
• For left-side cameras, drill the mounting holes at 11 o’clock and 5 o’clock.
• For right-side cameras, drill the mounting holes at 1 o’clock and 7 o’clock.
2 To further reduce stress on the camera cable, drill the cable hole off-center as shown.
Example
Watch this video to learn more. Click the Captions icon (CC) to turn on video captions in one of the
available languages.
Running a wheel imaging camera cable for a SharpX
You must run the camera cable to the LPR Processing Unit location (SharpX) or the breakout box
location (SharpX).
Before you begin
• The camera cable extension divides the cable into a separate camera cable and power cable. You
must terminate the power cable before running the camera cable.
• The camera must be assembled with the cable running through the camera base. You will not be
able to separate the camera ball from the base after the wire is run.
What you should know
• The wheel imaging camera is shipped with a 4.5 m (15’) camera cable extension. The cable is IP67
rated and is suitable for all-weather installations.