2.3 Changing the IP Address
To assign a static IP address or establish a connection to your ISP, log in the Web interface
to access the network setting page.
Note: If your router does not support DHCP, the default IP address will be 192.168.0.10.
In this case, it is strongly suggested to modify the IP address to avoid the IP address
conflict with other GV-IP device on the same LAN.
1. Open your Web browser, and type the IP address of the GV-Video Server or the
default IP address http://192.168.0.10
2. In both Login and Password fields, type the default value admin. Click Apply.
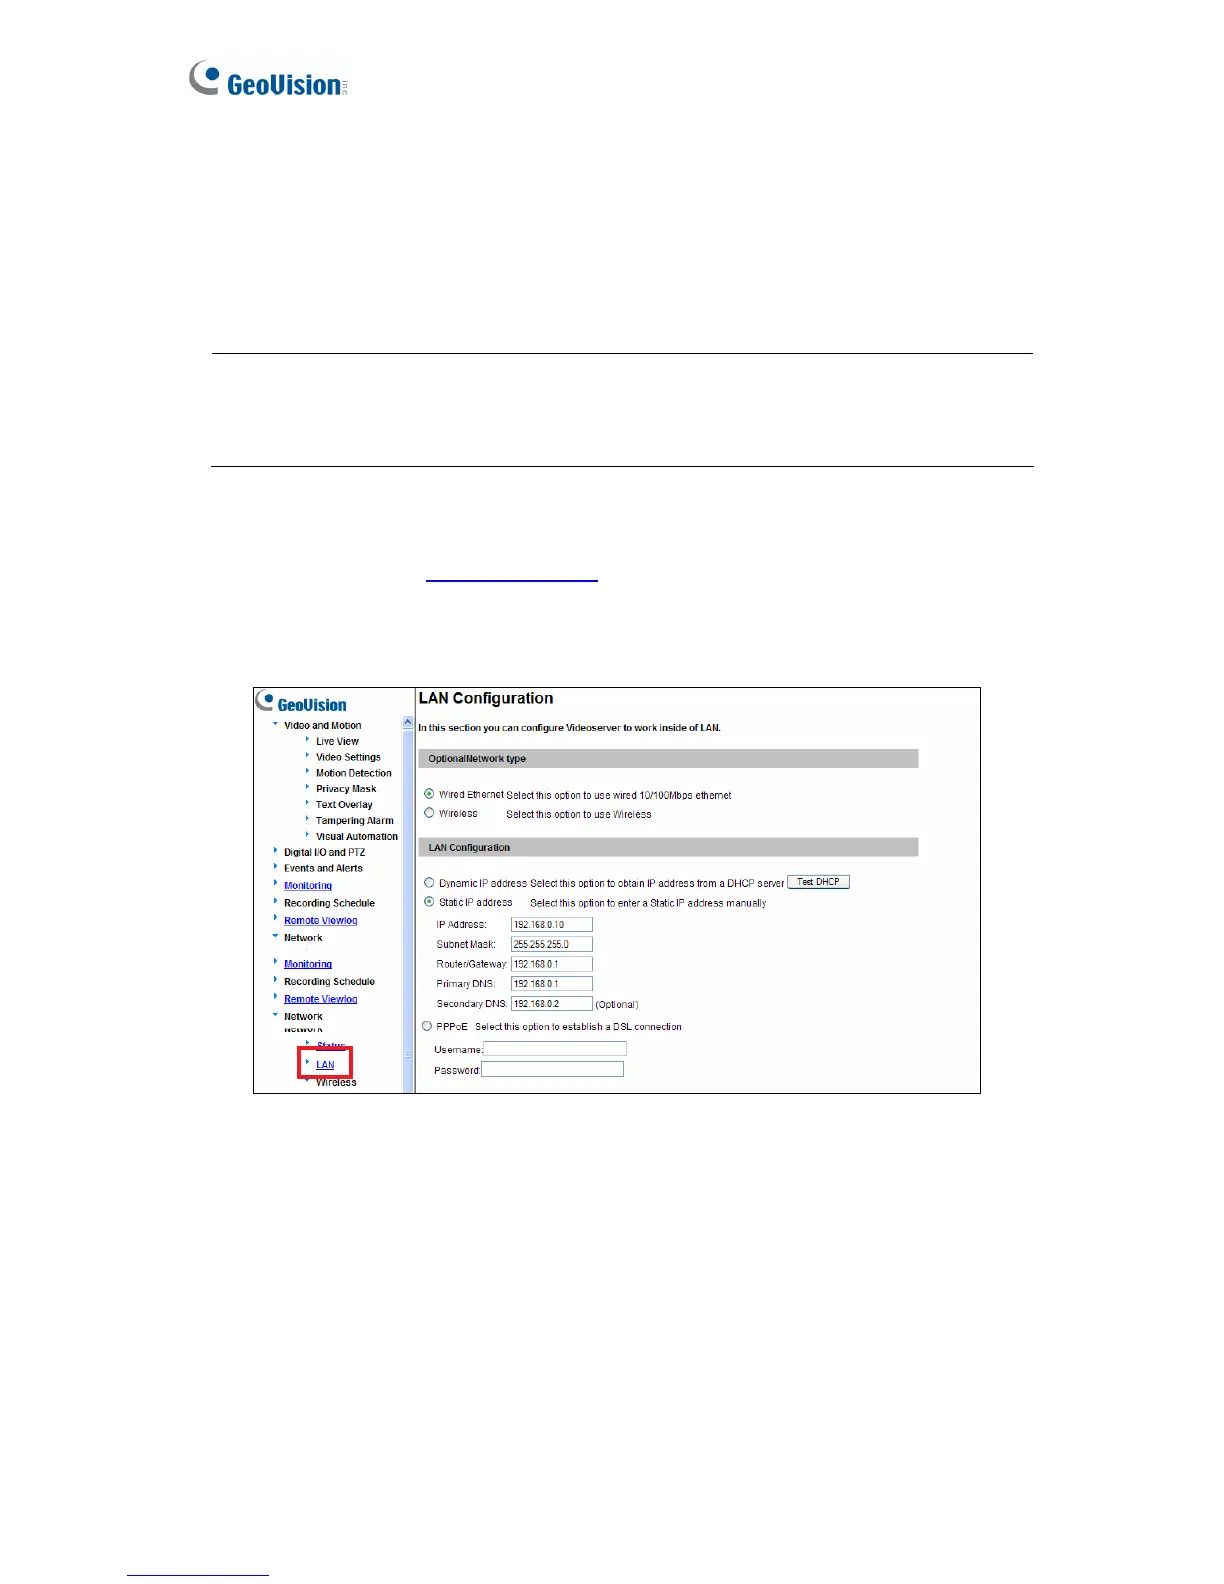
3. In the left menu, select Network and then LAN to begin the network settings.
Figure 2-3
4. To assign a static IP address, select Static IP address. Type IP Address, Subnet
Mask, Router/Gateway, Primary DNS and Secondary DNS in the Configure
connection parameters section.
5. To establish a connection to your ISP, select Use PPPoE, and type the username and
password.
6. Click Apply. The GV-Video Server is accessible by entering the assigned IP address
on the Web browser.
For details, see 4.7.1 LAN.
14
 Loading...