EN - 34
REMOVE BATTERIES
1. Open hood assembly. See Battery
Access on page 30.
2. Starting with the two rearmost batteries,
vertically lift batteries from busbar using
the supports on either side of battery tray.
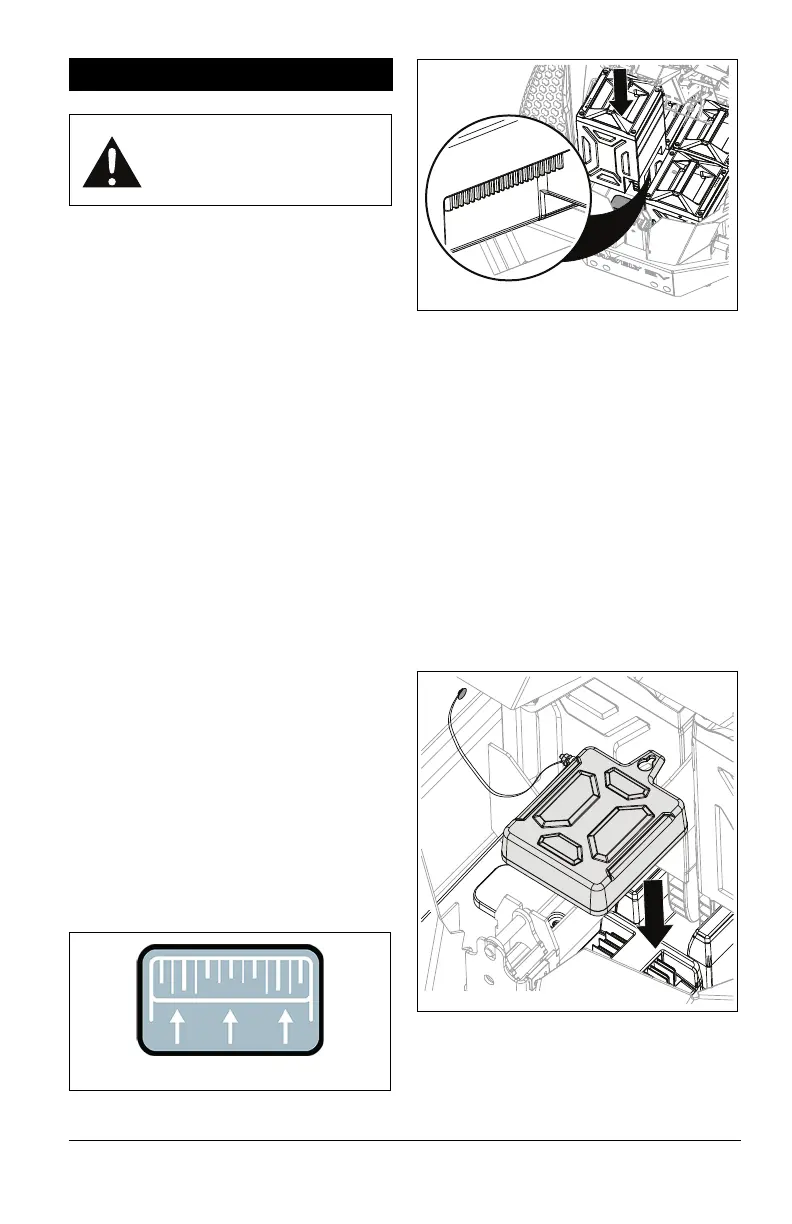
INSTALL BATTERIES
1. Open hood assembly. See Battery
Access on page 30.
See Figure 40.
2. Using two hands, carefully guide batteries
into busbar until fully seated, starting with
the two forward-most batteries. If properly
installed, LED lights will illuminate,
confirming recognition of software.
NOTICE: AVOID DAMAGE! Batteries must
be carefully inserted vertically into busbar
with battery connection pins facing the center
of the machine. DO NOT drag batteries
across busbar fins to position.
Refer to the following battery installation
instructions before installing batteries:
• If two batteries are installed in the
machine, install busbar cover. See
Install Busbar Cover on page 34.
• Install two to four batteries in the
machine whenever possible. Using one
or three batteries will expose busbar
terminals to grass, debris and moisture.
• Install at least two batteries to drive and
mow. Installing one battery allows for
drive-only operation. For drive-only
operation, a warning will be present on
the digital display (see Warnings on
page 39).
IMPORTANT: After installing batteries, press
SOC indicator to ensure batteries wake and
balance. See Check SOC on page 32.
INSTALL BUSBAR COVER
NOTICE: To prevent grass, debris and
moisture build-up on busbar terminals, use
busbar cover when two batteries are in the
machine.
1. Remove busbar cover from rear fender
on either side of unit.
2. Clear any accumulated debris from inside
cover.
3. Position cover over exposed battery
busbar pins. See Figure 41.
4. Close hood assembly and ensure handle
is securely latched.
ADJUSTMENTS
WARNING: AVOID INJURY.
Read and understand the
Safety section before
proceeding.