Slicer/Applicator
SS-10.DOC:1/26/2007 11:08 AM
Grote Company
31
Clutch Maintenance
Clutch Coil Adjustment
Figure 19. Clutch-Brake.
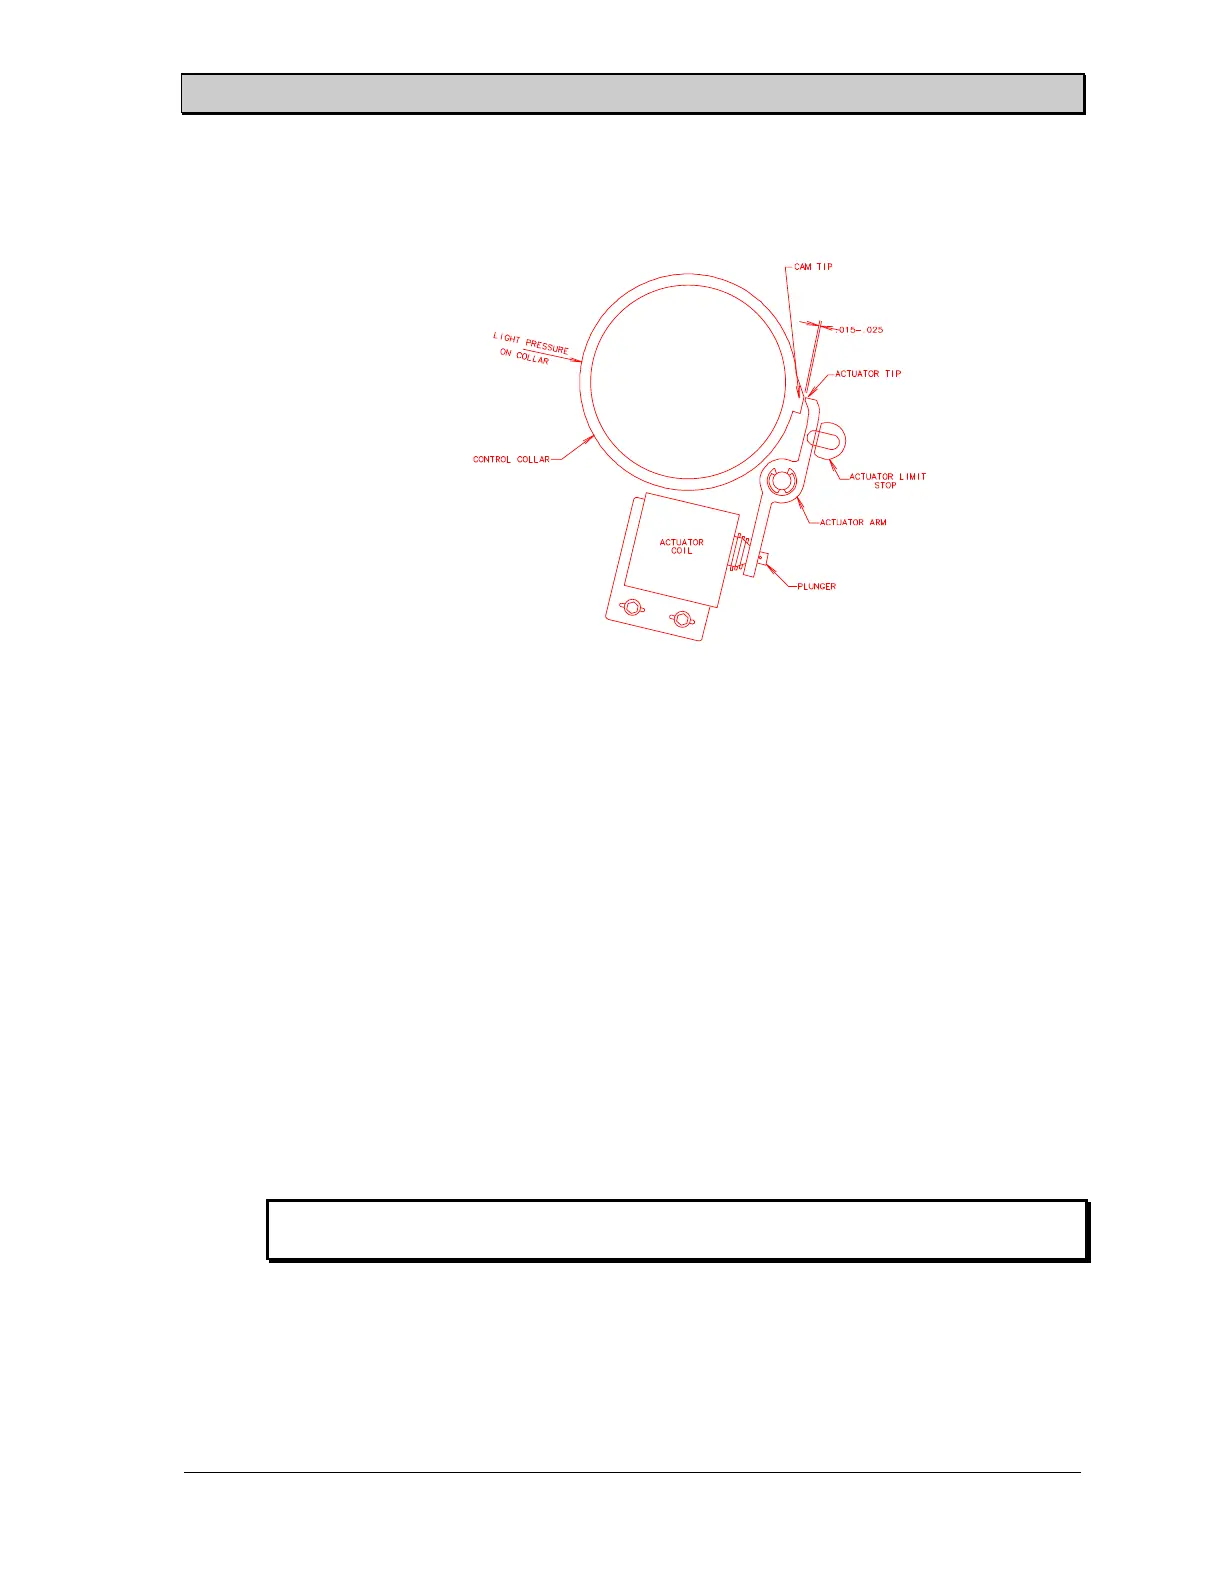
Refer to Figure 22.
1. Turn the machine off and disconnect the power supply.
2. Loosen the actuator limit stop assembly and move it to the position farthest away from
the actuator arm. Temporarily tighten the adjustment bolt.
3. Rotate the control collar until the cam tip is directly adjacent to the actuator tip.
4. Apply light pressure to the control collar in the direction shown. This pressure will
remove any "play" in the control collar. Depress the plunger in the actuator coil fully
until it bottoms. While holding the plunger fully depressed, check the clearance
between the actuator tip and the cam tip. If the clearance is not in the range shown,
loosen the coil mounting bolts and slide the coil assembly until the proper clearance is
obtained. Tighten the coil mounting bolts.
5. Adjust the actuator limit stop while the plunger is fully depressed. The actuator limit
stop is adjusted by loosening the mounting bolt and sliding the limit stop towards the
actuator arm until it just makes contact. Tighten the mounting bolt for the actuator
limit stop.
NOTE: Premature failure of the coil is avoided by adjusting the coil and actuator limit
stop so that the plunger bottoms at the same time as the actuator.
Clutch Coil Replacement
Remove the two screws holding the actuator coil in place and unplug the two wires from the
coil. The old coil can now be removed and the new coil installed. After installation adjust the
coil according to the procedure listed above.