35
"
"
!
!
"
!
Edge sanders
HS 950
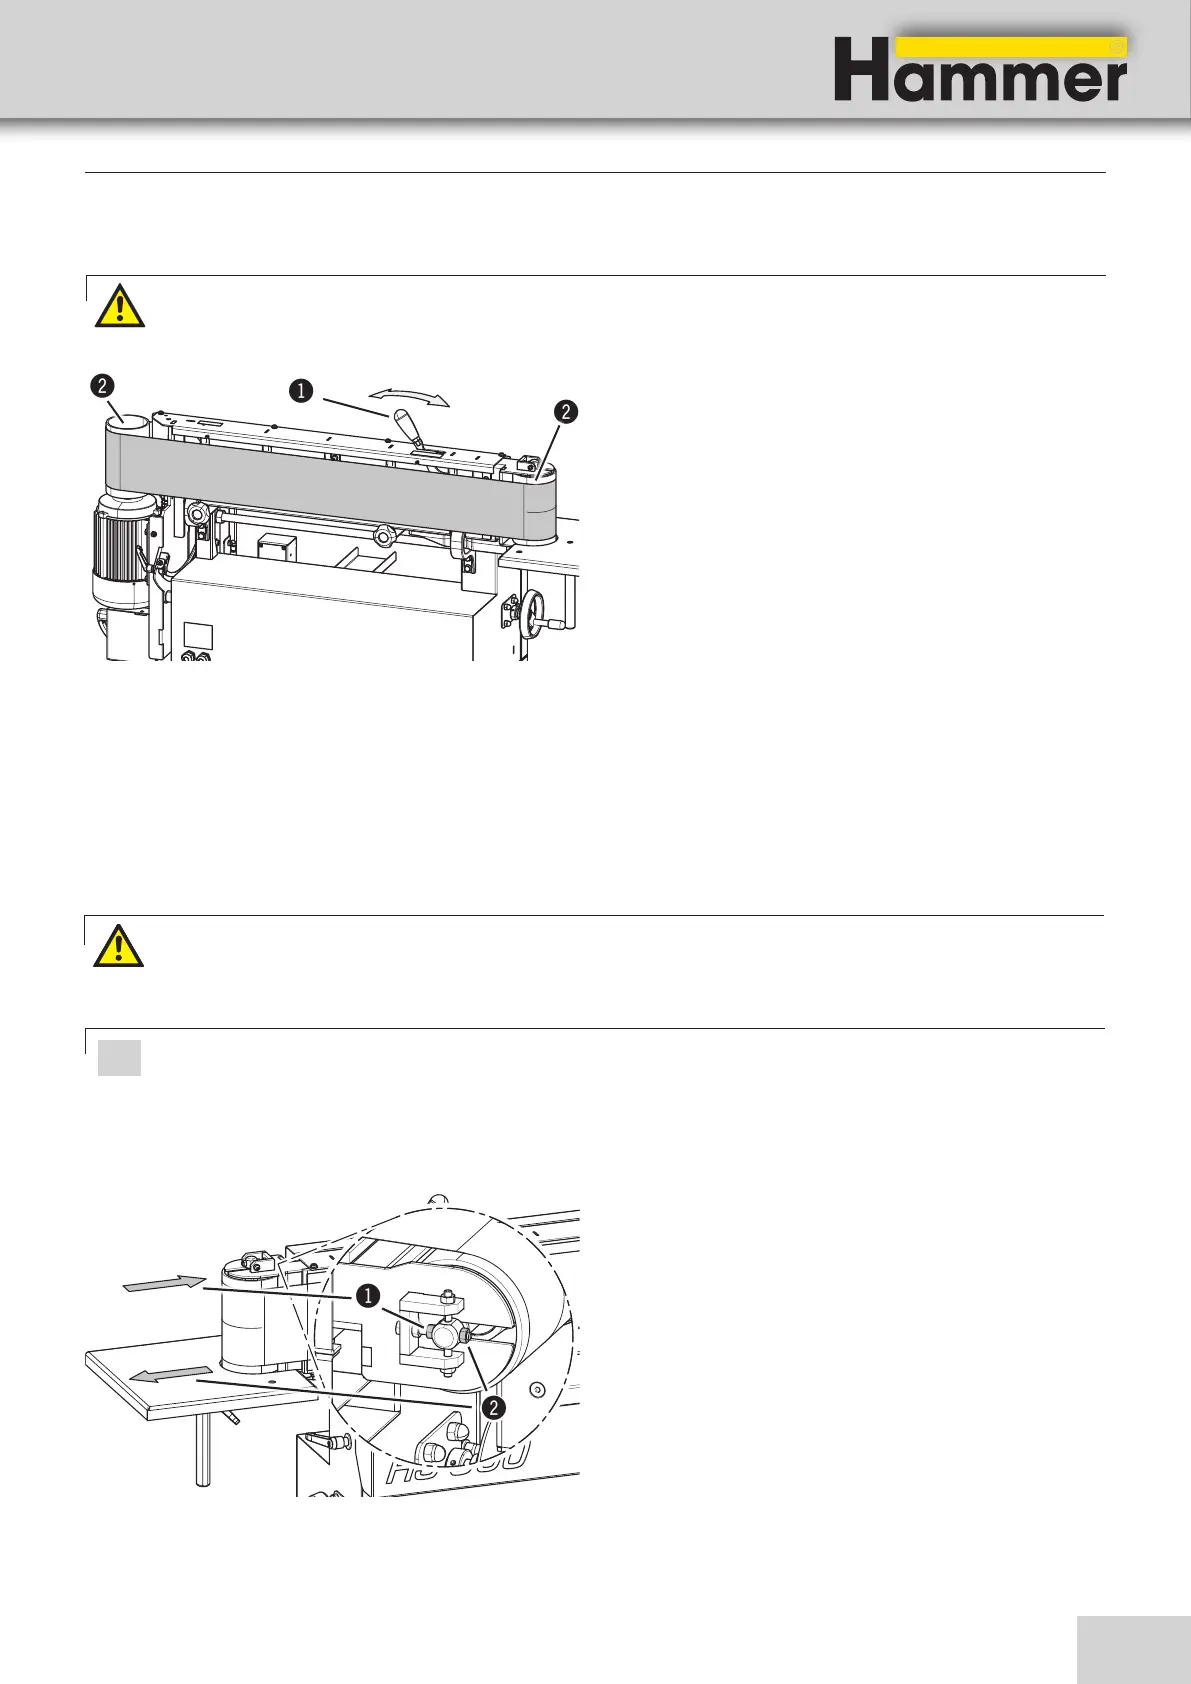
1. Remove the workpiece stop.
2. Remove the rear abrasive belt cover.
3. Tilt the lever until it snaps into place
4. Remove the sanding belt by twisting it slightly while
pulling it out.
5. Hook a new sanding belt around.
6. Unlock the lever to tension the abrasive belt.
7. Ensure that the upper sanding edge always runs be-
neath the upper edge of the belt gliding surface or
the drive rollers
See > Centering the sanding belt <
8. Reassemble the rear abrasive belt cover and workpi-
ece stop.
! Lever
" Rollers
Making adjustments and preparations
8.3 Fitting the sanding belt
Warning!: Make sure that the sanding belt is running in the correct direction. The direction of rotation is indi-
cated by an arrow on the back of the abrasive belt.
Fig. 8-1: Fitting the sanding belt
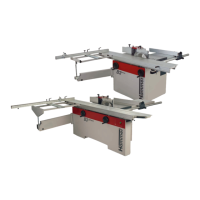
Sanding belt - Height adjustment :
1. Start the machine.
2. Adjust the angle with adjusting nuts
Depending on the direction of adjustment of the belt
roller, loosen the adjusting nut on the corresponding
side.
When the belt runs along the center of the belt roller,
fix the setting with the locking nut.
• Direction adjusting nut 1: Increase belt run
• Direction adjusting nut 2: Lower belt run
! Adjusting nut 1
" Adjusting nut 2
Warning!:Risk of injury due to crushing
This setting is made while the machine is switched on.
Do not touch the rotating abrasive belt!
Attention! Risk of material damage!
Ensure that the upper sanding edge always runs beneath the upper edge of the belt gliding surface or the drive
rollers.
The sanding belt is centered during the machine test in the factory. Proceed very cautiously with the settings
described here.
Fig. 8-2: Centering the sanding belt
8.3.1 Centering the sanding belt - Height adjustment