48
X
"
!
Edge sanders
HS 950
Fault Possible cause Repair
The workpieces are being
sanded diagonally
Abrasive belt support is not parallel Contact service technician
Lines are appearing in the
workpiece length during the
sanding process
The sanding belt grains are crushed or
the sanding belt is damaged as a result
of irregularities on the workpieces (e.g.
due to protruding nails)
Hook a new sanding belt around and
feed the workpieces over the whole
width
The sanding belt is covered with glue
or dust from previously sanded work-
pieces
Hook a new sanding belt around.
Ensure that the workpieces do not have
any protruding nails or contain any
undesired impediments
Sanding belt - The guides are dirty Clean the appropriate part
Cross lines have appeared in the
workpiece width
The weld on the sanding belt has a
difference in thickness which shows on
the workpiece
Place another sanding belt around;
take note of the correct welds
Burn traces have appeared on
the
workpiece and the sanding belt
during
the sanding process
The grain size employed is too fine to
achieve the desired depth of cut
Use a sanding belt with a coarser
grain size or, decrease the depth of cut
The sanding belt is blunt or covered in
a layer of fine dust
Hook a new sanding belt around
11.4.3 Sanding imperfections
Faults
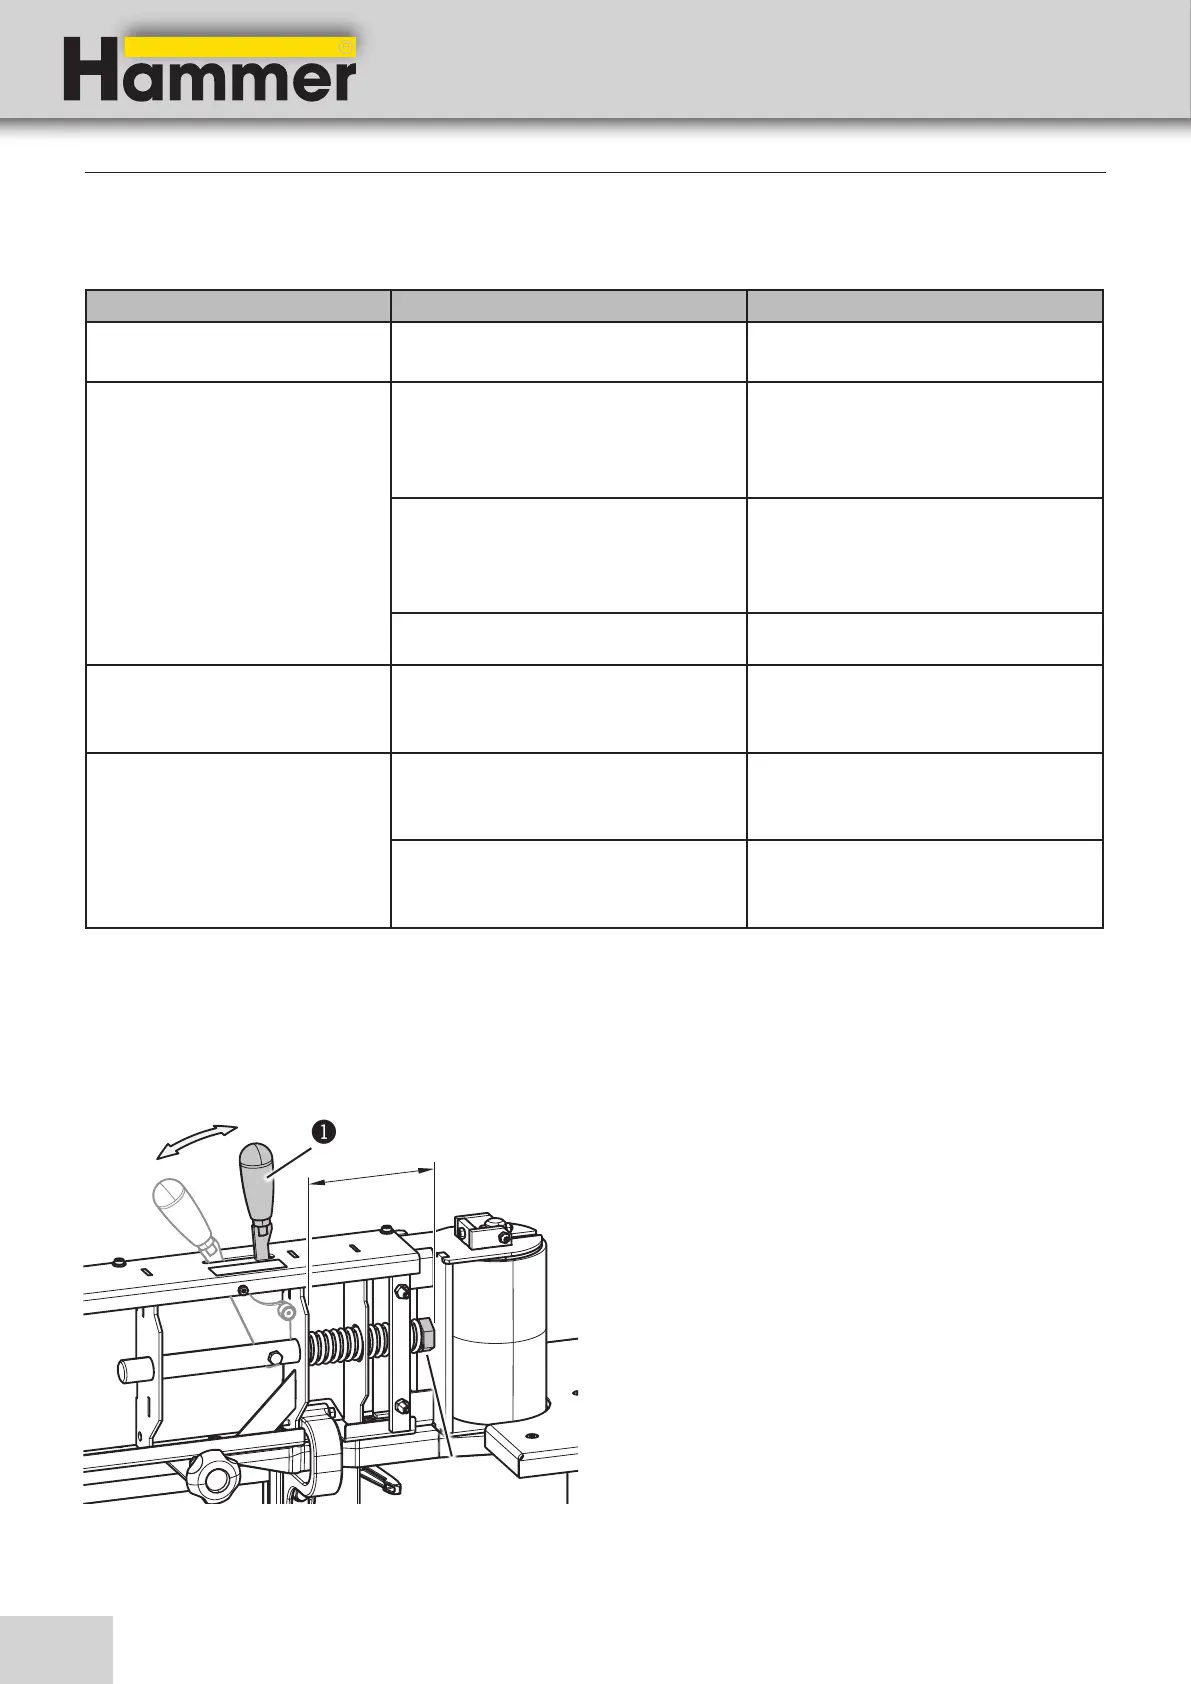
1. Remove the workpiece stop.
2. Remove the rear abrasive belt cover.
3. Tilt the lever until it snaps into place
4. Remove the sanding belt by twisting it slightly while
pulling it out.
5. Measure the distance X.
6. Adjust the distance: 128 mm
7. To adjust the distance, turn the nut.
8. To reassemble, follow the instructions in the reverse
order.
! Lever
" Nut
11.5 Set the spring tension - belt tension
Fig. 11-1: Set the spring tension