84_ starting web viewer
starting web viewer
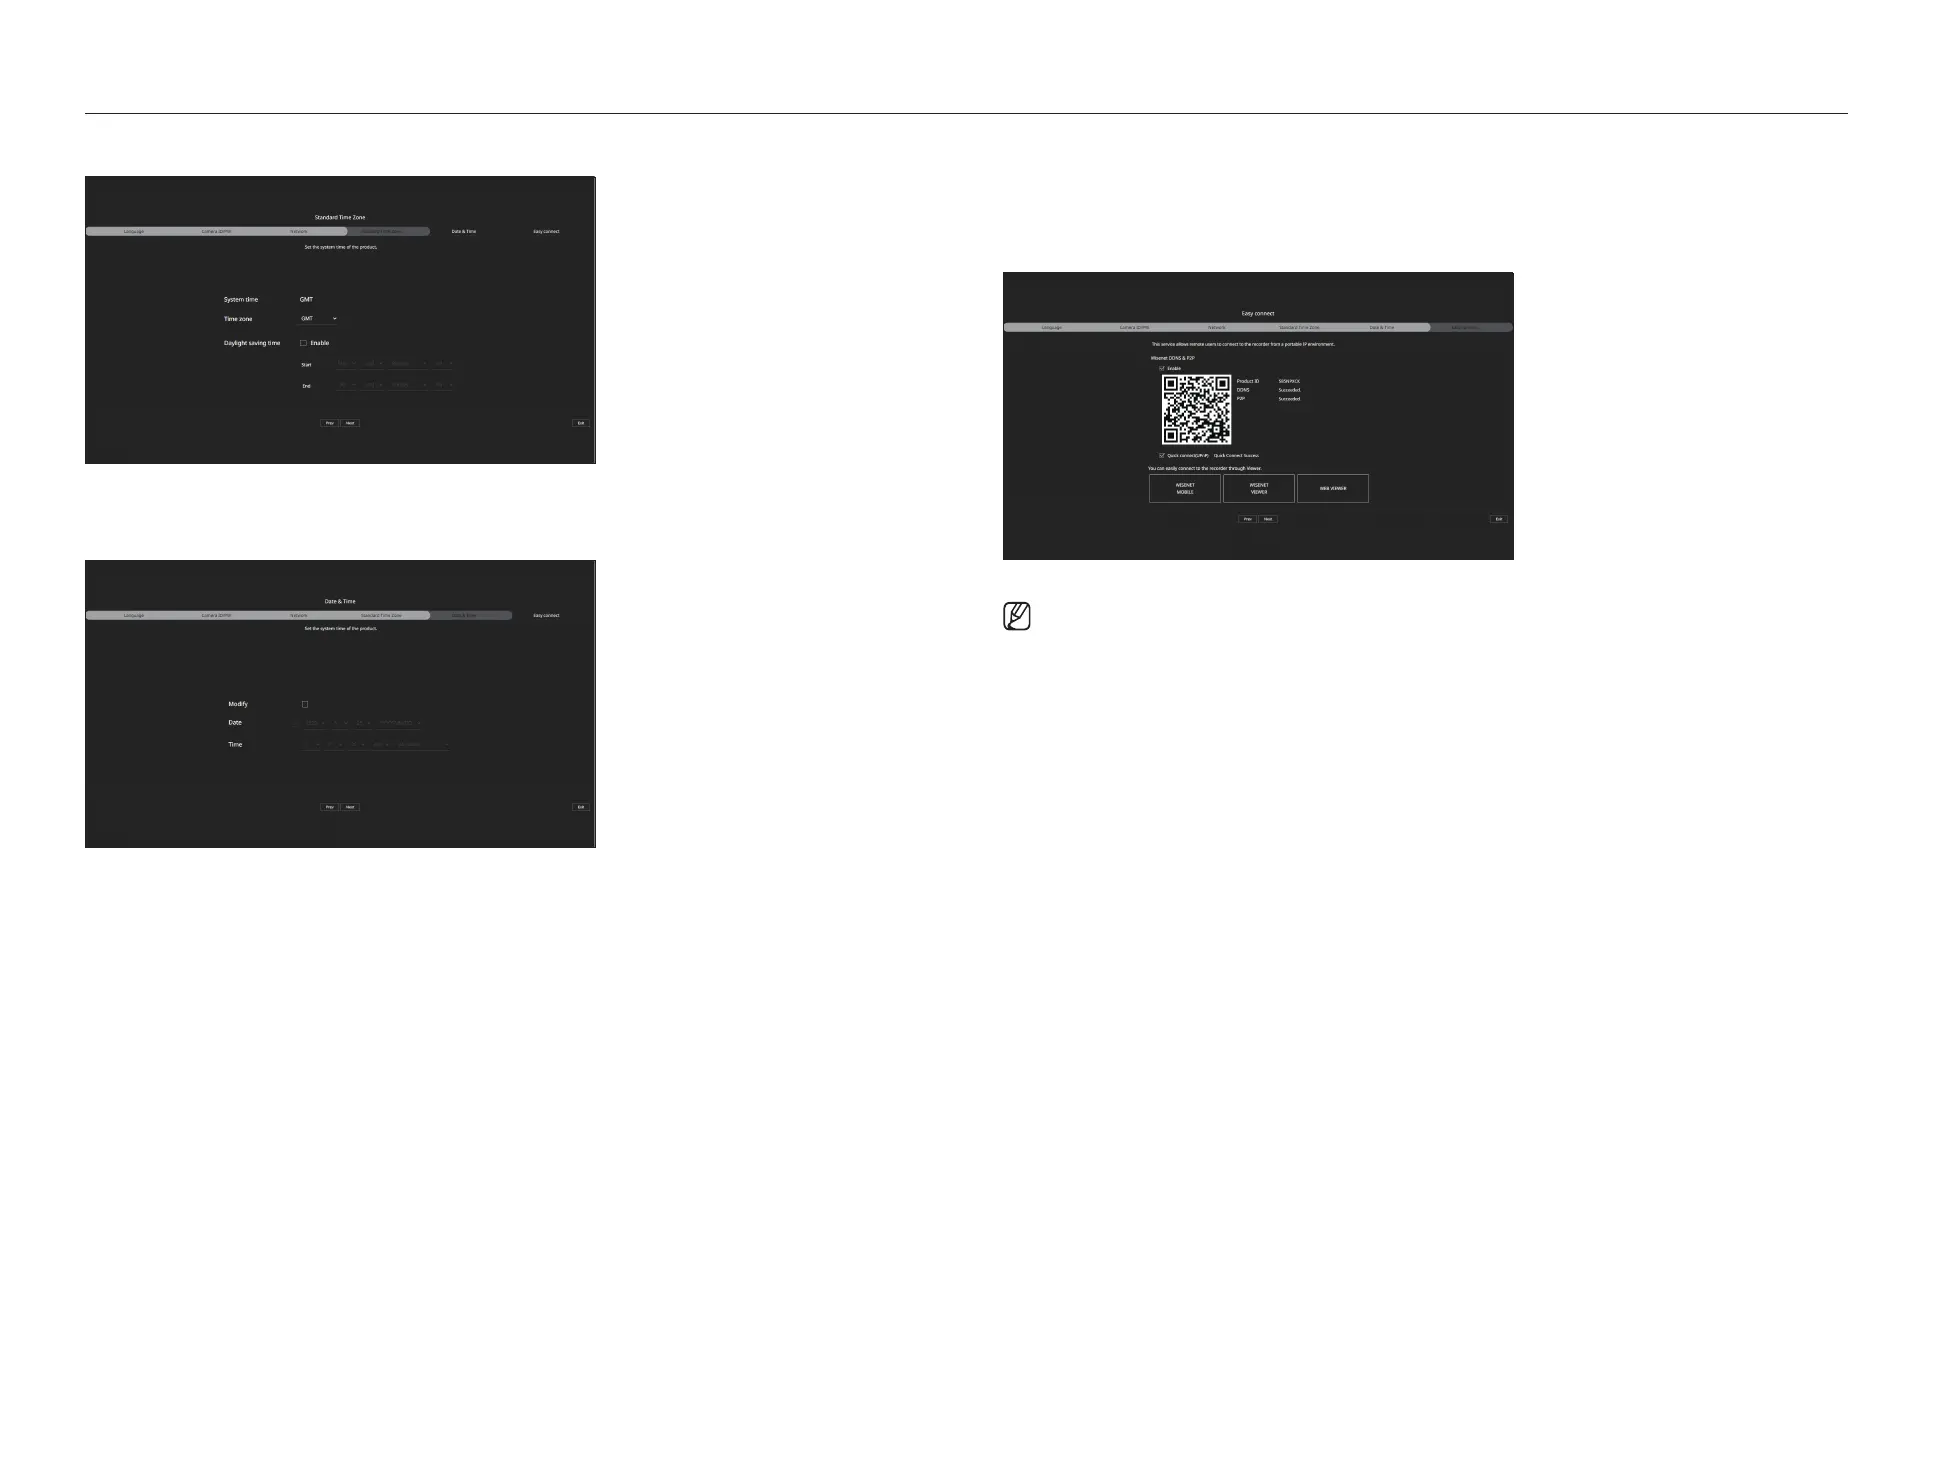
4. Set the daylight saving time on the <Time zone> screen, and then click <Next>.
5. To modify the date and time on the <Date & Time> screen, select the <Modify> check box.
Set the date and time, and then click <Next>.
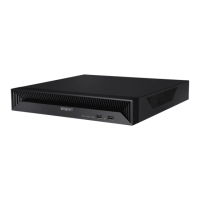
6. On the <Easy connect> screen, a remote user can network a recorder in a dynamic IP system.
Click <Enable> to test the connection to see if the current recorder can be connected remotely. When the
connection is successful, a QR code is created.
To connect a recorder via a viewer, select the viewer you want to use. You can check the connection method of the
selected viewer in the popup window.
■
It connects to Wisenet DDNS first. If it does not connect to DDNS, it automatically connects to P2P.
7. Click the <Next> button to complete the installation wizard.