English _83
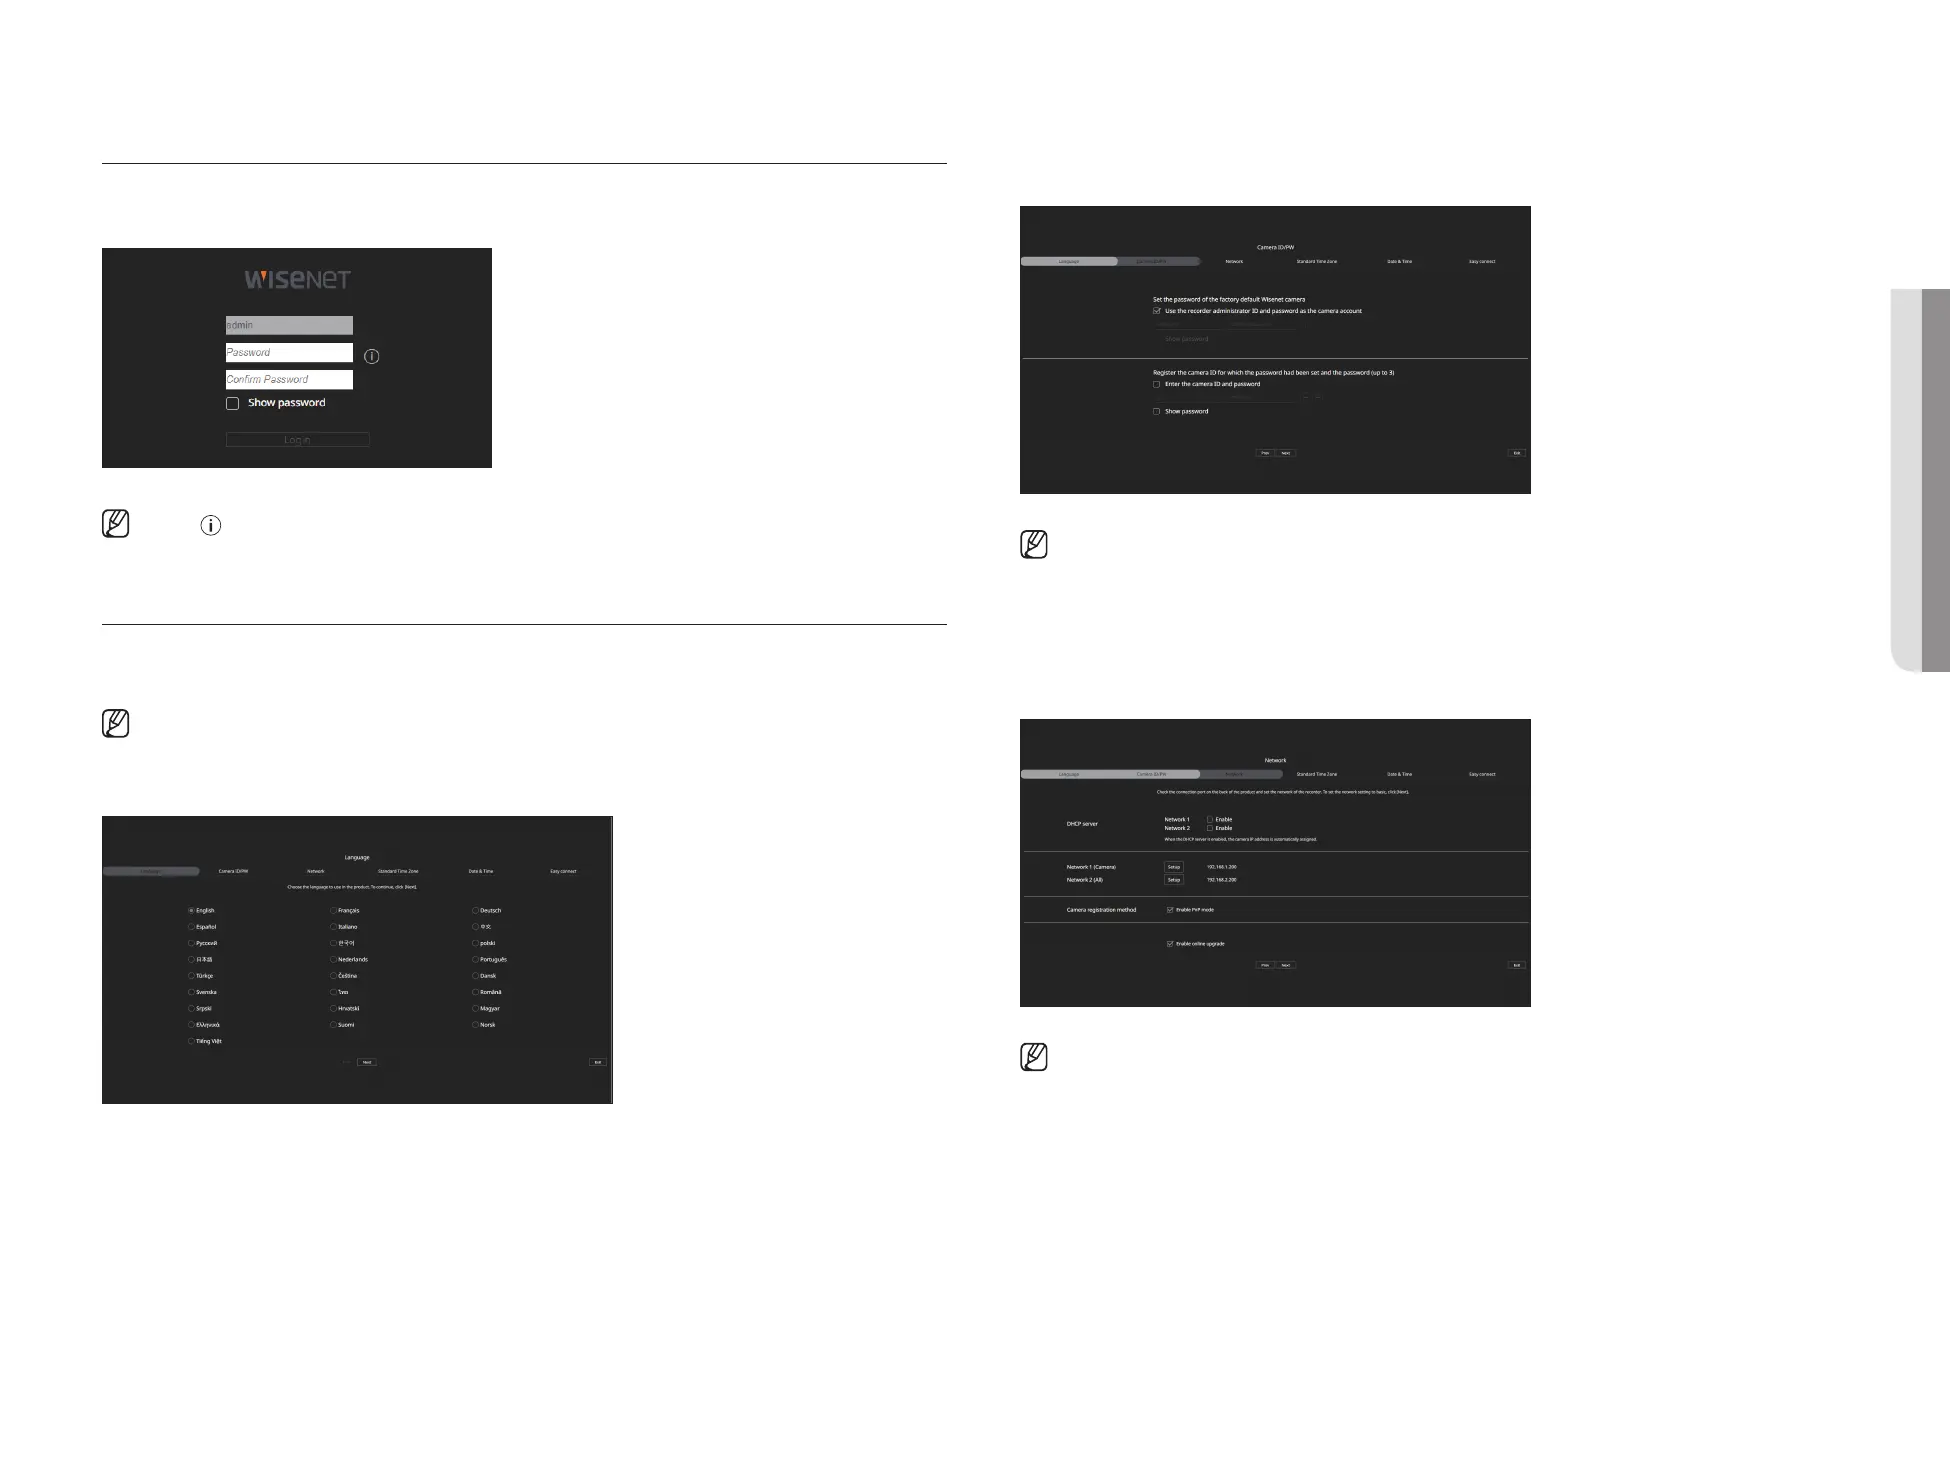
SET THE RECORDER PASSWORD
After factory reset, the password must be set for the recorder to access the web viewer.
Enter the password of the admin account, and click <Login>.
■
Click < > to view the basic guide for setting a password. Refer to the password setup rules.
INSTALLATION WIZARD
As shown below, proceed through each step of the <Installation wizard>.
Install Wizard can only be accessed at factory reset. If you do not want to proceed, click <Exit>.
■
When you complete installation using the install wizard on your recorder, the install wizard will not appear on your web viewer.
1. In the <Language> screen, select the language and press the <Next> button.
2. Set the camera password in factory reset on the <Camera ID/PW> screen.
If ID/PW is already set in the camera, register the ID/PW and click <Next>.
■
When the password is in factory reset, it can be changed and managed in a batch.
■
Up to 3 sets of camera ID with password and password can be registered.
■
You may change the passwords of registered cameras all at once in the "Setup > Camera > Camera password" menu.
■
You cannot change the password for cameras registered with ONVIF and RTSP.
3. Set the network connection type and the connection environment on the <Network> screen, and then click the
<Next> button.
■
For details on network settings, refer to the "Getting Started > Installation wizard" page in the Table of Contents.
• STARTING WEB VIEWER