6 - Maintenance
115
Pump Valves and Diaphragms Replacement
Diaphragm pump overhaul kit (valves, seals, diaphragms etc.) can be
ordered. Detect the pump model - kit can be ordered using correct
HARDI® part No.:
Model 464: part No. 75586000
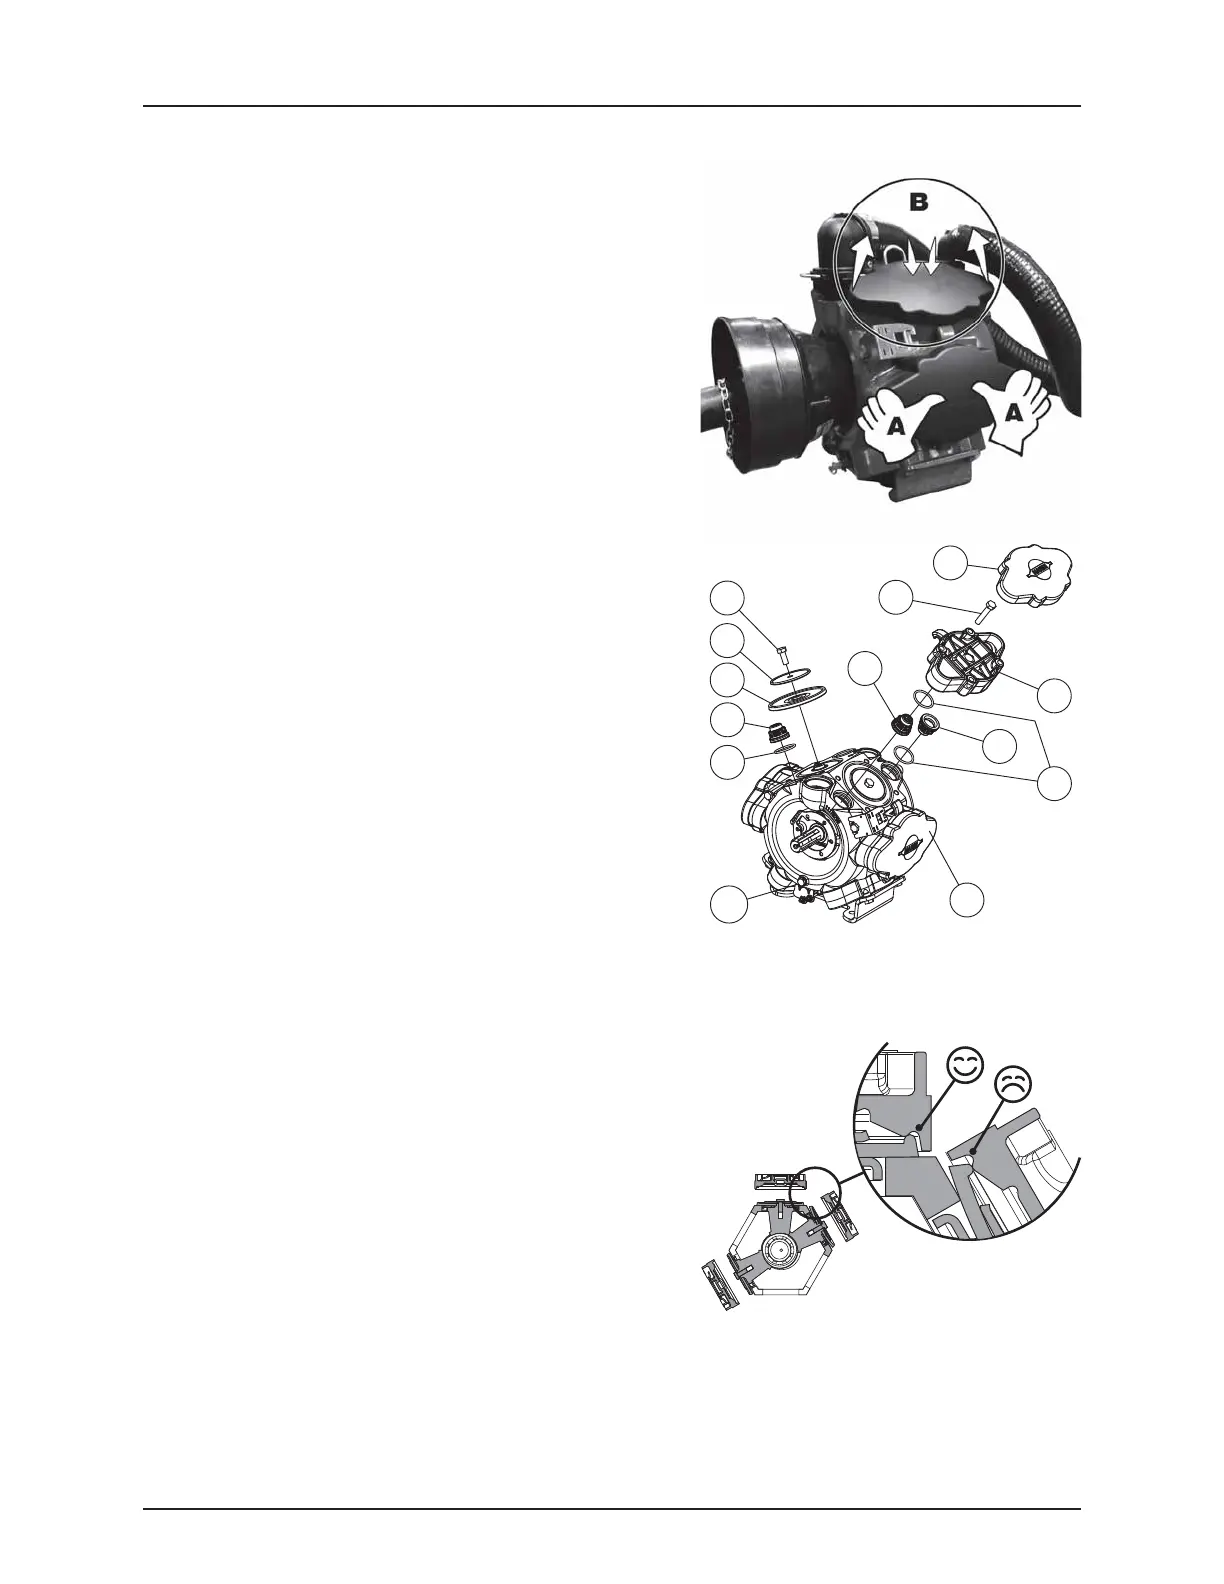
1. Lift off the plastic covers (C) with your hands (A) by pulling with the
finger tips while pushing with the thumbs in the center, as shown
in (B).
Valves
2. Loosen the 4 head bolts (1).
3. Remove the head (2).
4. Change the valves (3) - note their orientation so that they are
replaced correctly!
ATTENTION! It is recommended to use new gaskets (4) when
changing or checking valves.
Diaphragms
5. Loosen the diaphragm bolt (5).
6. Remove the diaphragm washer (6).
7. The diaphragm (7) may then be changed.
8. Check that the drain hole (8) at the bottom of the pump is not
blocked.
9. Apply a small amount of pump grease on the underside of the
diaphragms (between diaphragm and connecting rod washer).
10. Reassemble the pump with the following torque setting:
• Diaphragm head bolts (1): 67 Ft/lb (90 Nm)
• Diaphragm bolt (5): 67 Ft/lb (90 Nm)
11. Replace the plastic covers (C).
÷
NOTE! The diaphragm bolt on 1000 rpm. pumps must be secured
with a locking compound such as Loctite® 262
(HARDI® Part No.: 28045503).
ATTENTION! Before tightening the 4 bolts for the head (2), the
diaphragm must be positioned between the center and top to
ensure correct sealing between the diaphragm pump housing
and diaphragm cover. Turn the crank shaft if necessary.
C
C
1
2
3
3
3
4
4
5
6
7
8
 Loading...