CONTROL UNIT
95
11
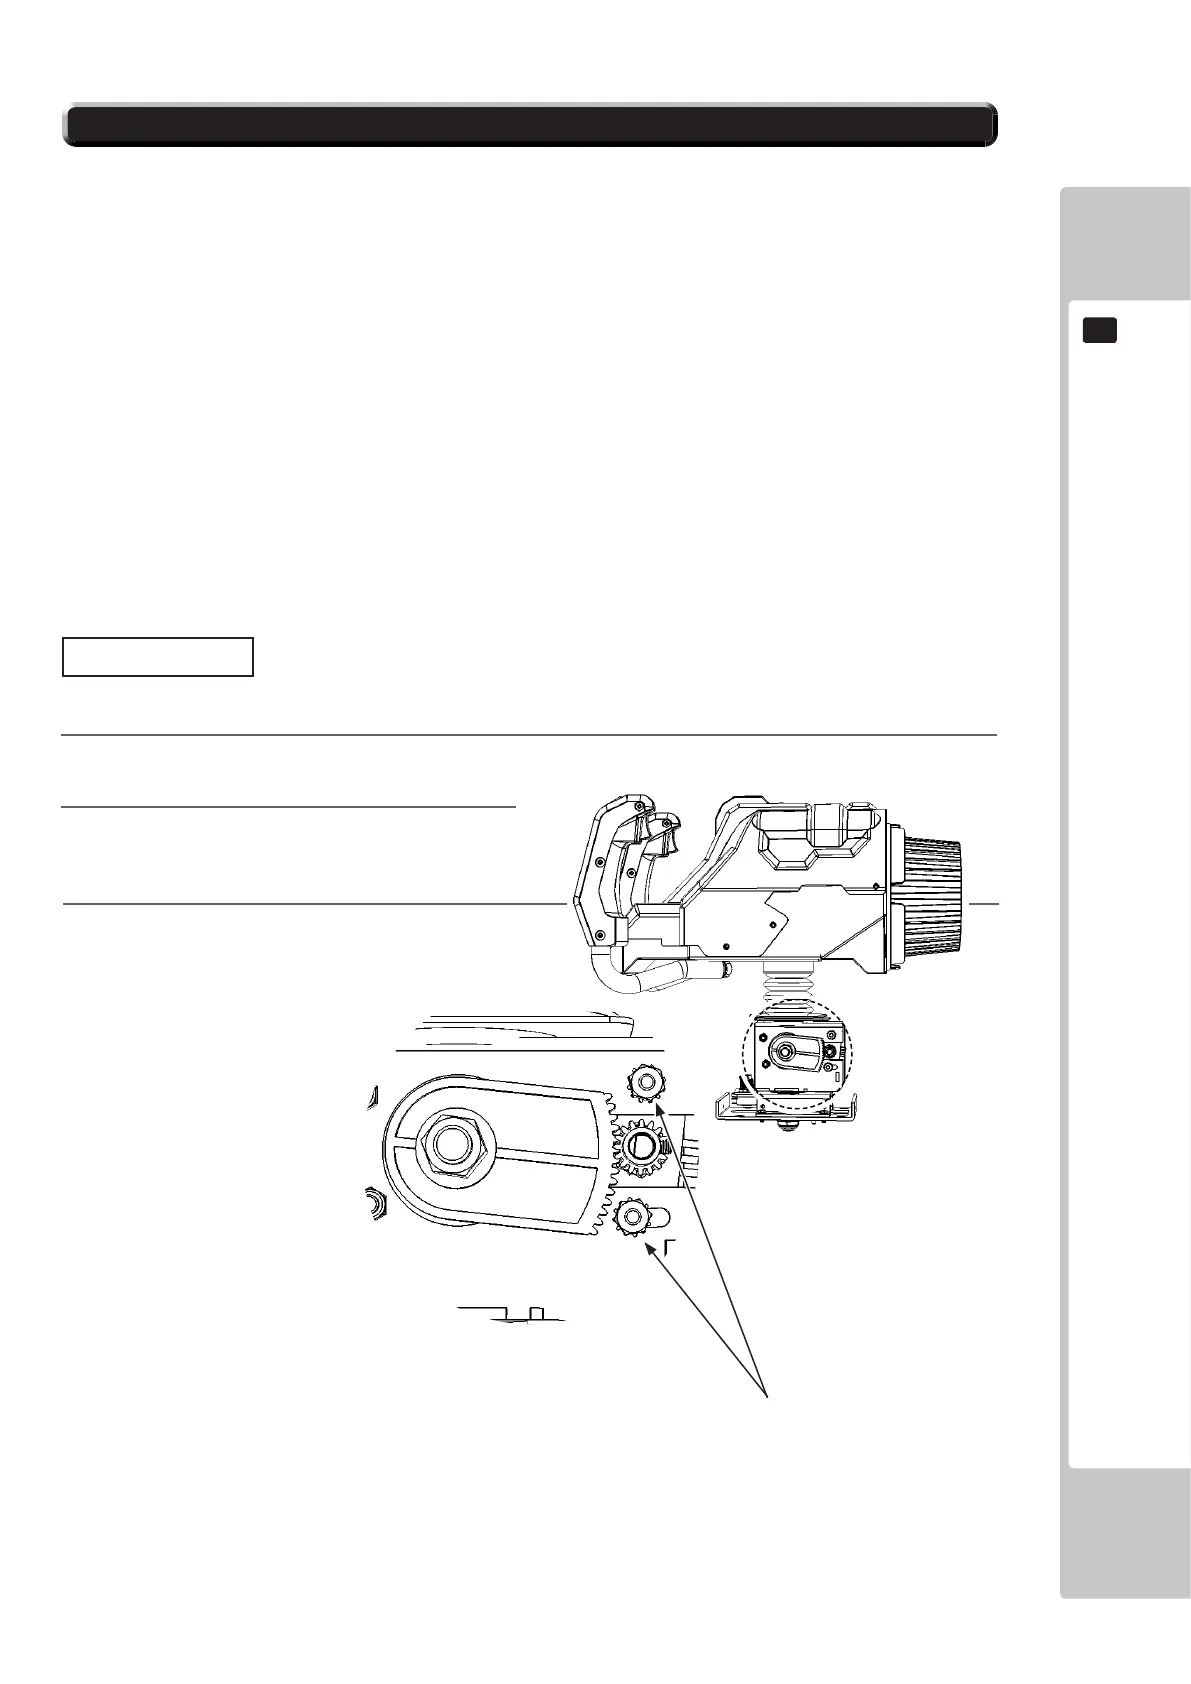
11-3 ADJUSTING OR CHANGING THE Y AXIS VOLUME
Adjustment
FIG. 11-3a
The Y (up and down) axis volume is on the bottom of the Control Unit.
If the Y axis volume does not seem to be working properly and the TEST Mode calibration screen has no eect, the
cause is likely to be a problem with or damage to the gears of the Y axis volume.
When replacing the volume, you will need a replacement volume and three heat shrink tubes. You will also need the
following tools and some solder:
- Wrench or screwdriver for tamperproof screws (for M4)
- A 7 millimeter spanner, hexagonal screwdriver, or socket wrench
- An 11-12 millimeter spanner
- Cutters
- Wire stripper
- Soldering iron
- Industrial heat gun
1
Turn o the power and remove the Control Unit (see 11-1).
2
Locate the Y axis volume - positioned at the
right hand side of the controller.
3
Loosen the (2) hex nut from the volume
pot bracket. Disengage the volume gear by
sliding the bracket out towards the front of the
controller.
Imperial Hex Nut.

 Loading...