15
TROUBLESHOOTING
116
If a problem occurs, rst check to make sure that the wiring connectors are properly connected.
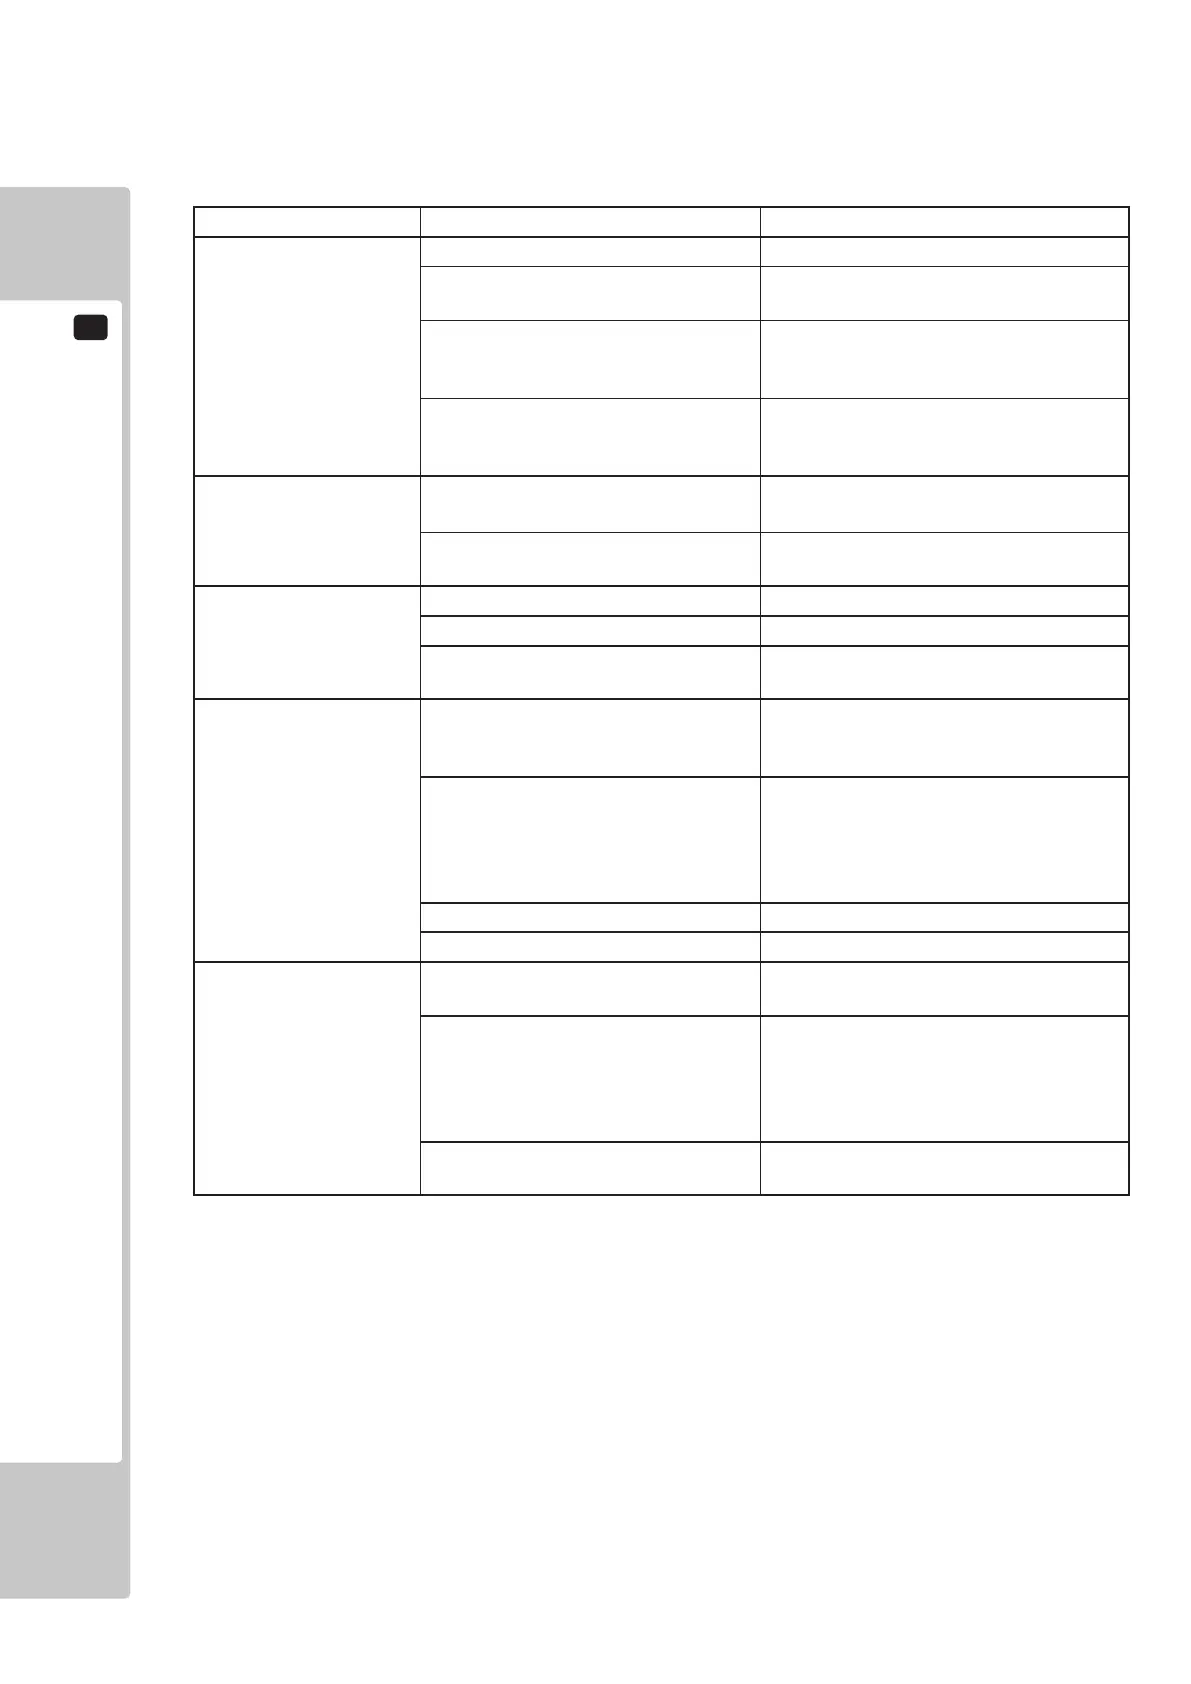
15 TABLE 01
PROBLEM CAUSE COUNTERMEASURES
When the Main
SW is turned ON,
the machine is not
activated.
The power is not ON Firmly insert the plug into the outlet
Incorrect power source/voltage
Make sure that the power supply/
voltage are correct
The Fuse on the AC Unit has
blown due to momentary over
current
After eliminating the cause of
overload, replace the specied rating
fuse
The Fuse of the Connect Board
has blown due to momentary
over current
After eliminating the cause of
overload, replace the specied rating
fuse
No sound is
generated from the
speakers
Volume not correctly adjusted
Adjust the sound volume (see
chapter 9)
Game Bd or Amplier malfunction
Call service dept mentioned in this
manual
LCD colour incorrect
Screen not correctly adjusted Adjust the screen (see chapter 11)
VGA cable malfunction Replace VGA cable
LCD failure
Call service dept mentioned in this
manual
The controller line of
sight is not acceptible
Sights are not aligned due to
changes in the surrounding
enviroment
Re-align the sight settings (see
chapter 9)
Sight LED board malfunction.
Check LED bds positioned around
the screen - check that all LEDs are lit
(This can be easily achieved if
viewing LED through a digital device
i.e camera or camera phone)
Sensor unit malfunction Replace sensor unit. (see chapter 10)
LED Board / cover contaminated Clean both LED covers and LEDs
The controller unit
does not to appear to
operate correctly
Microswitch failure
Check using Input Test (see chapter 9)
to establish operation
LED board malfunction
Check LED bds positioned around
the screen - check that all LEDs are lit
(this can be easily achieved if viewing
LED through a digital device i.e
camera or camera phone)
Sensor Unit malfunction
Replace the Sensor Unit (see chapter
10)
 Loading...