www.honeywell.com/security
86 | Performance Series HQA Digital Video Recorder Remote User Guide
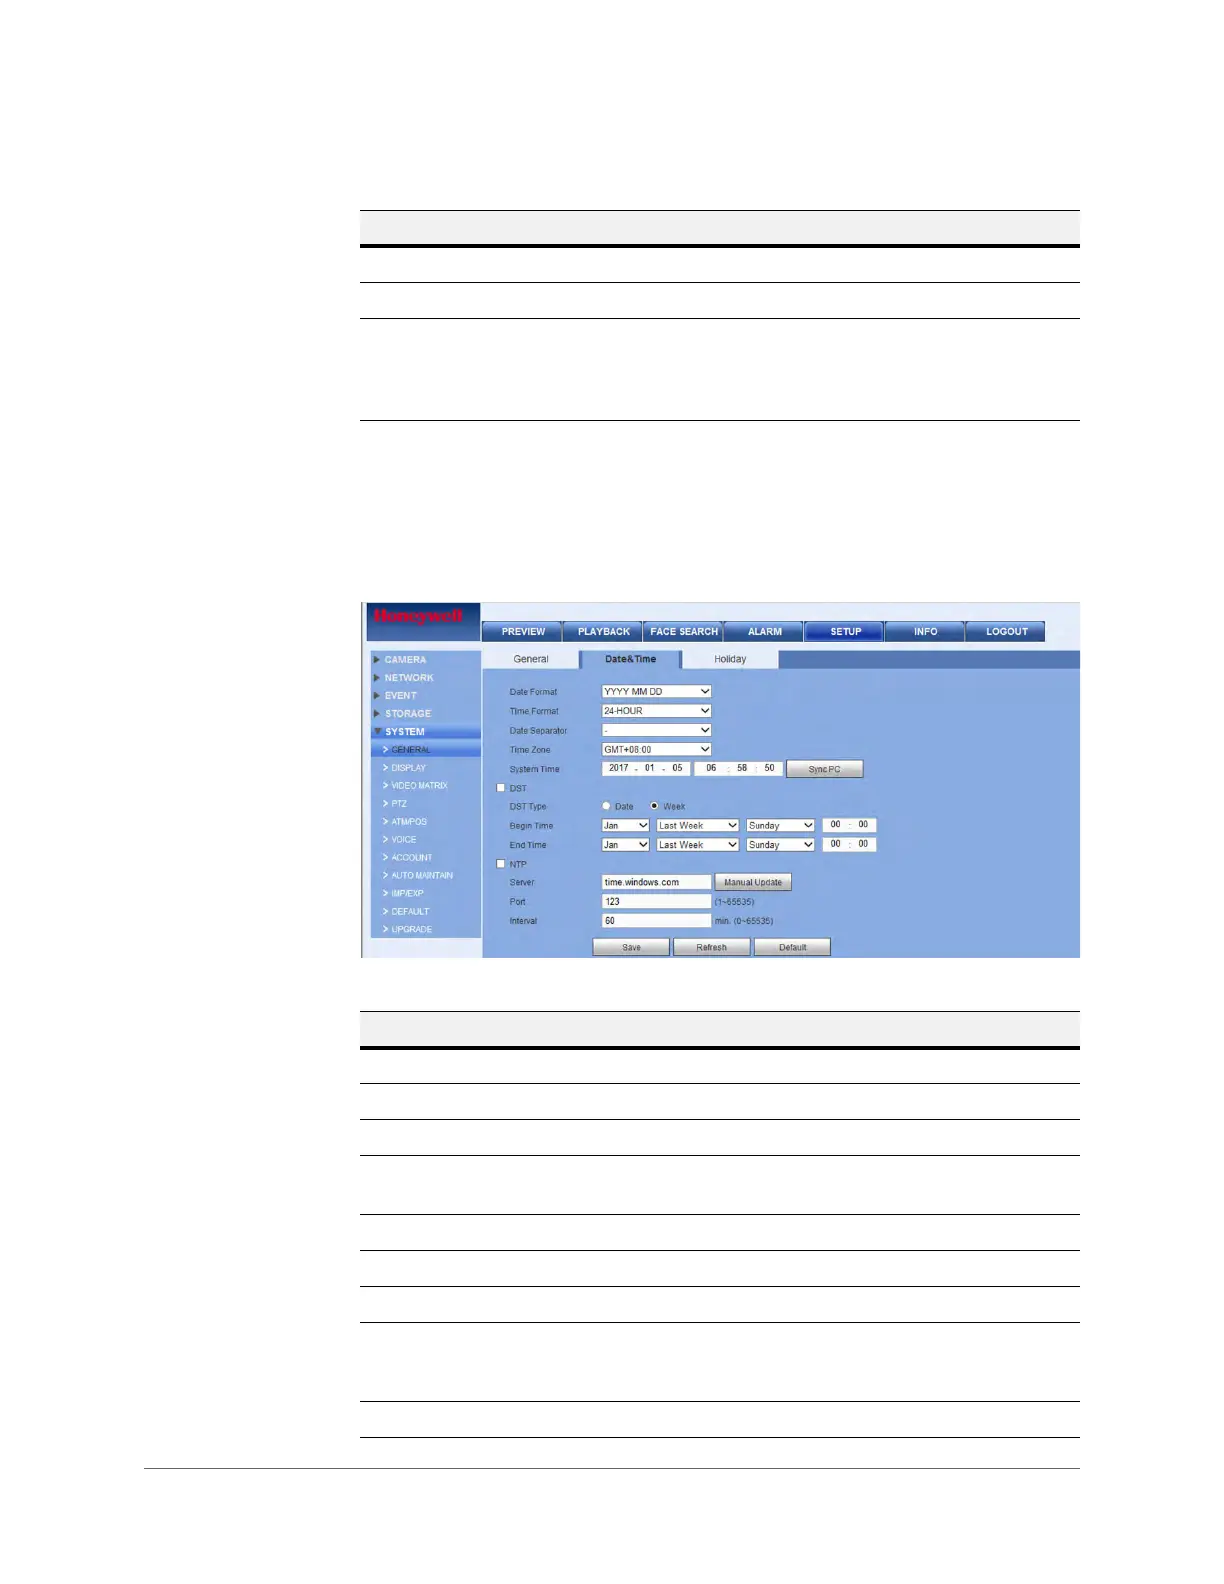
Configuring Date and Time Settings
Click the Date & Time tab in the General settings configuration interface to open the Date &
Time configuration interface.
Figure 3-49 Date & Time Configuration Interface
Startup Wizard Click to enable/disable the Startup Wizard.
Navigation Bar Click to enable/disable the Navigation Bar.
IPC Time Sync Using the 24-hour clock (where 10 is 10:00am and 22 is
10:00pm), configure a time at which the IPC Time Sync
occurs. At this specified time, the DVR synchronizes the IP
camera time to the DVR time.
Table 3-21 General Settings Configurations
Configuration Description
Table 3-22 Date & Time Configurations
Configuration Description
Date Format Select the date format from the drop-down list.
Time Format Select from either 24 hour or 12 hour.
Date Separator Select from a period (.), a hyphen (-), or a slash (/).
Time Zone Select your time zone (GMT + a number of hours) from the
drop-down menu.
System Time Set the DVR’s time. You have to Save to activate this setting.
Sync PC Click to synchronize your DVR’s time with your PC’s time.
Time Zone Select a Time Zone for the DVR.
DST Click to enable Daylight Saving Time (DST). Click to select a
type, either Date or Week. Then configure a date and time
when DST begins and ends.
NTP Click to enable the NTP server.
 Loading...