www.honeywell.com/security
68 |
MPA1 User Guide
5. Optional: Enter a note, such as Department number, phone extension, or a birthday,
for example. Notes can be up to 20 characters.
6. Turn Trace on or off.
Trace provides a record of the card holder’s path through the facility by sending an
alarm message to the alarm monitor whenever a card with trace enabled is presented
at a reader.
7. Select a type of Usage.
• If you select Temporary, then you must select an end date on the calendar.
• If you select Limited, then you must select the maximum number of times the
card can be presented.
8. Select an Access Type: Employee, Supervisor, or VIP. See User Access Types and
Functionality on page 115 for more about Access Types.
9. Click Save.
TIP! You can assign attributes from an existing set of cards. At the bottom of the People
& Cards window, click Add to open a list of available cards, then select a card to assign to
this person.
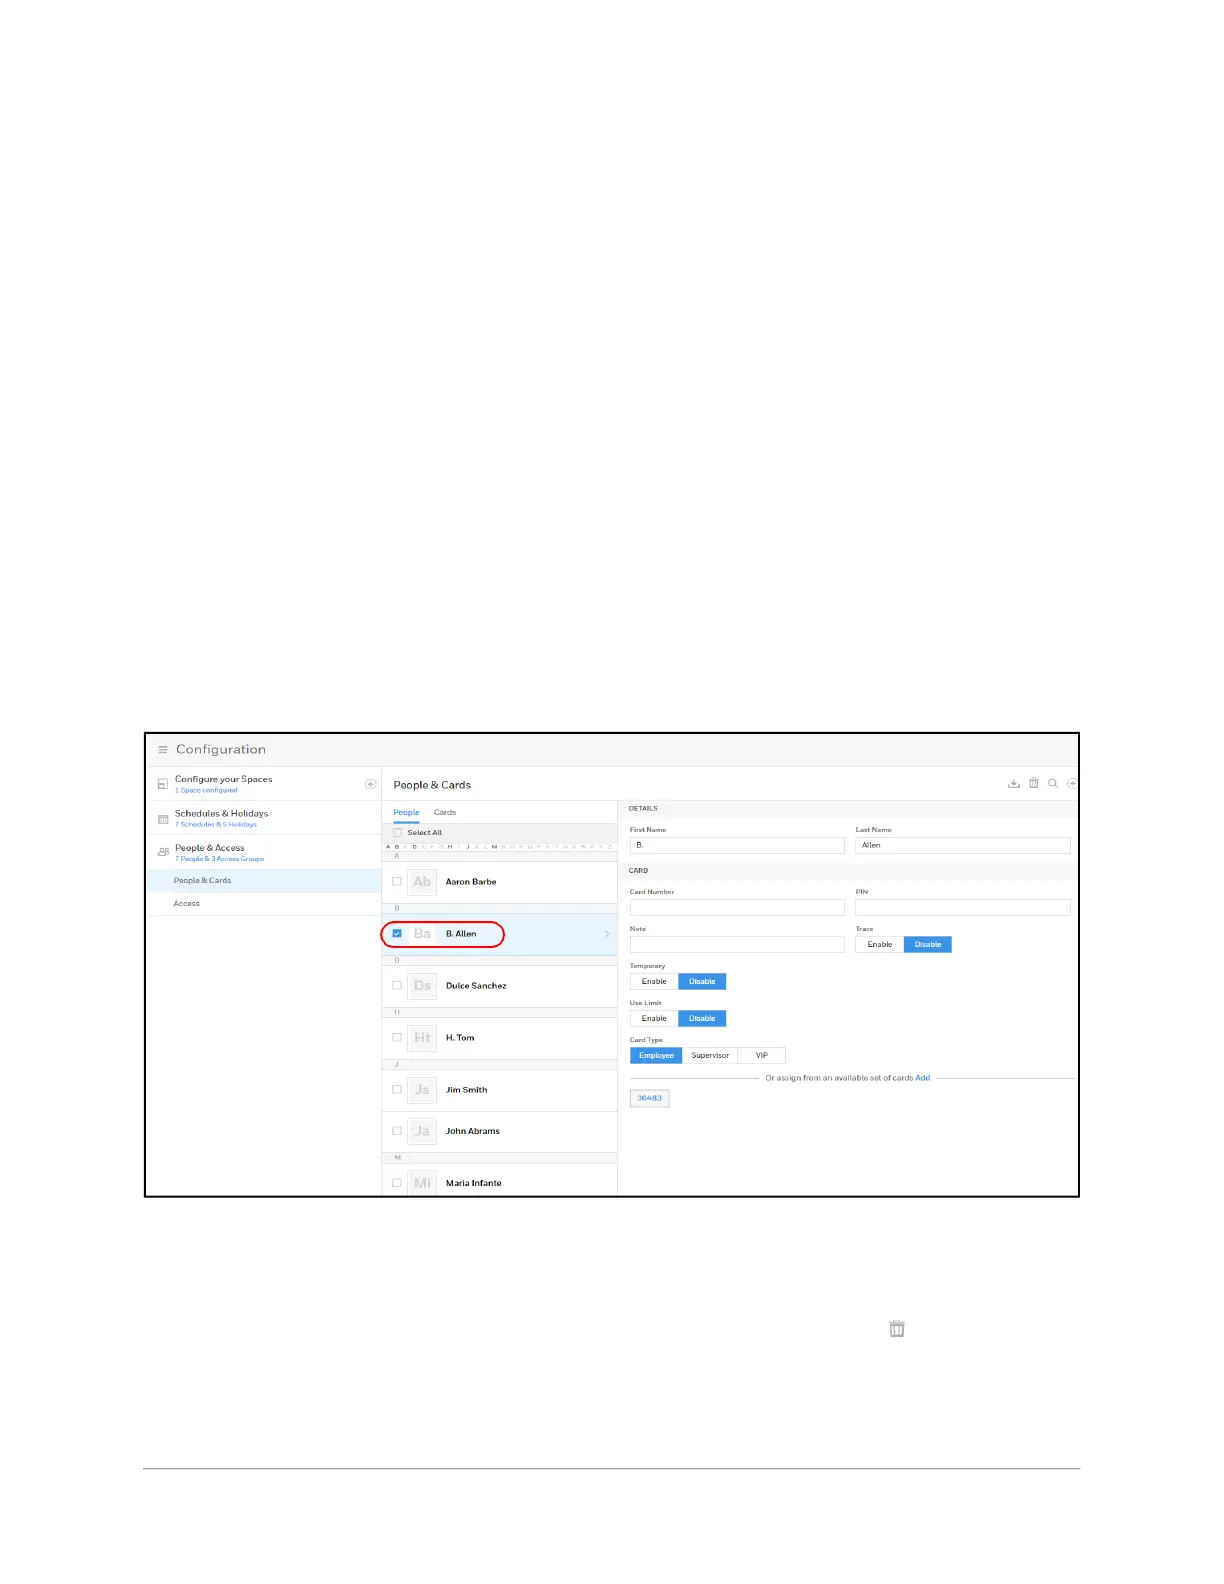
Modifying a Person
1. Click the box next to the person’s name.
Figure 2-38 Modifying a Person
2. Make changes to the person, then click Save.
Deleting a Person
1. Click the box next to the person’s name. A delete icon appears .