4-9
Switch Meshing
Configuring Switch Meshing
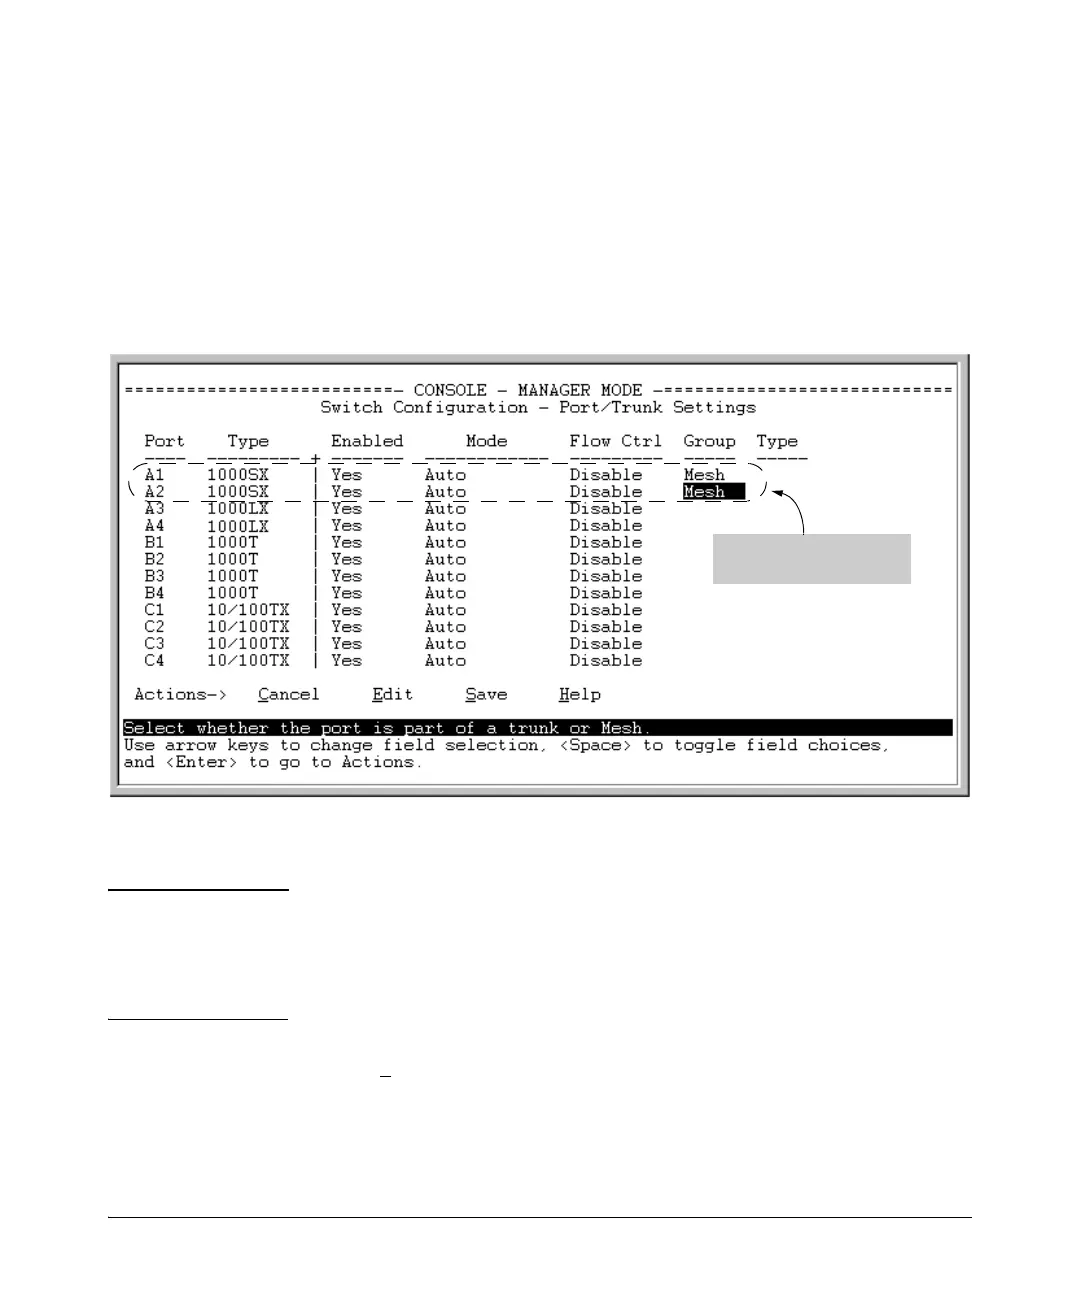
3. In the Group column, move the cursor to the port you want to assign to
the switch mesh.
4. Press [M] to choose Mesh for the selected port.
5. Use the up-arrow or down-arrow key to select the next port you want to
include in your mesh domain, then press
[M] again. For example, if you
were adding ports A1 and A2 to your mesh domain, the screen would
appear similar to figure 4-7:
Figure 4-7. Example of Mesh Group Assignments for Several Ports
6. Repeat step 5 for all ports you want in the mesh domain.
Notes For meshed ports, leave the Ty pe setting blank. (Meshed ports do not accept
a Type setting.)
All meshed ports in the switch automatically belong to the same mesh domain.
(See figure 4-2 on page 4-3.)
7. When you finish assigning ports to the switch mesh, press [Enter], then [S]
(for S
ave). You will then see the following screen.
Ports A1 and A2 configured
for meshing.
 Loading...