Service Reference Guide, dc7100 361288-003 8–9
Removal and Replacement Procedures - Ultra-Slim Desktop (USDT) Chassis
8.7 Front Bezel
1. Prepare the computer for disassembly (Section 8.1).
2. Remove the computer access panel (Section 8.3).
3. Remove any MultiBay device in the drive cage (Section 8.4).
4. Remove the MultiBay riser card (Section 8.5).
5. Remove the front panel assembly (Section 8.6).
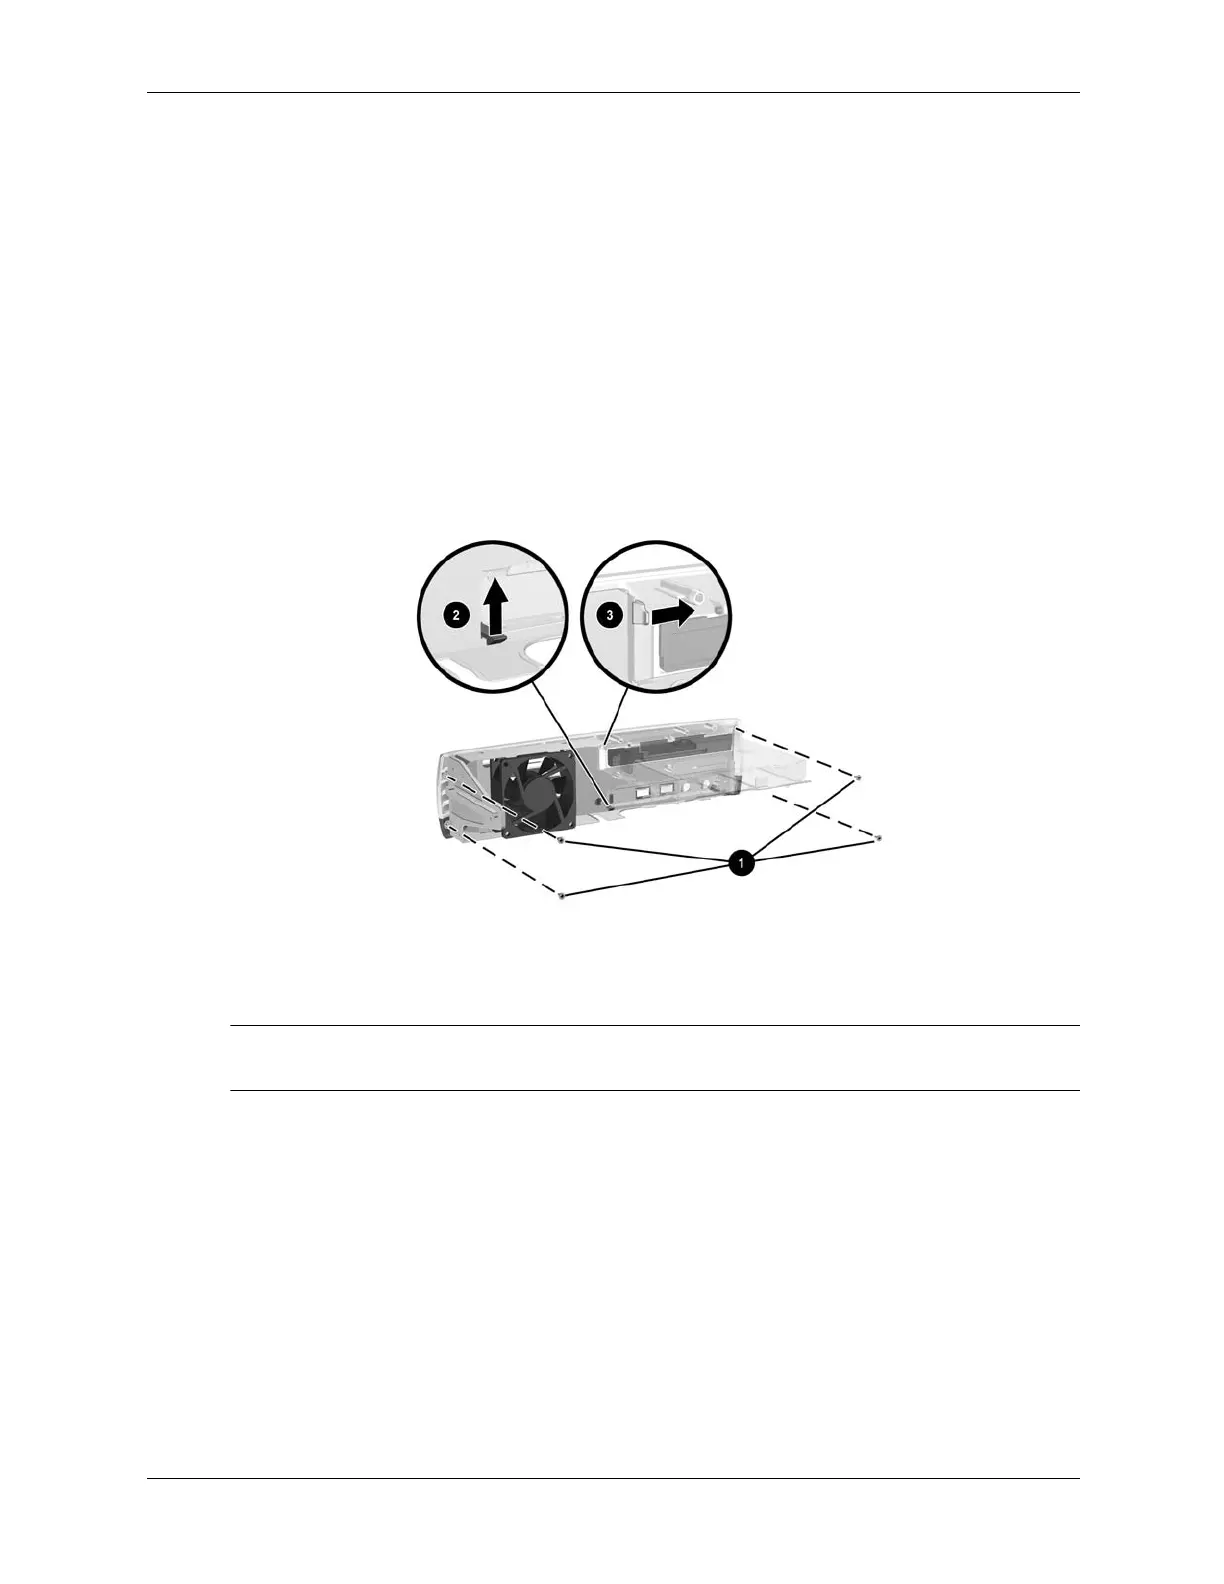
6. Use a #0 Phillips screwdriver to remove the four screws that secure the front bezel to the
front panel assembly 1.
7. Raise the plastic locking device 2 located just below the MultiBay drive cage and pull the
front bezel away from the assembly. It may be necessary to release the catch 3 that keeps the
top of the bezel in place.
To reinstall the front bezel, reverse the removal procedures.
✎
When installing the front bezel, make sure that the MultiBay eject lever is positioned nearest the
center of the bezel to ensure it will properly activate the eject mechanism.
 Loading...