3. Release the PCI I/O riser by lifting the release handle. This action frees the PCI I/O riser from
the system board.
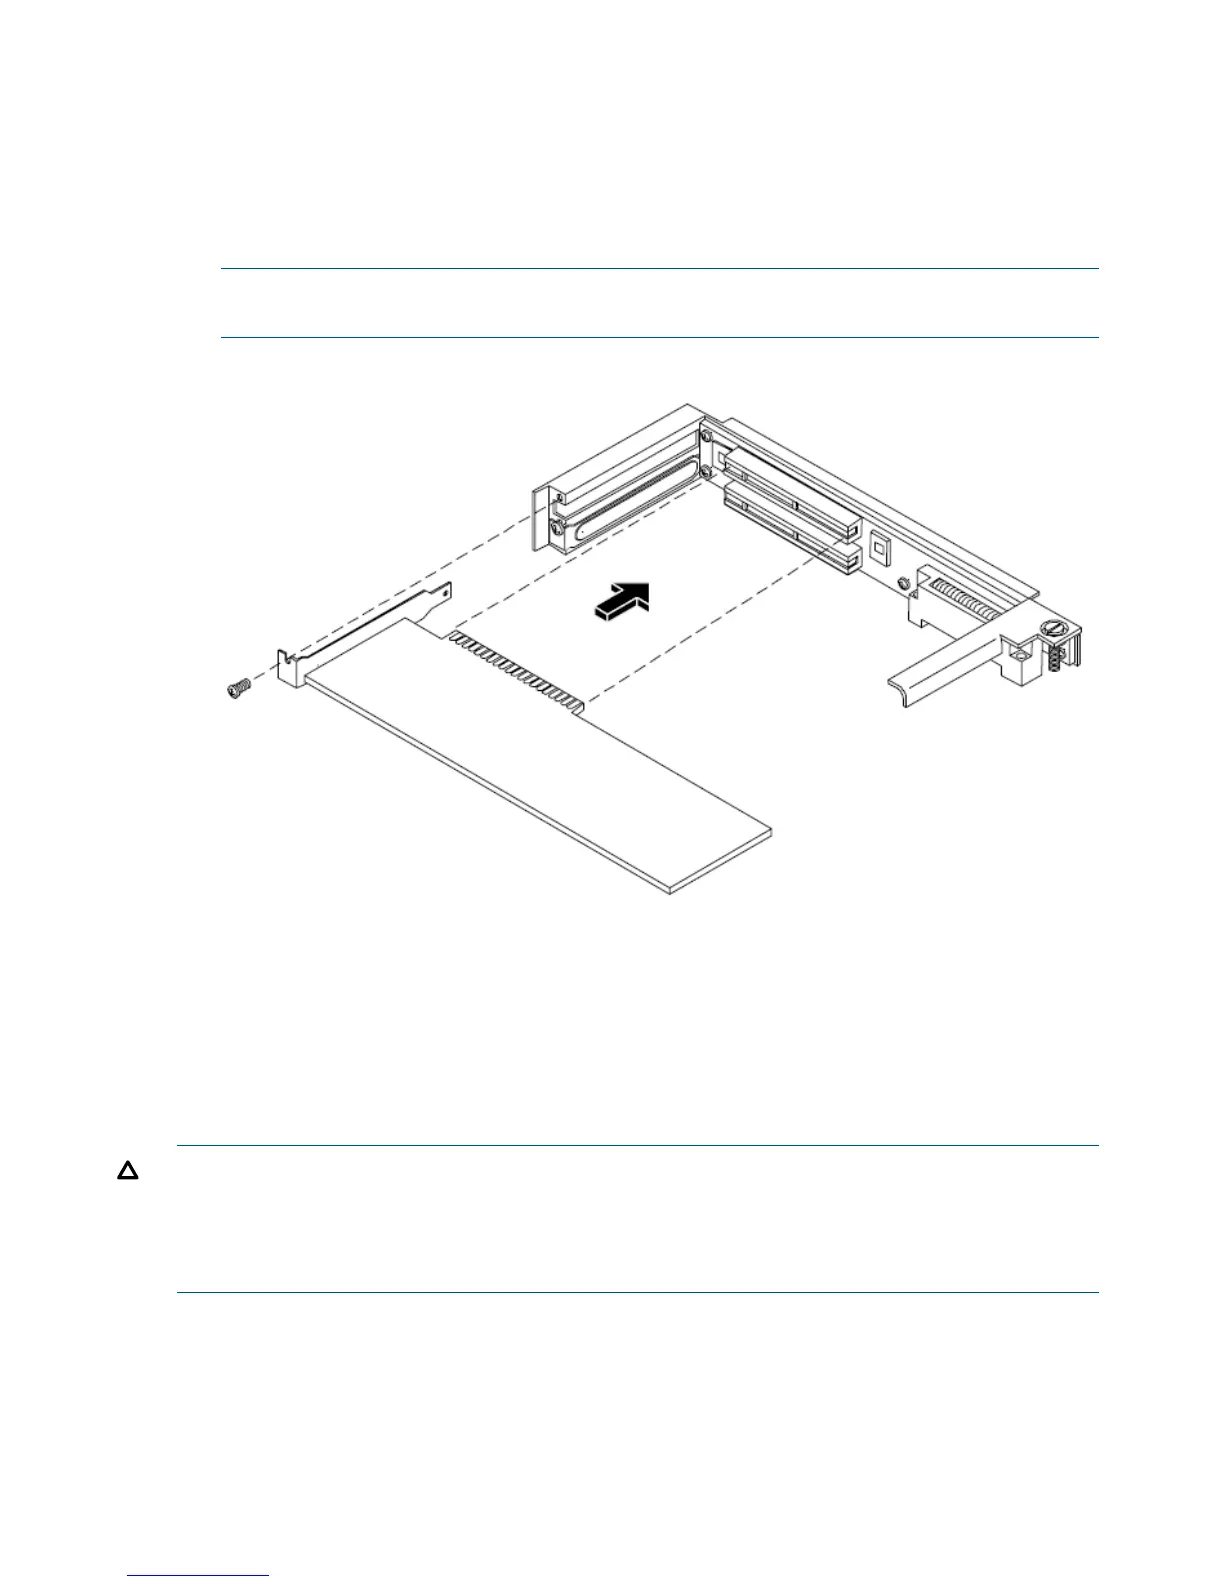
4. Grasp the edges of the PCI card being removed and gently rock the card releasing the
connector from the PCI I/O riser connector. Place the removed PCI card in an antistatic
container.
5. Grasp the edges of the replacement PCI card and gently press the connector into the PCI I/O
riser connector.
NOTE: Full length PCI cards may only be installed in slot 1, the top slot of the PCI I/O riser
assembly. The lower slot (slot 2) can only accept half-length cards.
Figure 52 Installing a PCI Card
6. Replace the PCI I/O riser assembly by positioning the connector over the mating connector
on the system board and then turning the jackscrew to complete the connector mating.
7. Connect any cables that are required by the PCI card.
8. Replace the cover. See “Removing and Replacing the Cover” (page 30).
Removing and Replacing an Internal Hard Disk Drive
This section provides information about removing and replacing internal hard disk drives.
CAUTION: A hot-swap device may require interaction with the operating system before the device
can be safely installed into the server. Verify that the operating system supports installing disk drives
while the operating system is running. If the operating system does not support this feature, shut
down the operating system before attempting this procedure. Failure to observe this caution will
result in system failure.
Removing an Internal Hard Disk Drive
One additional disk drive may be added to your HP Server in slot 1. Always use low profile disk
drives (1.0” height) in your HP Integrity rx1620 Server.
To remove a disk drive, perform the following steps:
1. Open the drive-ejector handle by lifting it up until the drive releases from the connector.
2. Pull the drive forward and away from the SCSI cage.
56 Removing and Replacing Components

 Loading...


