64 Managing switches
Setting the switch symbolic name and domain ID
Use the Set Switch Symbolic Name and/or Domain ID dialog box to change the symbolic switch name or
the domain ID.
To change the switch symbolic name and domain ID:
1. To access the Set Switch Symbolic Name and/or Domain ID dialog box, choose one of the following
options:
• On the HBA & Switch Management menu, click Set Switch Symbolic Name and/or Domain ID. (If
you have more than one switch in your SAN, the Switch Selection dialog box prompts you to select
a switch, and then click OK.)
• In the content pane’s Physical Connection map, right-click a switch icon to select that specific switch.
Then on the shortcut menu, click Set Switch Symbolic Name and/or Domain ID.
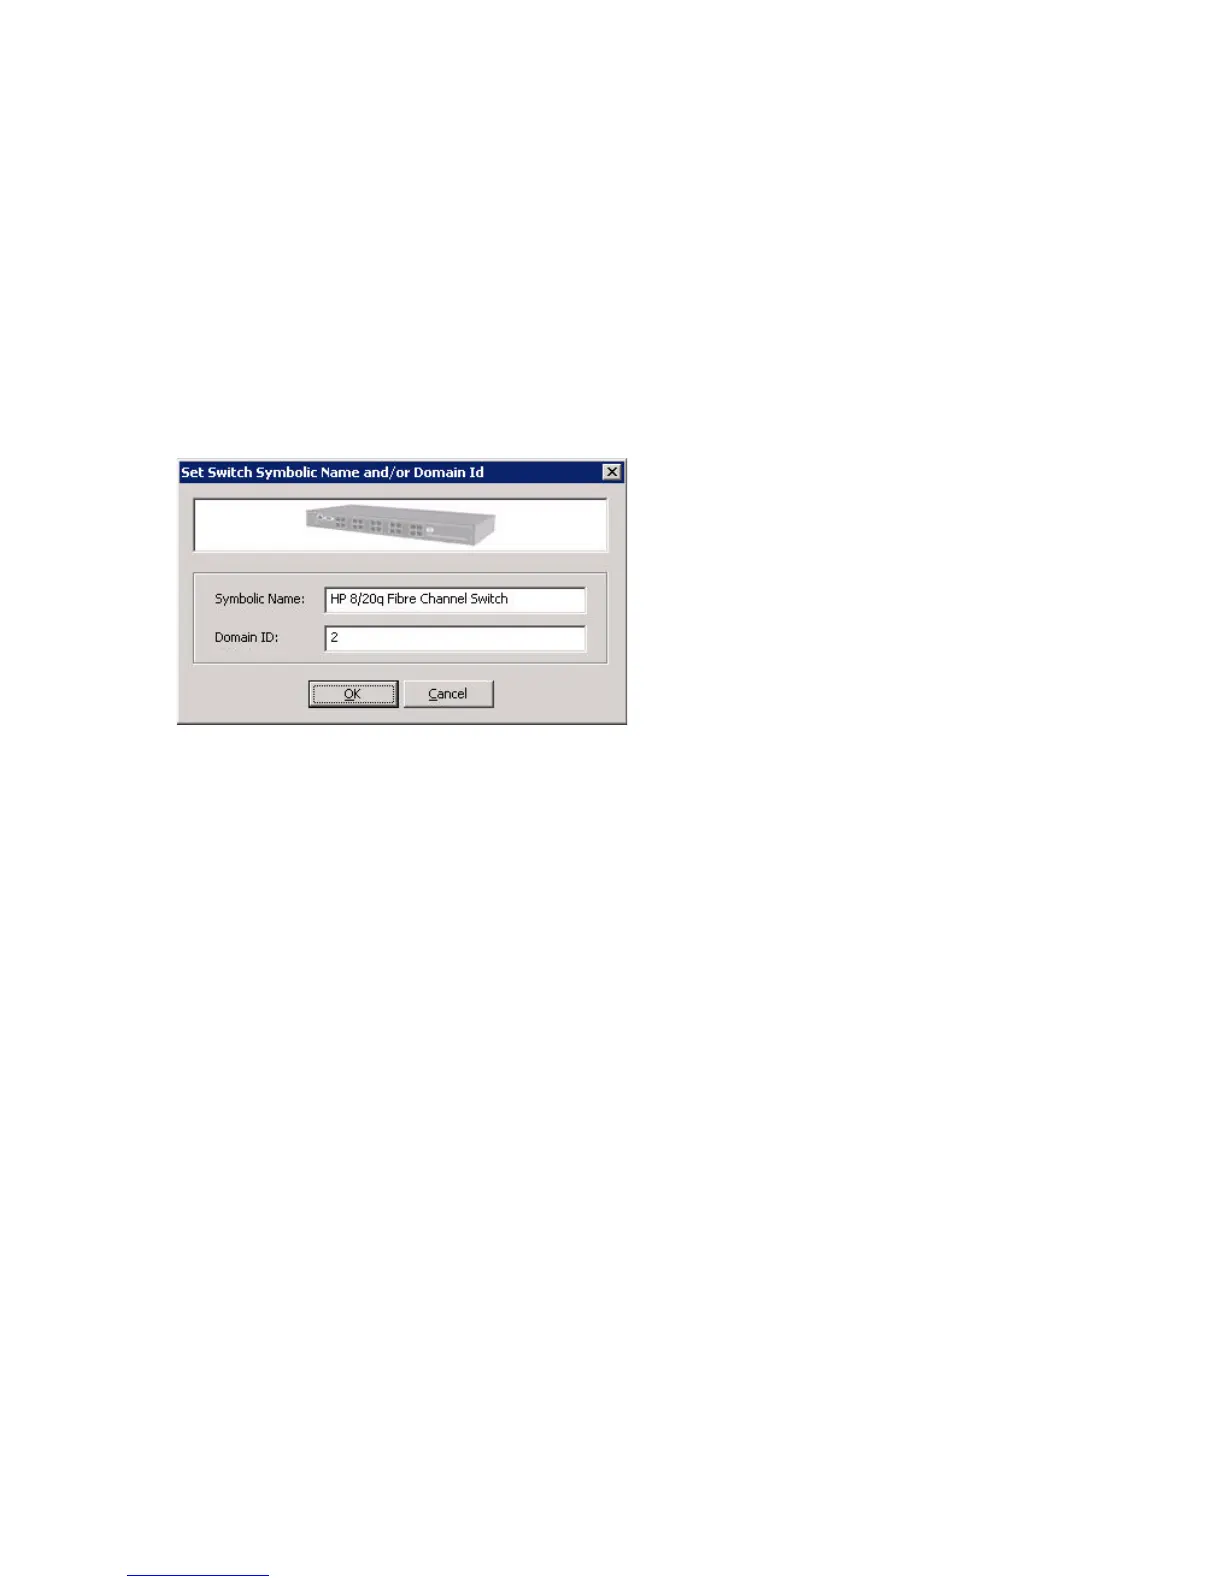
The Set Switch Symbolic Name and/or Domain ID dialog box (Figure 36) opens and shows the current
symbolic name and domain ID.
Figure 36 Set Switch Name and/or Domain ID dialog box
2. If you want to change the symbolic name, enter a new name (maximum 32 characters) in the Symbolic
Name box.
3. If you want to change the domain ID, enter a new name in the Domain ID box.
4. To make the changes and close the dialog box, click OK. To close the dialog box without making any
changes, click Cancel.
Setting DNS properties
Simple SAN Connection Manager enables you to set the Domain Name System (DNS; aka Domain Name
Server) on the switch. DNS is a system that stores all the information associated with domain names in a
database. DNS is used to attach easy-to-remember domain names to hard-to-remember IP addresses in the
form of URLs and e-mail addresses.
To set the switch DNS properties:
1. To access the DNS Properties dialog box, choose one of the following options:
• On the HBA & Switch Management menu, click Set DNS Properties. (If you have more than one
switch in your SAN, the Switch Selection dialog box prompts you to select a switch, and then click
OK.)
• In the content pane’s Physical Connection map, right-click a switch icon to select that specific switch.
Then on the shortcut menu, click Set DNS Properties.
The DNS Properties dialog box (Figure 37) opens.
 Loading...