3. Horizontally holding the processor and heat sink, align the notched corner on
the heat sink with the notched corner on the processor socket, and place the
processor and heat sink downwards on the socket along the guide sleeves.
Keep the processor and heat sink parallel with the mainboard to prevent
damage to processor socket pins.
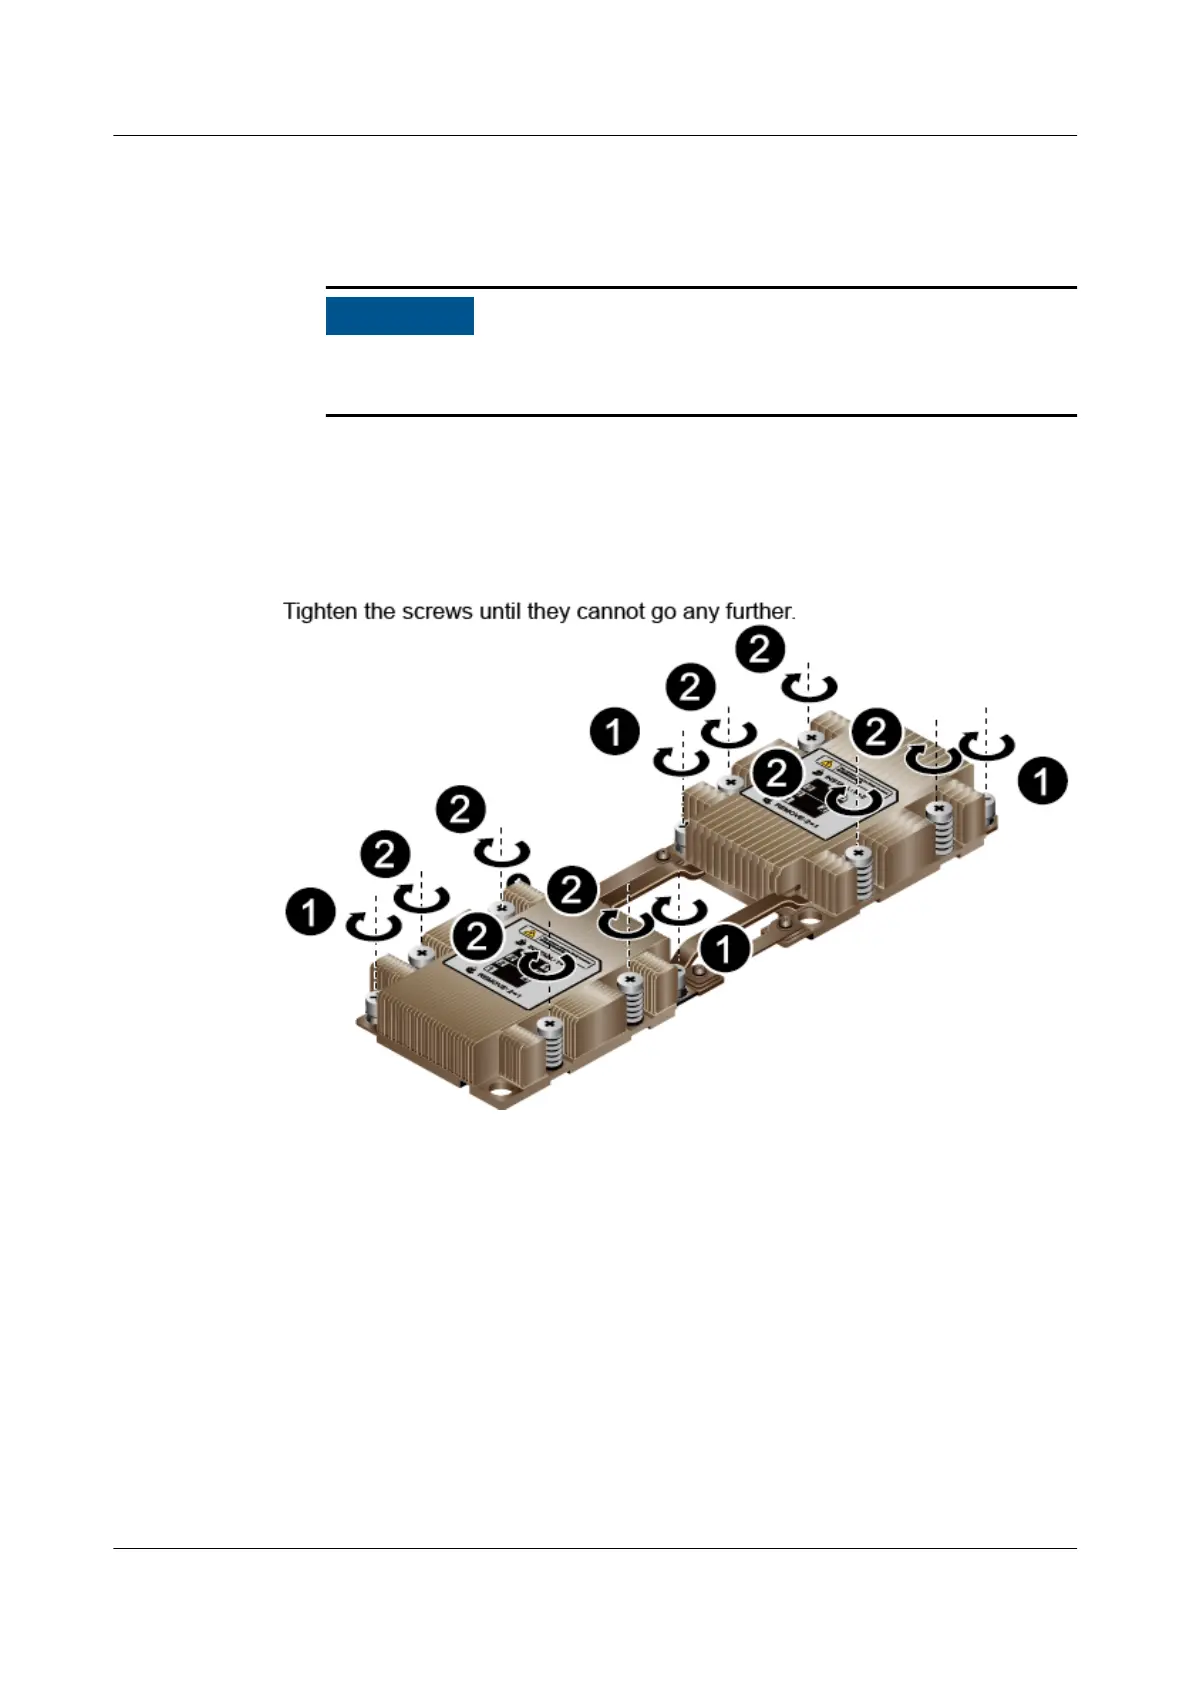
4. Use a Phillips screwdriver to tighten the two diagonal screws (marked 1 on
the label) on the heat sink. See (1) in Figure 8-40.
5. Use a Phillips screwdriver to tighten the four screws (marked 2 in the label) in
the middle of the heat sink in a diagonal sequence. See (2) in Figure 8-40.
Figure 8-40 Installing the heat sink
Step 11 Install the air duct.
For details, see 8.4.24 Installing the Air Duct.
Step 12 Install the server node.
For details, see 8.3.4 Installing an XH321 V5.
Step 13 Power on the server node.
For details, see 8.3.1 Power-On Procedure.
----End
FusionServer Pro XH321 V5 Server Node
Maintenance and Service Guide 8 Parts Replacement
Issue 17 (2021-03-09) Copyright © Huawei Technologies Co., Ltd. 74