Installation
134 810060 Instruction Manual XPR170
4. Use a clean, lint-free cloth to wipe the internal and external surfaces of
the torch.
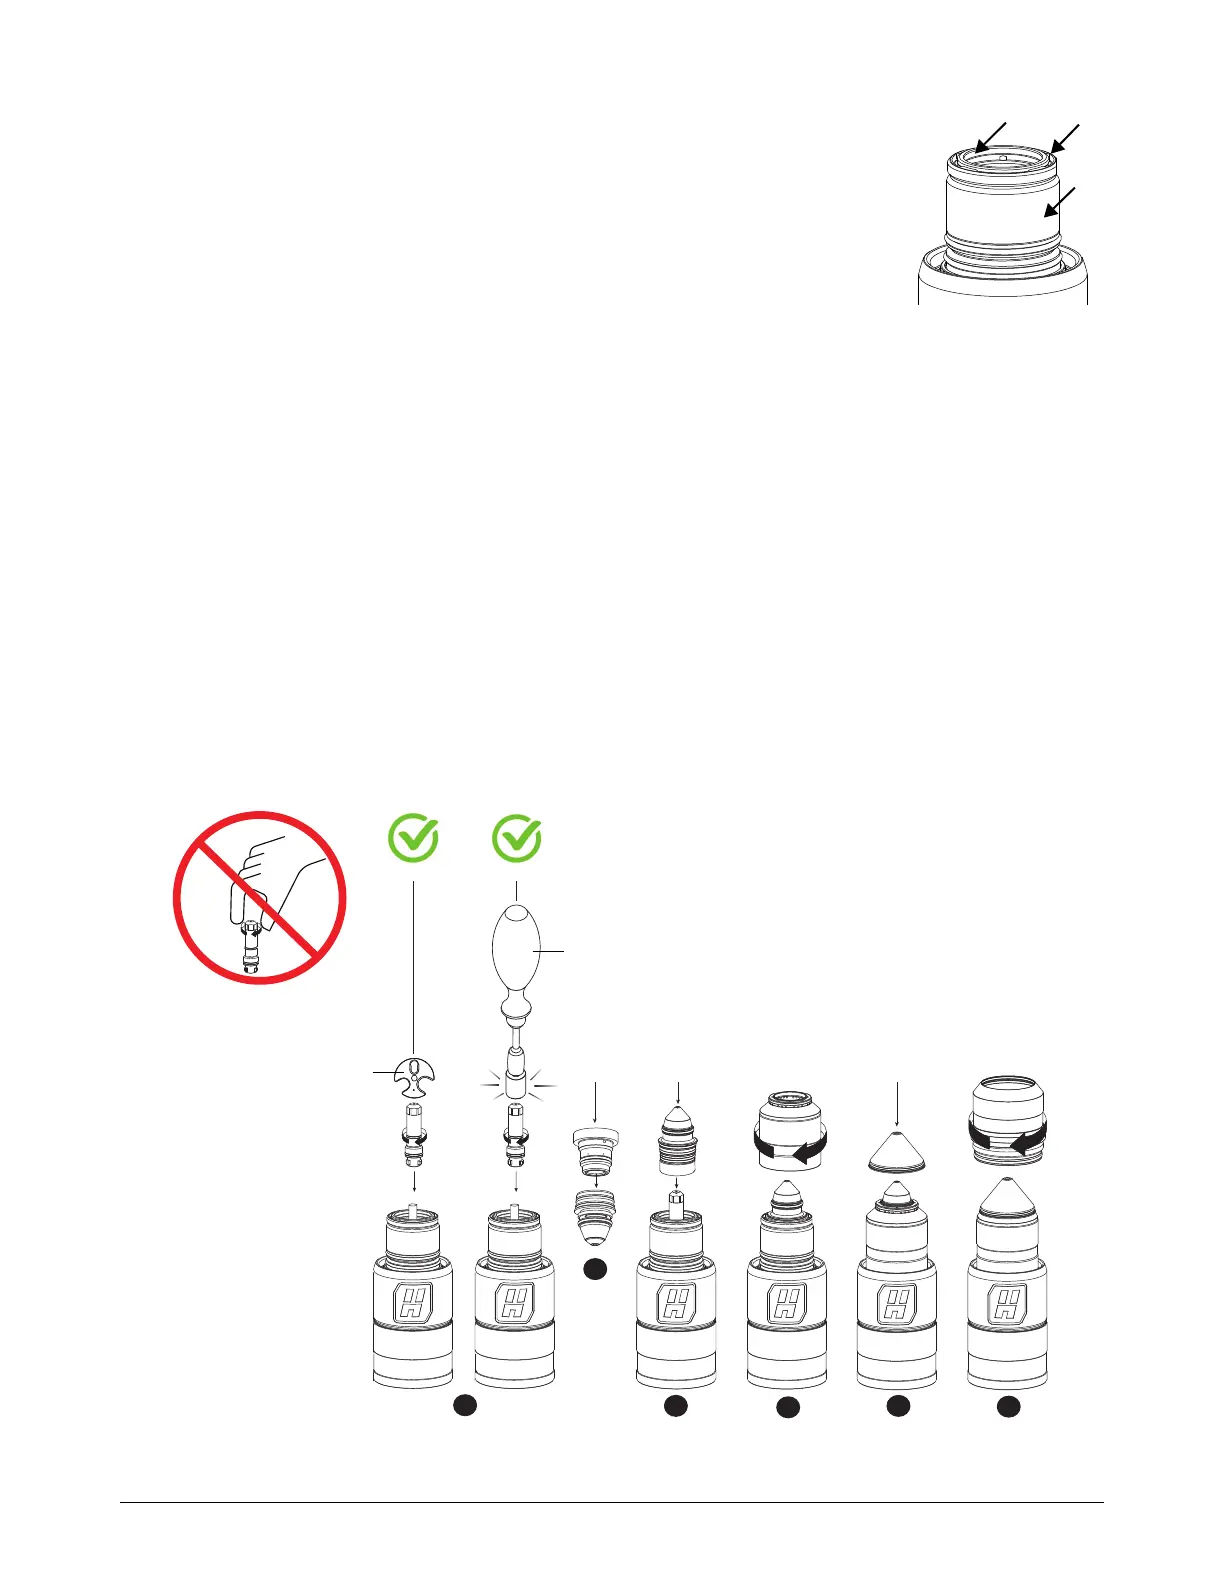
5. Install the consumables on the torch as shown in Figure 36:
a. Install the water tube. Make sure that the water tube is installed prior
to electrode installation.
b. Install the electrode.
c. Use either 1 of the 2 available tools (104119 or 429013) to tighten the electrode. A tool is
necessary to correctly install and tighten the electrode. Do not use your hands. If you fail to
correctly install or tighten the electrode, torch damage can occur. Hypertherm recommends
tightening the electrode to between 2.3 Nm – 2.8 Nm (20 inlbf – 25 inlbf) torque.
Hypertherm offers 2 tools for tightening XPR torch components (104119
or 429013). The electrode toque tool (429013) is pre-calibrated at
2.5 Nm (22.1 inlbf).
d. Install the swirl ring into the nozzle.
e. Install the nozzle and swirl ring assembly.
f. Install the nozzle retaining cap.
g. Install the shield.
h. Install the shield cap.
Figure 36 – Install the consumables on the torch
Pre-calibrated:
2.3 Nm – 2.8 Nm
(20 inlbf – 25 inlbf)
“Click”
“Snug-tight”