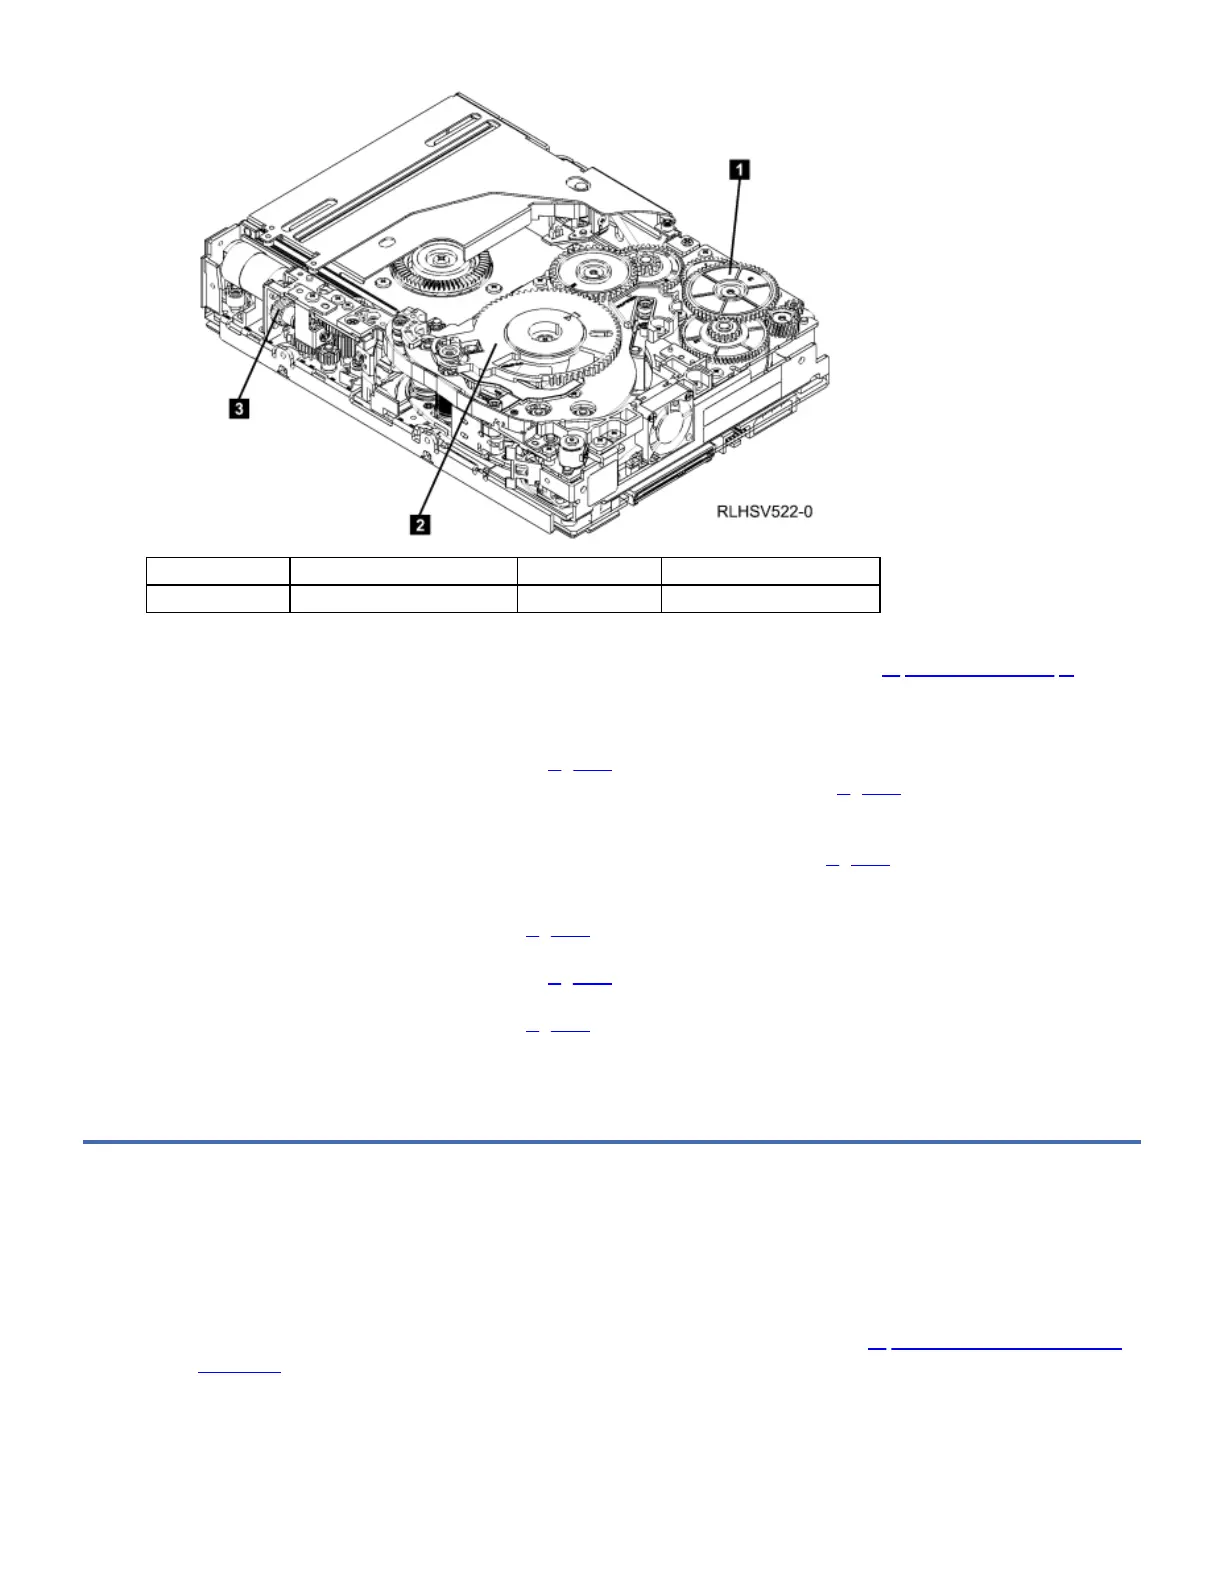
1 Threader intermediate gear 2 Threader mechanism gear
3 Loader motor worm gear
1. Pull out tape from the take up reel.
Note: If there is more than approximately 0.6 m (2 ft.) of tape on the take up reel, go to Tape Broken in Mid-tape.
2. If there is less than approximately 0.6 m (2 ft.) of tape on the take up reel, cut off the excess tape as close to the leader
pin, as possible.
3. Reattach the leader pin to the remaining tape.
4. Locate the threader intermediate gear (1 in Figure 1) near the rear of the drive. You can use your finger to rotate the
threader intermediate gear and slowly rotate the threader mechanism gear (2 in Figure 1) clockwise. This draws the
tape leader block assembly (LBA) into the cartridge.
5. As the leader pin is secured in the cartridge, you should hear the leader pin retention spring clips click into place. If you
do not hear the click, continue rolling until the threader intermediate gear (1 in Figure 1) stops. The LBA is in the
correct position.
Note: Be sure to keep tension on the tape as the LBA is drawn into the cartridge.
6. Rotate the loader motor worm gear (3 in Figure 1) clockwise as viewed from the front of the drive until it stops. This
releases the LBA leader pin.
7. Rotate the threader intermediate gear (1 in Figure 1) counterclockwise until the leader block is in front of the
Read/Write head. This moves the LBA out of the cartridge.
8. Rotate the loader motor worm gear (3 in Figure 1) counterclockwise as viewed from the front of the drive until it stops.
9. Remove the cartridge from the cartridge loader tray.
10. Reassemble the drive.
11. Install a new drive and return the failed drive.
Tape Broken in Mid-tape
Use the following procedure to remove a tape cartridge when the tape has broken in the middle of the tape:
1. With the front of the drive facing you, pull an arm’s length of tape out of the take up reel. From the take up reel, thread
tape around the rear of the tape path and over the head rollers on the left side of the drive.
Note: If there is less than approximately 5 cm (2 in.) of tape on the take up reel, go to Tape Pulled from or Broken near
Leader Pin.
2. From the supply reel inside the cartridge, pull approximately 0.3 m (1 ft.) of tape.
3. Make sure the tape is not twisted. Untwist tape if required.
4. Moisten a cotton swab with water, and wet approximately 13 mm (0.5 in.) of the tape end. Overlap the tape ends,
loosely mending them together.
5. Set the drive on its left side with the head and tape path facing up.

 Loading...


