Tape cartridges should always be stored in their protective cases. The storage case helps prevent damage from dust and
physical misuse. When the tape cartridges are not in use or being stored, they should be in their storage cases and
stood on edge in a designated storage location. Do not stack cartridges on the flat side or stack other items on top of the
tape cartridges. Handle your tape cartridges with care to reduce archival problems.
Tape cartridge protective cases should be kept closed except when inserting or removing a cartridge. Contamination can
build up and be transferred to the tape cartridge if the protective case is left open.
Stored tapes should be exercised at least once every 12 months. Run the tape from Beginning of Data (BOD) to End of
Data (EOD) and back to BOD at normal operating speeds. Tapes stored in a warmer environment should be exercised
more frequently.
Sunlight can damage the tape and the cartridge shell. Store tape cartridges out of the direct sunlight.
Attention: Operation outside of the recommended environment can result in possible loss of data or failure of the drive.
Operating in Harsh Environments
Do not use as an archival tape any tape that has been used outside of the operating ranges specified in Table 1 for an extended
period of time. The magnetic and physical strength of the tape will have deteriorated as a result of its exposure to the
environment. Do not store important data on such a tape; transfer the data to a newer tape for reliable archiving.
Attention: Do not operate the LTO tape drive in a poor air-quality environment.
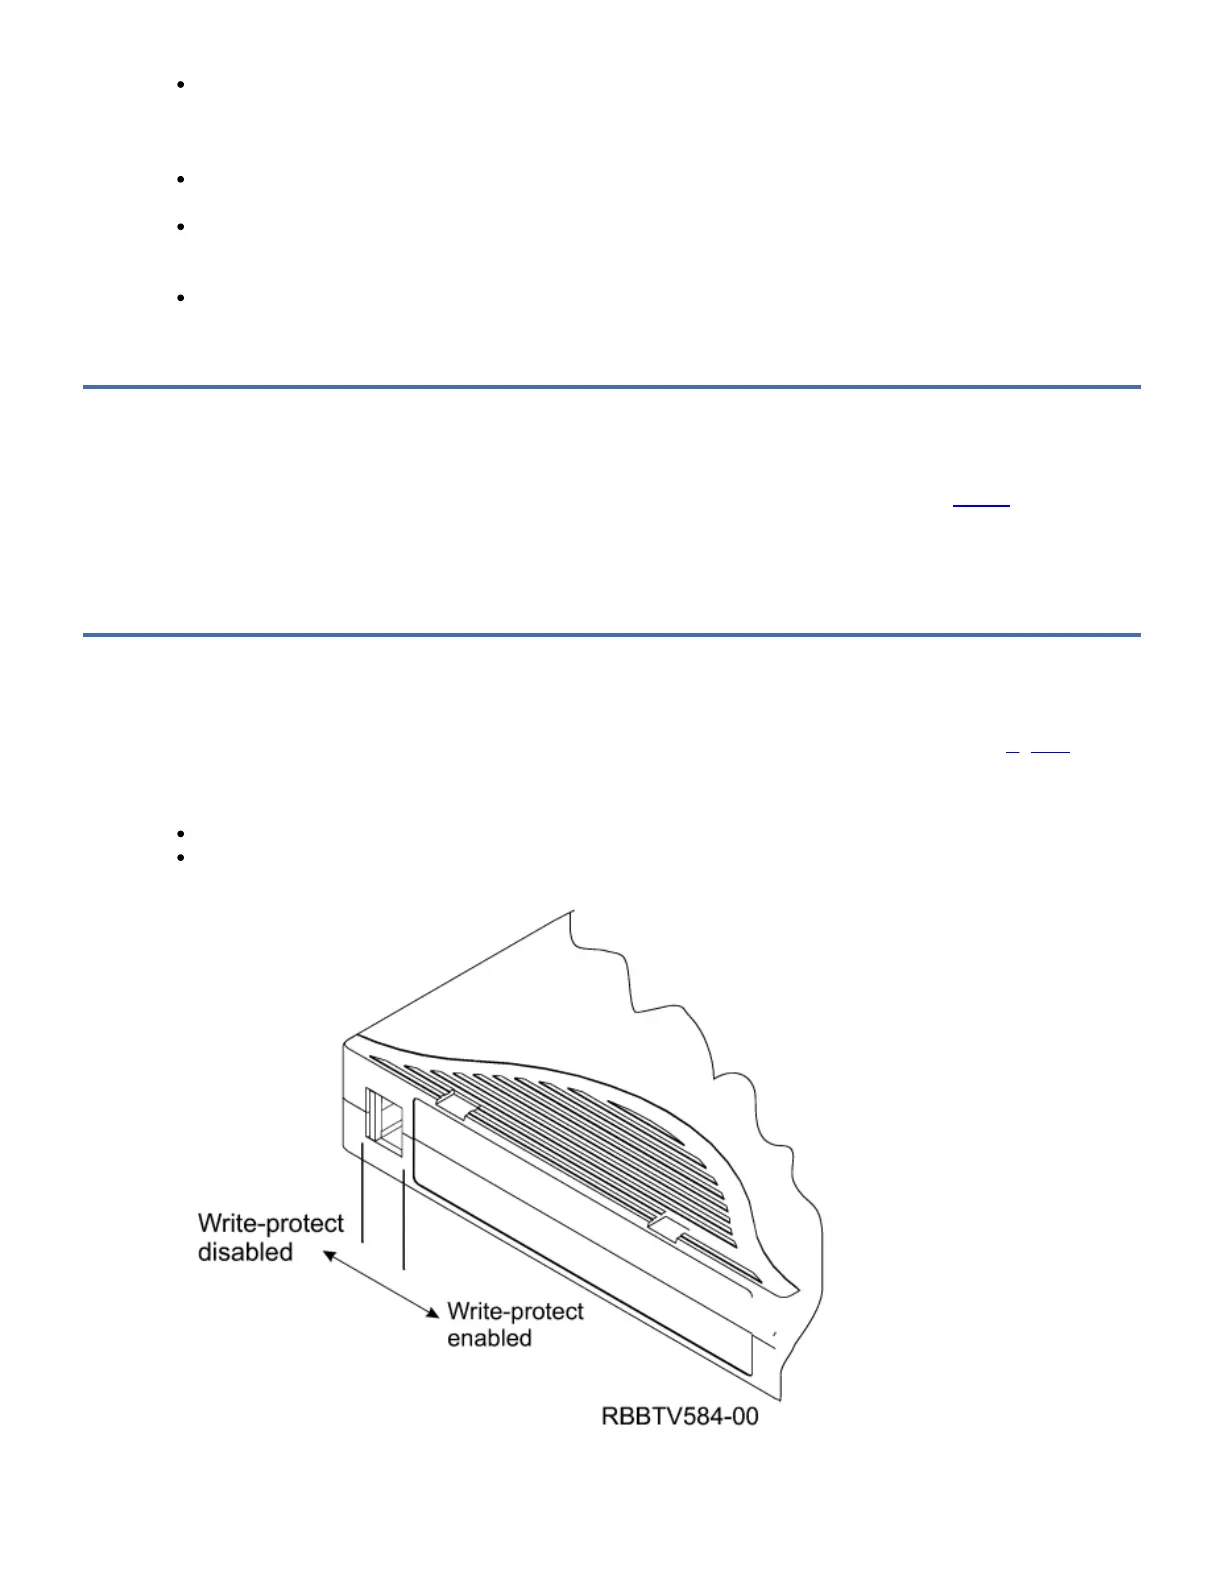
Setting the Write-Protect Switch
The position of the write-protect switch on the tape cartridge determines when you can write to the tape (see Figure 1). Before
loading cartridges into magazines, you should set the write-protect switch of each cartridge to enable or disable data
recording.
To enable data recording, slide the write-protect to the left so that the write-protect window is open.
To disable data recording, slide the write-protect switch to the right so that the locked icon appears on the switch.
Figure 1. Setting the Write-Protect Switch

 Loading...


