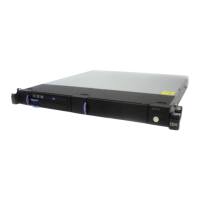
The DAT 160 Tape Drive includes an emergency eject and reset feature that releases the tape cartridge and resets the drive. If
the Eject button is pressed when a drive is performing an operation, the drive will attempt to finish the task before ejecting the
cartridge. This ensures that a proper End-of-Data (EOD) marker is written and the task is completed in a controlled manner.
EOD marker is placed at the end of each operation to indicate completion of that task.
Note: In some emergency eject cases where a read or write operation takes longer than 35 seconds, the operation may be
discontinued before a proper EOD marker can be written.
To perform an emergency eject of the tape cartridge or a reset of the drive, press and hold the unload button for at least 5
seconds. If a cartridge is in the drive, it automatically ejects without rewinding the tape.
Note: Emergency ejection overrides any PREVENT REMOVAL that may be in effect, and can stop any tape drive operations.
Resetting the Tape Drive
You might need to reset your tape drive. Use the following procedure to reset the drive:
Use this information to reset your tape drive, without affecting server operation. Allow up to 2 minutes for the entire tape drive
process to complete.
Attention: Resetting a tape drive before the current backup operation has completed can cause loss of customer data.
To reset the tape drive, follow these steps:
1. Press and hold the eject button for 20 seconds, and then release the button. The LEDs on the drive will be flashing while
the reset function is in process.
2. When the LEDs stop flashing, wait approximately one minute for the drive to complete the reset operation. The drive will
then be ready to use.
Cleaning the Tape Drive
Clean the DAT 160 Tape Drive whenever the Fault status LED comes on or a system I/O error related to the device occurs.
Attention: Use only the recommended cleaning cartridge to clean the tape drive. Use of other than recommended cleaning
cartridges can damage your drive and may void the warranty.
The tape drive will turn on the cleaning indicator for the following reasons:
The tape drive exceeds internal preset error thresholds in the drive.
A cleaning cartridge that has been used the maximum number of times is inserted in the drive. The cleaning indicator is
turned on to indicate that the cleaning process was not done and the cleaning cartridge is no longer usable.
The tape drive exceeds the maximum recommended time between cleaning.
The tape drive determines how much to clean the drive and uses less or more cleaning media depending on what the drive
determines is necessary. The average number of uses expected from a cleaning cartridge is 50, the minimum is 27, and the
maximum is 70.
The maximum recommended time between preventive-maintenance cleaning is 50 tape motion hours. Tape motion hours are
defined as the time that the tape drive is moving tape. If the tape drive reaches 50 tape motion hours since the tape drive was
last cleaned, the drive turns on the cleaning required LED to indicate the drive needs cleaning. The tape drive will continue to
operate but the tape drive must be cleaned at the next opportunity to insert a cleaning cartridge.
Note: Operating the tape drive in a low-humidity environment causes the drive to request cleaning more often than in normal
humidity environment. In extreme low-humidity conditions of less than 15% relative humidity, the tape drive might request
cleaning every 10 tape motion hours or even more frequently. For this reason, it is best not to use the tape drive in extremely
low-humidity environments.
To clean the DAT 160 Tape Drive tape drive:
1. Make sure that the power is on to the 7226 Storage Enclosure.
2. If a tape cartridge is in the DAT 160 tape drive, eject and remove the cartridge.
3. Grasp the cleaning cartridge by the outer edges, with the window side up and the write-protect switch facing you.

 Loading...