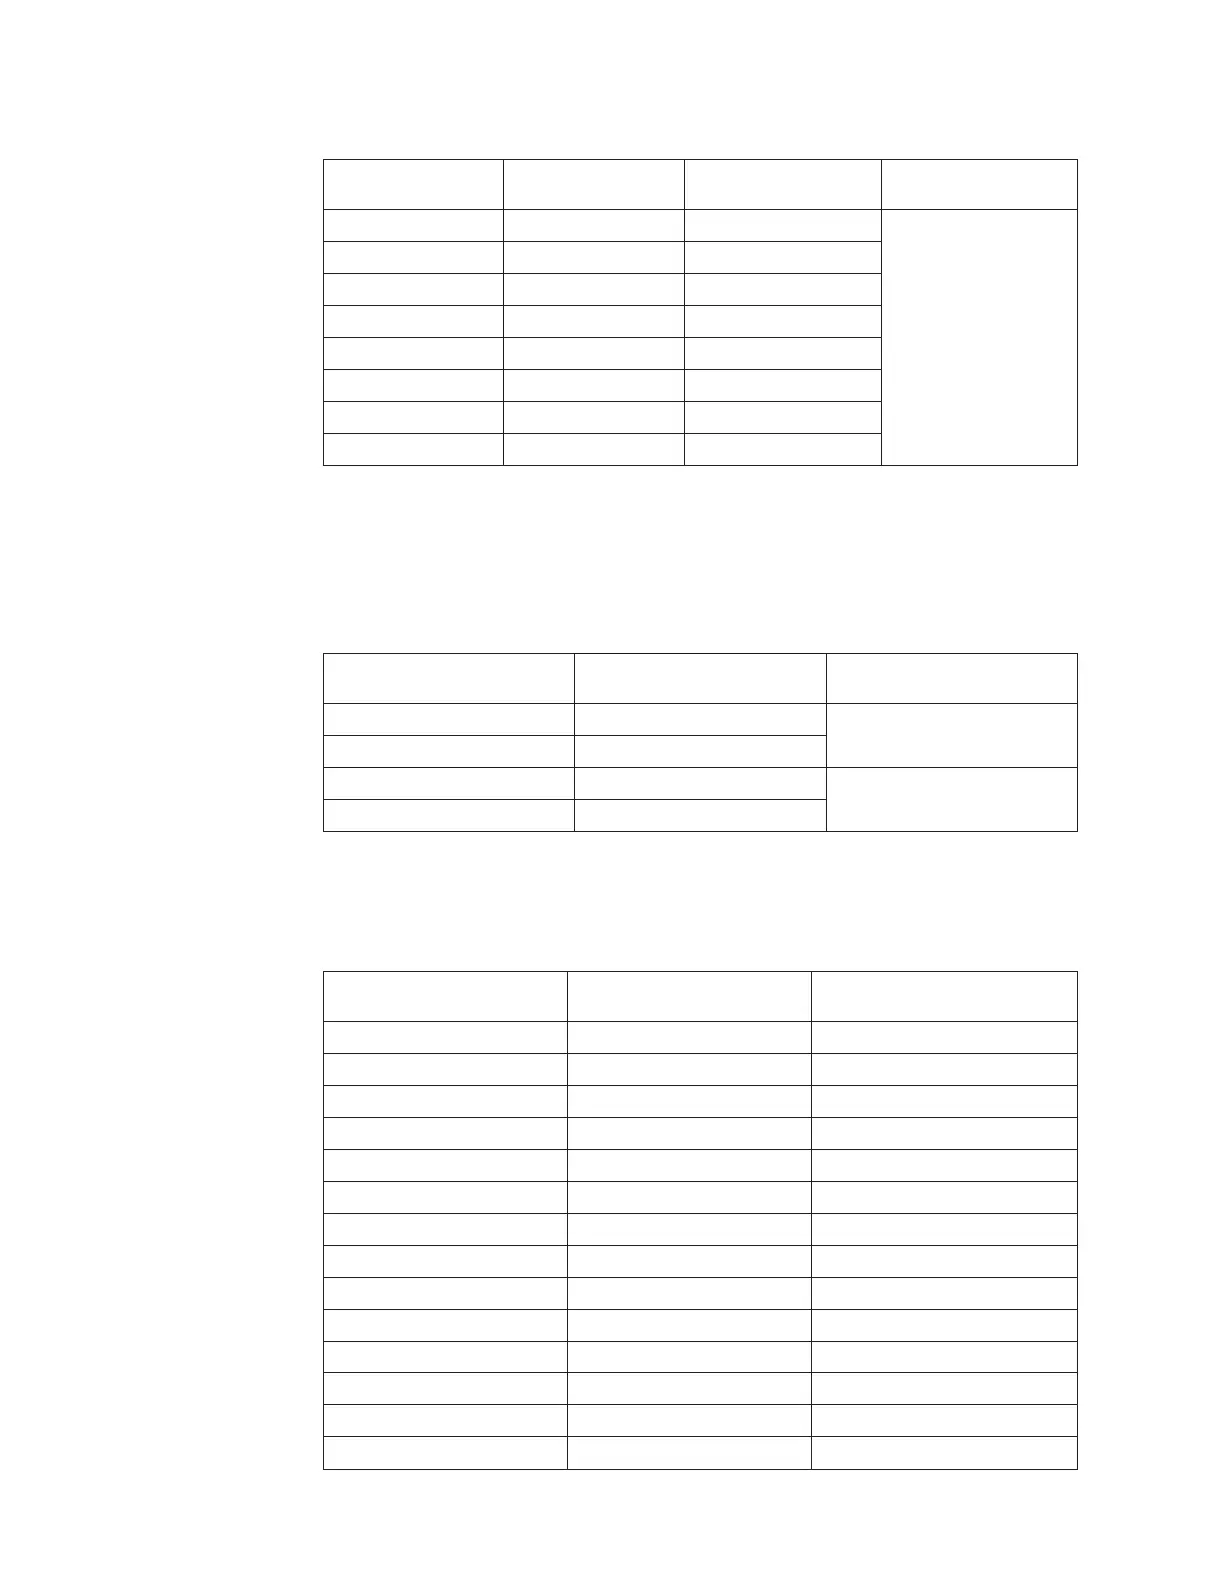
Table 17. Low-cost and low-power DIMM installation sequence
DIMM pair
installation order
Memory-card
connector number
DIMM-connector
numbers
Installed
microprocessors
First 1 1 and 8 1 and 4
Second 7 1 and 8
Third 1 3 and 6
Fourth 7 3 and 6
Fifth 1 2 and 7
Sixth 7 2 and 7
Seventh 1 4 and 5
Eighth 7 4 and 5
If you plan to install additional memory cards in the low-cost installation
sequence, follow the DIMM installation sequence in “Memory cards and
memory modules (DIMM)” on page 129 for each memory card. Install the
memory cards in the installation sequence shown in “Memory cards and
memory modules (DIMM)” on page 129.
Table 18. Low-cost and low-power memory-card installation sequence
Memory card pairs
Memory-card connector
number Installed microprocessors
First 1 and 7 1 and 4
Second 2 and 8
Third 3 and 5 2 and 3
Fourth 4 and 6
In a high-performance DIMM installation, install the DIMMs on each memory
card in the order shown in the following table. You must install at least one pair
of DIMMs on each memory card.
Table 19. High-performance memory-card installation sequence
DIMM pair installation
order
Memory-card connector
number DIMM connector numbers
First 1 1 and 8
Second 7 1 and 8
Third 3 1 and 8
Fourth 5 1 and 8
Fifth 2 1 and 8
Sixth 8 1 and 8
Seventh 4 1 and 8
Eighth 6 1 and 8
Ninth 1 3 and 6
Tenth 7 3 and 6
Eleventh 3 3 and 6
Twelfth 5 3 and 6
Thirteenth 2 3 and 6
Fourteenth 8 3 and 6
132 IBM System x3850 X5 and x3950 X5 Types 7145, 7146, 7143, and 7191: Problem Determination and Service Guide
 Loading...


