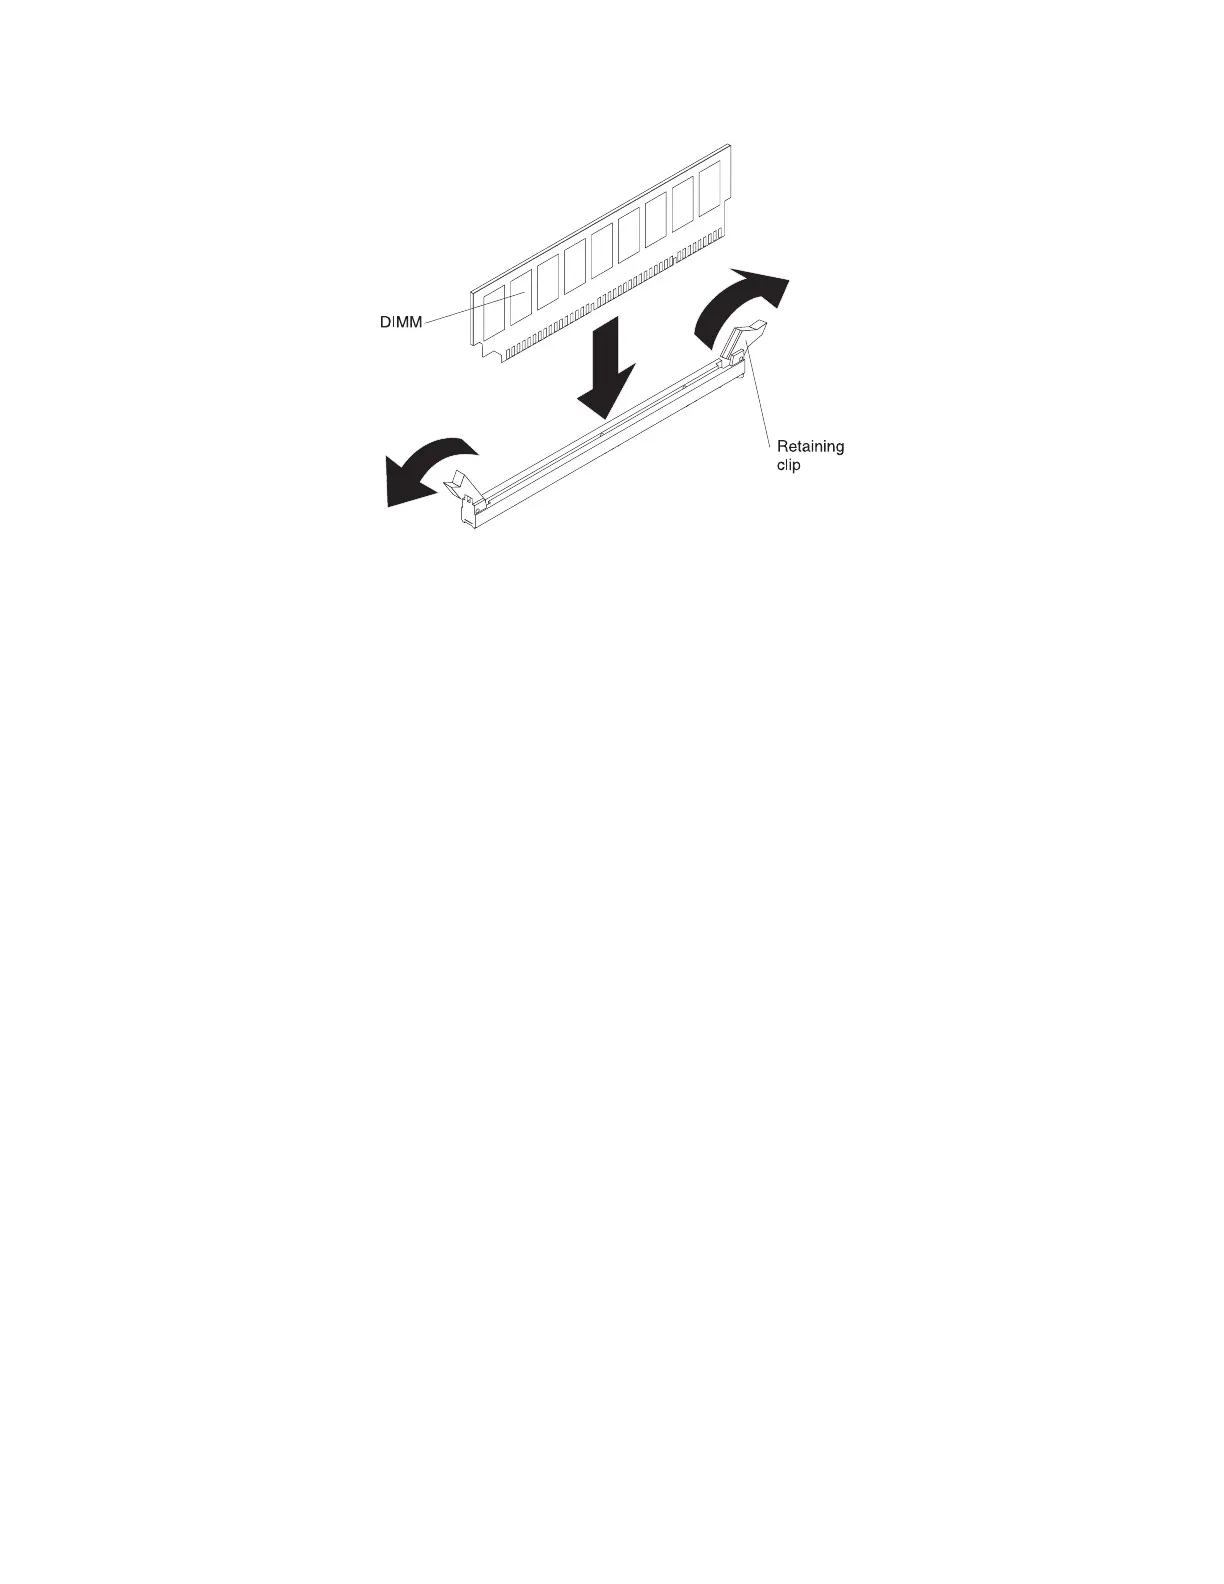
4. Insert the DIMM into the connector by aligning the edges of the DIMM with
the slots at the ends of the DIMM connector. Firmly press both ends of the
DIMM straight down into the connector. The retaining clips snap into the
locked position when the DIMM is seated in the connector.
Note: If there is a gap between the DIMM and the retaining clips, the DIMM
has not been correctly inserted; open the retaining clips, remove the DIMM,
and then reinsert it.
5. Reinstall the memory card (see “Replacing a memory card” on page 137).
6. Install the top cover (see “Replacing the top cover” on page 107).
7. Connect the cables and power cords (see “Connecting the cables” on page 104
for cabling instructions).
8. Turn on all attached devices and the server.
Removing and replacing Tier 2 CRUs
This topic provides general information about removing and replacing Tier 2 CRUs
You may install a Tier 2 CRU yourself or request IBM to install it, at no additional
charge, under the type of warranty service that is designated for your server.
The illustrations in this document might differ slightly from your hardware.
Chapter 5. Removing and replacing components 139
 Loading...


