Removing the I/O-board shuttle
This topic provides instructions for how to remove the rear I/O-board shuttle.
About this task
To remove the rear I/O-board shuttle, complete the following steps.
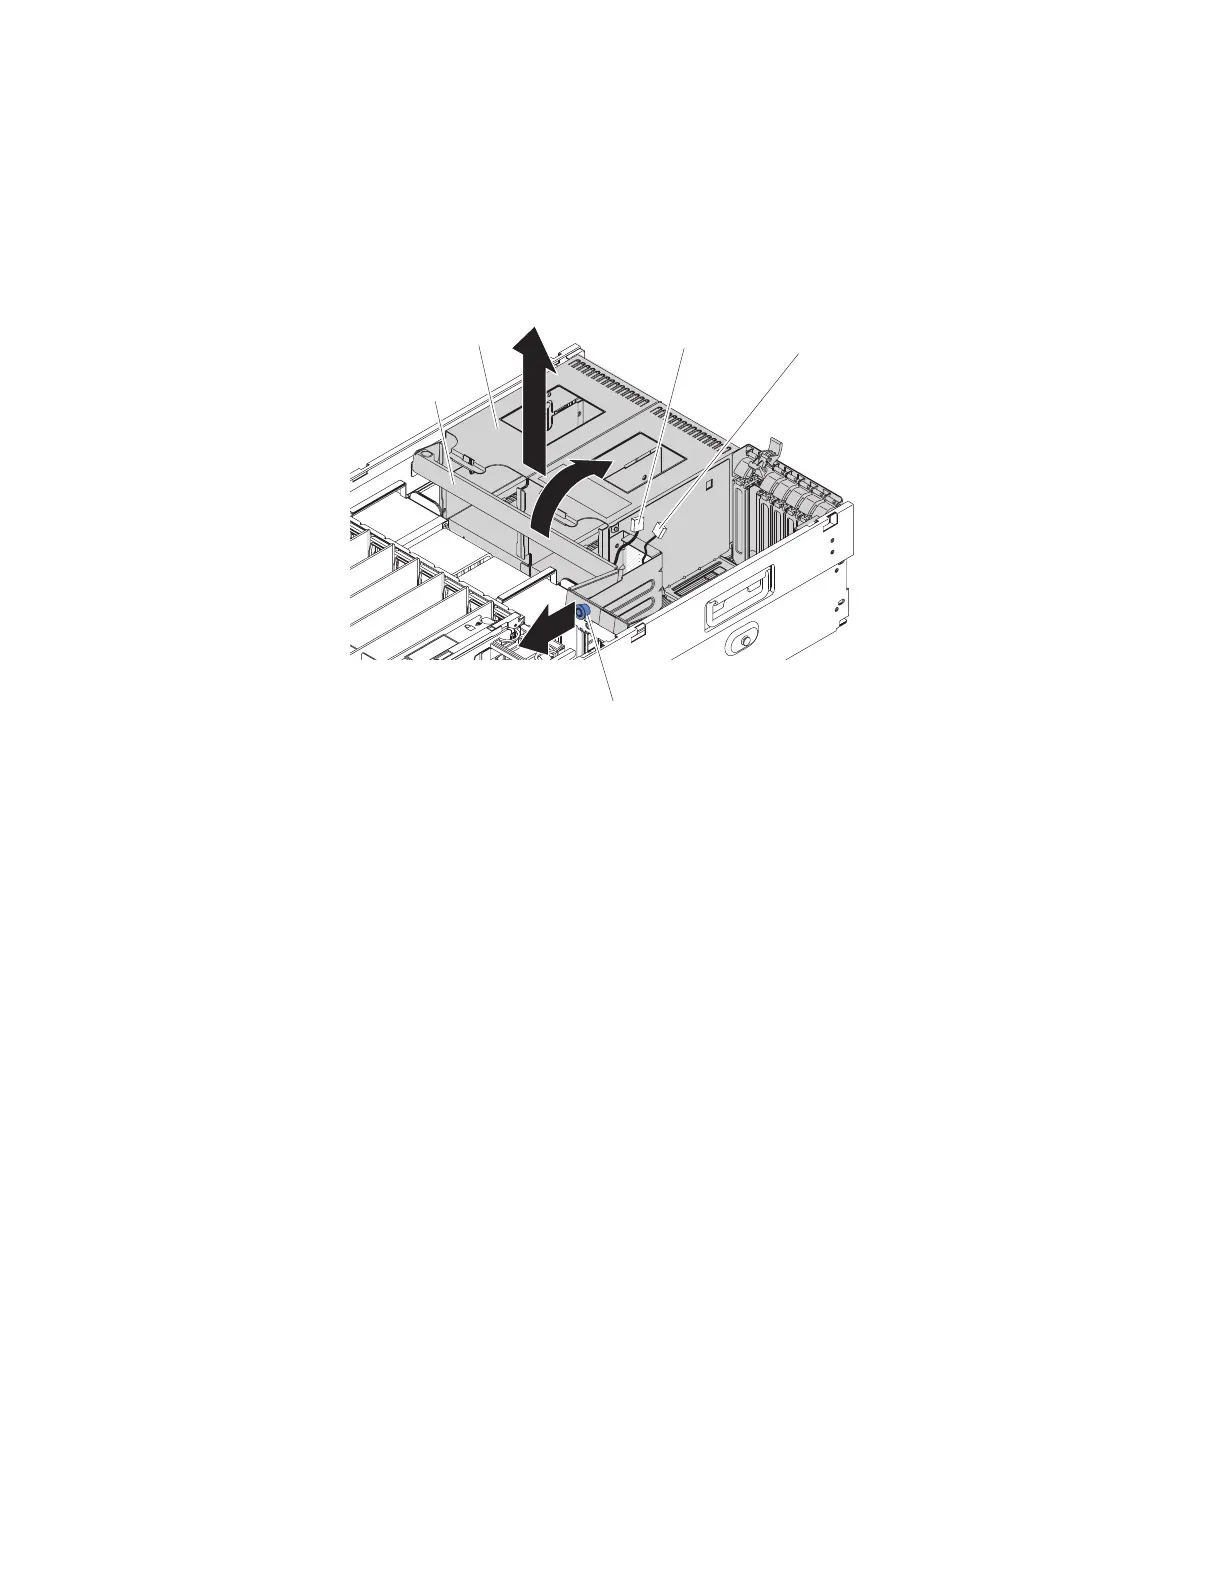
Release pin
Handle
I/O shuttle
DVD signal
cable
USB
cable
Procedure
1. Read the safety information that begins with “Safety” on page v and
“Installation guidelines” on page 97.
2. Turn off the server and peripheral devices, and disconnect the power cords
and all external cables as necessary to replace the device.
3. Remove the top cover (see “Removing the top cover” on page 106).
4. Remove the top cover bracket (see “Removing the top-cover bracket” on page
107).
5. Remove any installed adapters (see “Removing an adapter” on page 110).
6. Remove the power supplies or power-supply fillers from the rear of the server
(see “Removing a hot-swap power supply” on page 123).
7. Pull out the blue release pin to unlatch the shuttle, and then rotate the shuttle
handle up.
8. Disconnect the front USB cable and the DVD signal cable from the connectors
on the shuttle.
9. Pull up on the handle to remove the I/O-board shuttle assembly from the
server and place it on a clean, flat surface to avoid damage to the connectors
on the underside of the board.
10. If you are instructed to return the I/O-board shuttle, follow all packaging
instructions, and use any packaging materials for shipping that are supplied
to you.
Chapter 5. Removing and replacing components 143
 Loading...


