Replacing the I/O-board shuttle
This topic provides instructions for how to install the replacement rear I/O-board
shuttle.
About this task
To install the replacement rear I/O-board shuttle, complete the following steps:
Procedure
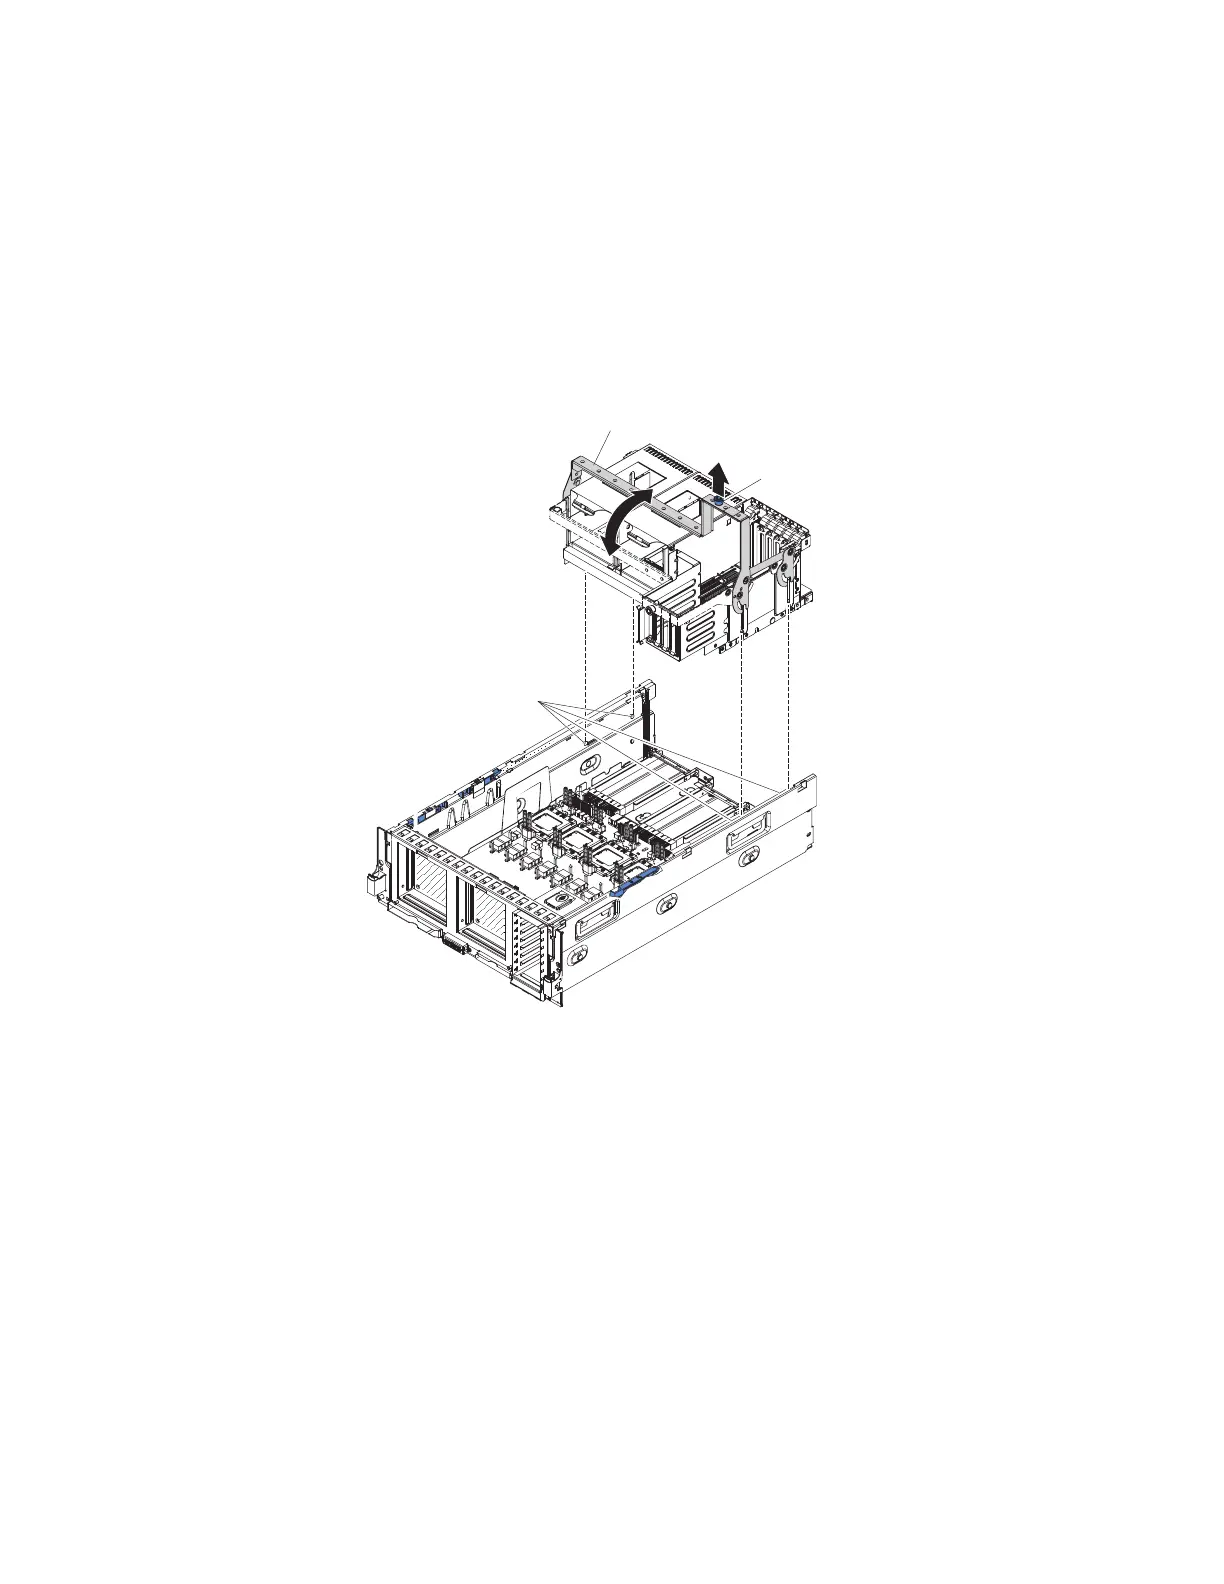
1. Align the I/O-board shuttle over the server so that the pins on the side of the
chassis can slide into the slots on the side of the server.
Alignment
pins
Release
latch
Handle
2. Carefully lower the shuttle into the chassis, leaving the handle in the vertical
position.
3. Thread the USB and DVD drive cables into the shuttle.
4. Connect the USB cable and the optical drive cable to the connectors on the
I/O shuttle.
5. Rotate the handle to the closed and locked position until the pin locks into the
handle.
6. Reinstall the power supplies and power supply filler (see “Replacing the
hot-swap power supply” on page 127).
7. Reinstall the adapters (see “Replacing an adapter” on page 111).
8. Reinstall the top cover bracket (see “Replacing the top-cover bracket” on page
108).
9. Install the top cover (see “Replacing the top cover” on page 107).
10. Connect the power cords and external cables (see “Connecting the cables” on
page 104 for cabling instructions).
11. Turn on all attached devices and the server.
144 IBM System x3850 X5 and x3950 X5 Types 7145, 7146, 7143, and 7191: Problem Determination and Service Guide
 Loading...


