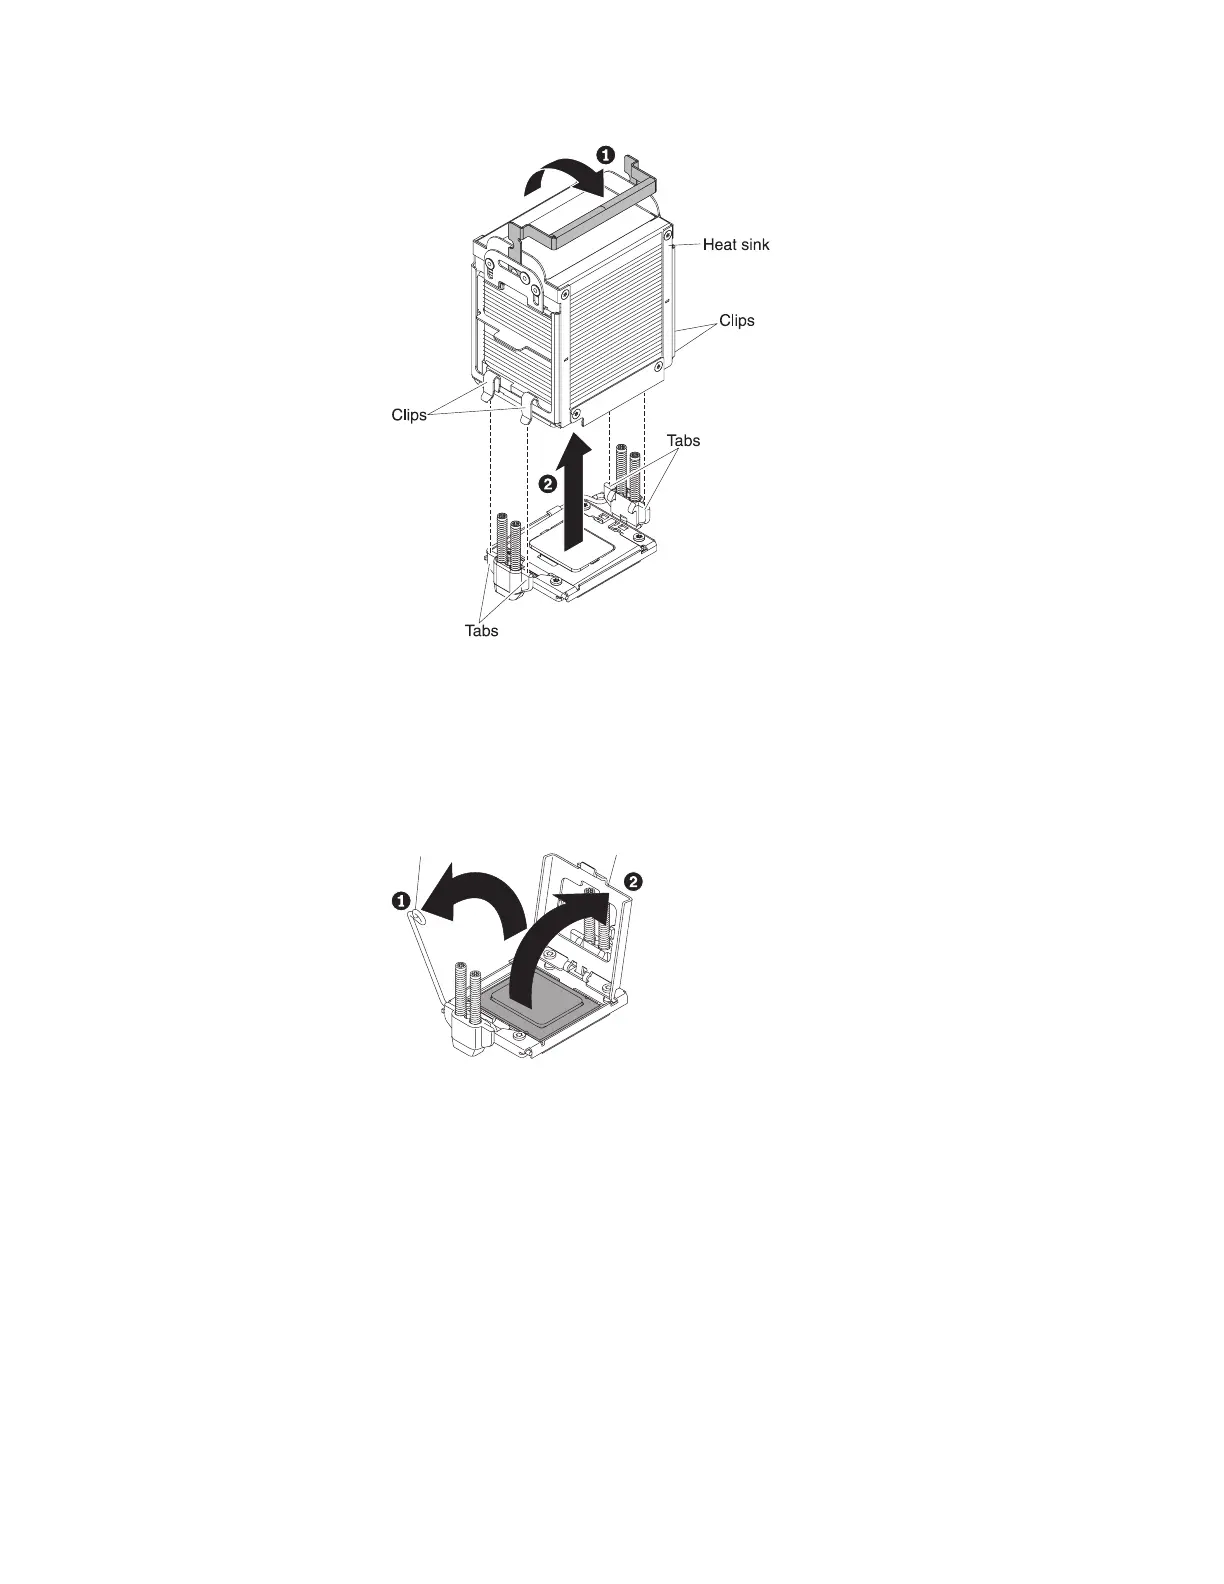
6. Lift the heat sink 2 out of the server. If the heat sink sticks to the
microprocessor, slightly twist the heat sink back and forth to break the seal.
After removal, place the heat sink on its side on a clean, flat surface.
7. Open the microprocessor release latch 1 by pressing down on the end,
moving it to the side, and releasing it in the open (up) position. Swing open
the microprocessor load plate 2.
Load
plate
Microprocessor
release latch
8. Place the microprocessor installation tool (which comes with the new
microprocessor) down over the microprocessor 1, aligning the holes on the
tool with the screws on the microprocessor bracket. Twist the handle
clockwise 2 to lock the microprocessor in the tool.
Note: The microprocessor installation tool is recessed to prevent damage to
the microprocessor grease.
Chapter 5. Removing and replacing components 163
 Loading...


