TANK -820-H61 E mbedded S ystem
Page 22
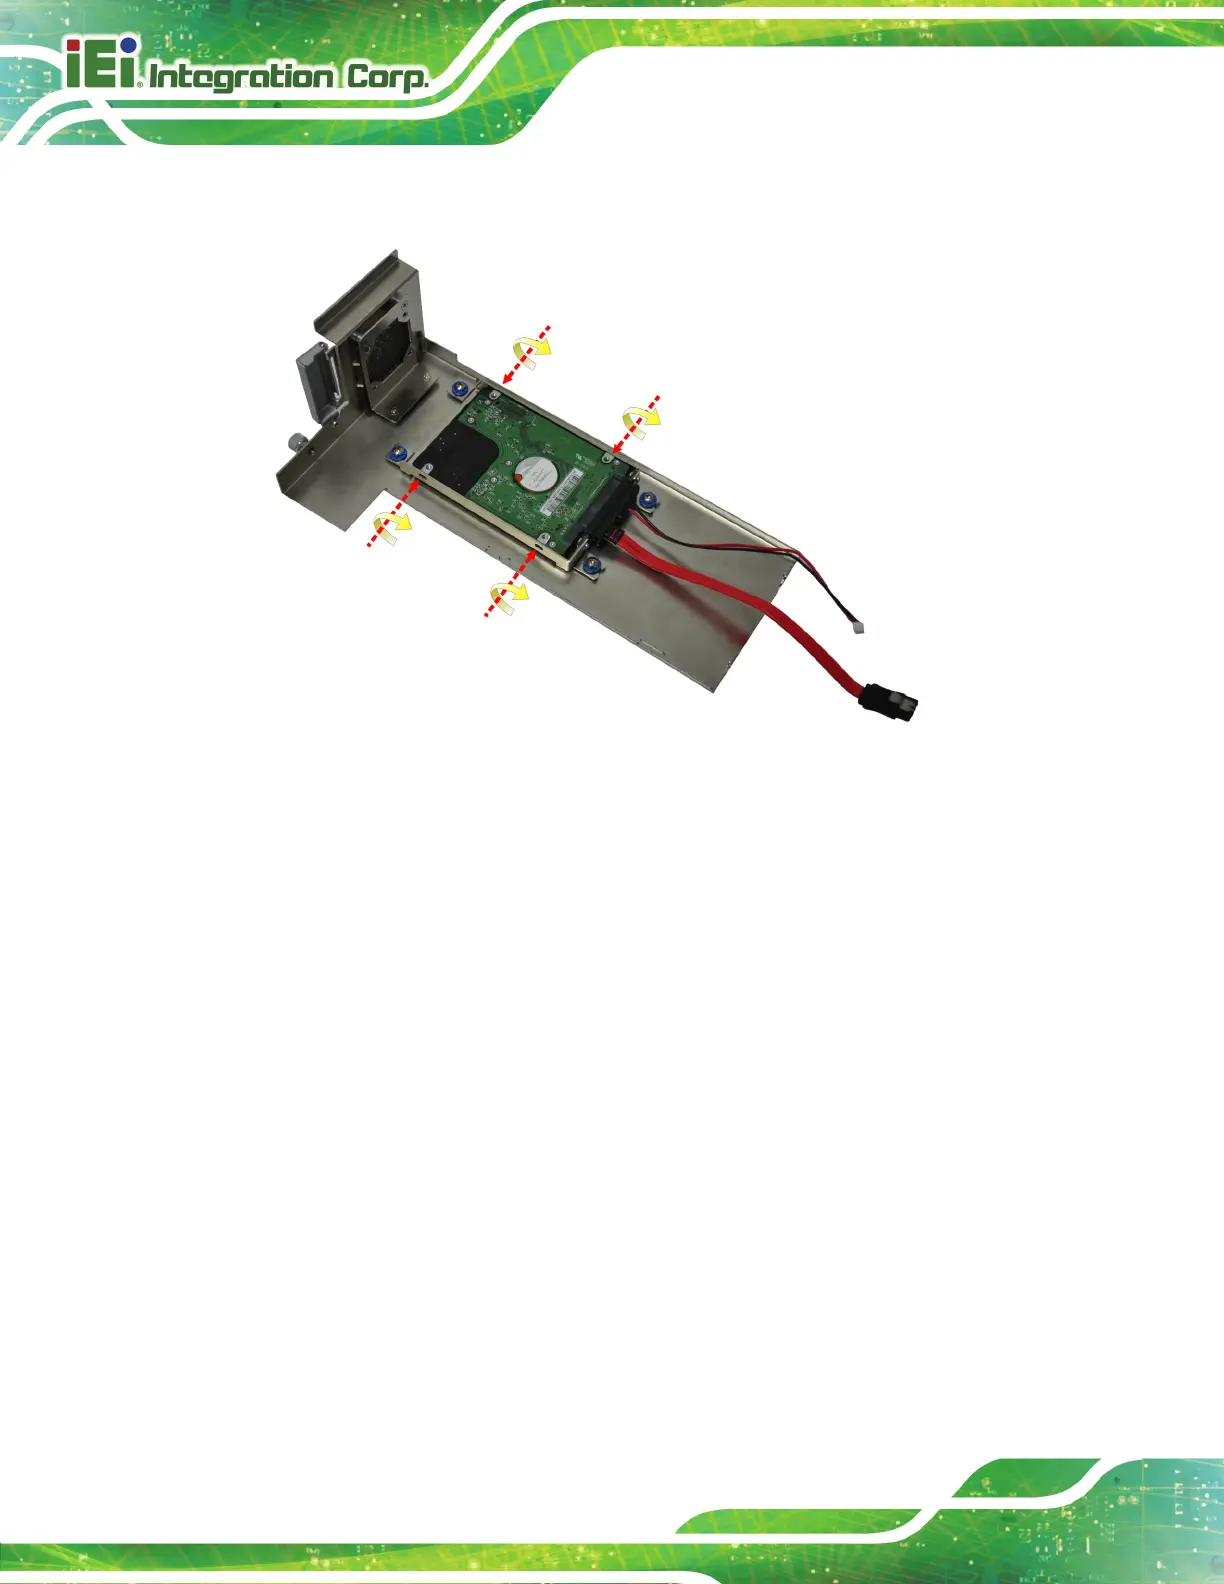
S tep 4: Secure the HDD with the HDD bracket by four retention screws (Figure 3-7).
Figure 3-7: HDD Retention Screws
S tep 5: Reconnect the SATA signal and power cables to the TANK-820-H61.
S tep 6: Reinstall the cover.
3.4 S ys tem Fan Ins tallation
To install the optional system fan, please follow the steps below:
S tep 1: Remove the two retention screws on the rear panel and loosen the two
thumbscrews on the front panel, slide the cover inwards, and then lift the cover
up gently (Figure 3-4).
S tep 2: Unplug the SATA signal and power cables connected to the TANK-820-H61, and
then place the cover on a flat surface (Figure 3-5).
S tep 3: Attach the system fan to the TANK-820-H61 and secure it by four retention
screws (Figure 3-8).
 Loading...