The StellarMate Plus Manual
274 / 341
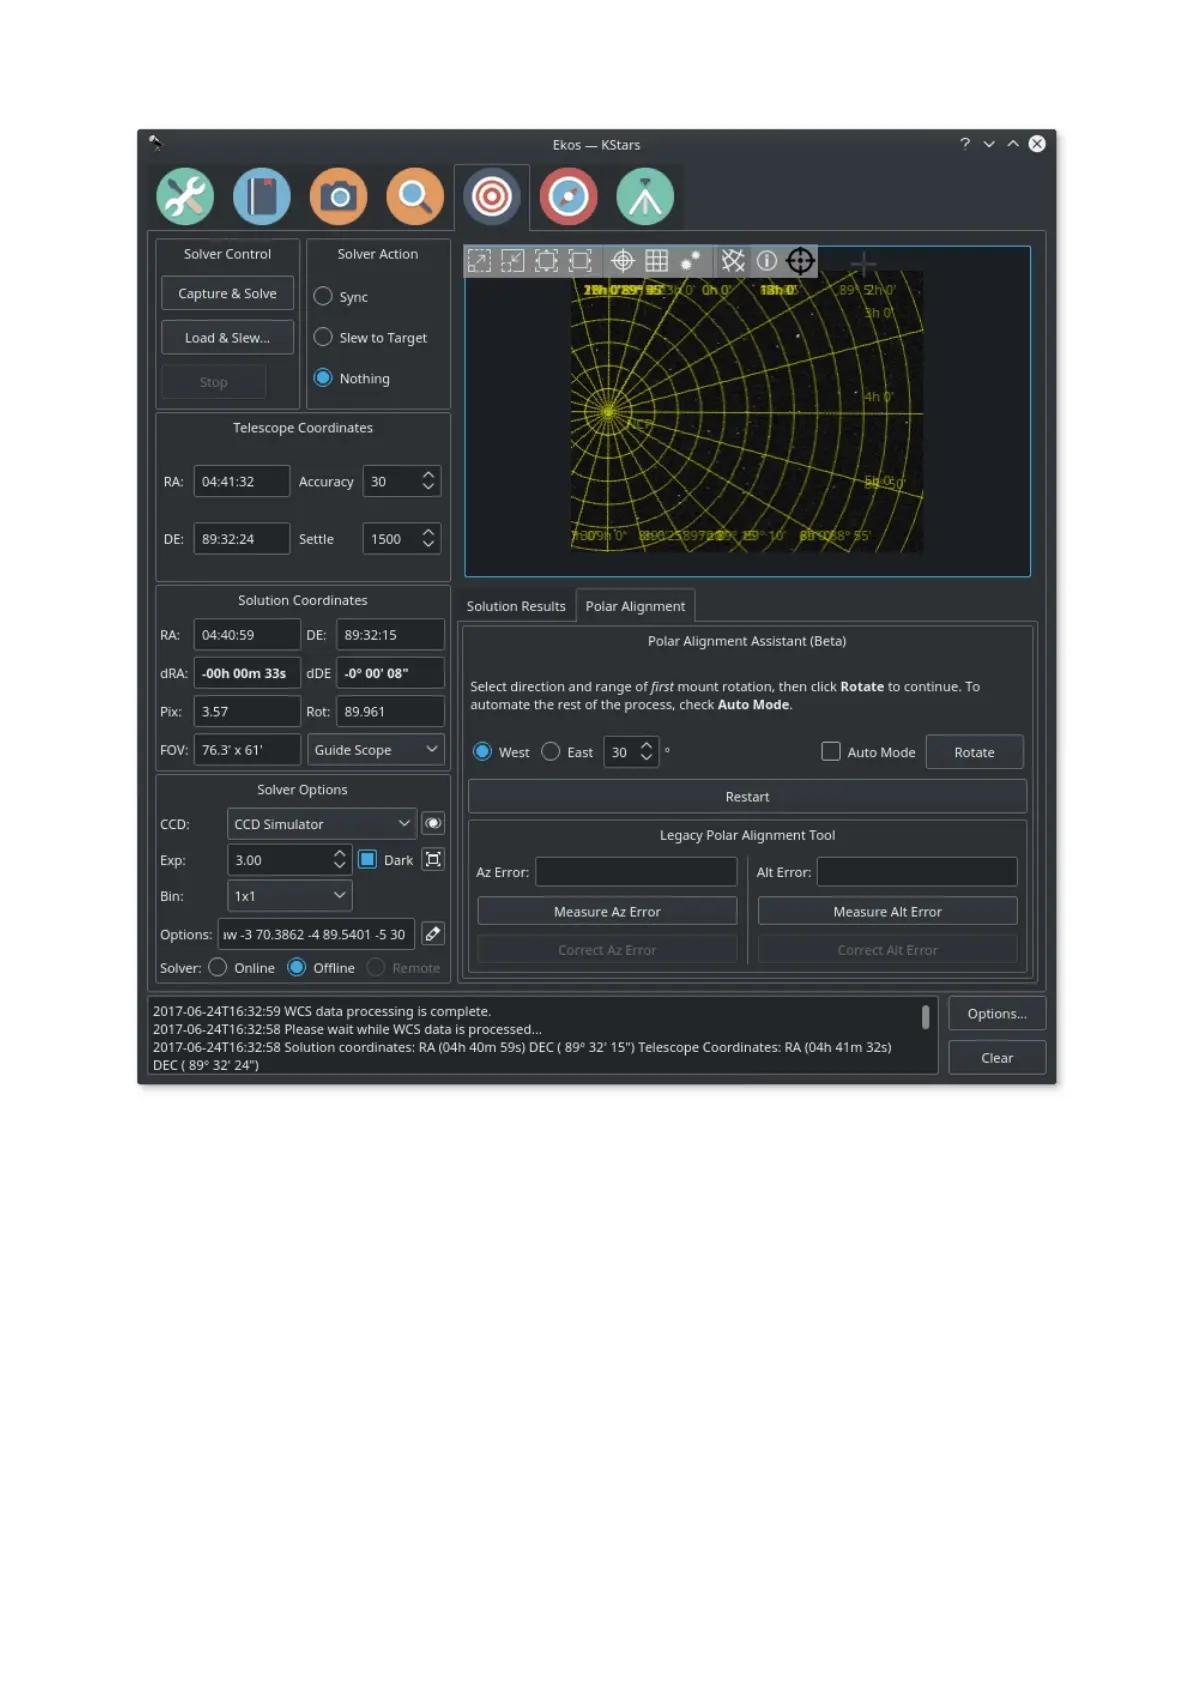
After the first capture, you can rotate the mount by a specific amount (default 30
degrees) either West or East. After selecting the magnitude and direction,
click Next to continue and the mount will be rotated. Once the rotation is
complete you shall be asked to take another capture, unless you have
checked Auto Mode. In Automated mode, the rest of the process will continue
with the same settings and direction until a total of three images are captured.
Since the mount's true RA/DE are resolved by astrometry, we can construct a
unique circle from the three centers found in the astrometry solutions. The circle's
center is where the mount rotates about (RA Axis) and ideally, this point should
coincide with the celestial pole. However, if there is a misalignment, then Ekos
draws a correction vector. This correction vector can be placed anywhere in the
image. Next, refresh the camera feed and make corrections to the mount's
Altitude and Azimuth knobs until the star is located in the designated cross-hair.
To make it easy to make corrections, expand the view by clicking on the