A20733 B0 117
Adjustment and replacement procedures
2.3 Replacing the ink filter cartridge
Special tools:
- Standard draining and cleaning equipment.
- 3 mm Allen wrench.
PREPARATION
1- Stop the printer and unplug it from the mains. Withdraw the ink circuit to the end of the
runners.
2- Drain the ink tank by removing the drain plug. Drain the main filter by loosening the two drain
screws. Replace the cap and tighten the screws when the filter is empty.
REPLACEMENT
3- Open the main filter and remove the old cartridge.
CAUTION: Take precautions as some ink will remain and may pour out.
REFITTING AND TESTING
4- Refit:
- the anti-pulsing bellows
- the new filter cartridge
- the O-ring.
Check that the drain circuits are closed then pour a little ink into the tank.
5- Start the printer and check that there are no leaks and that the pressure is correct.
ROUTINE CHECKS
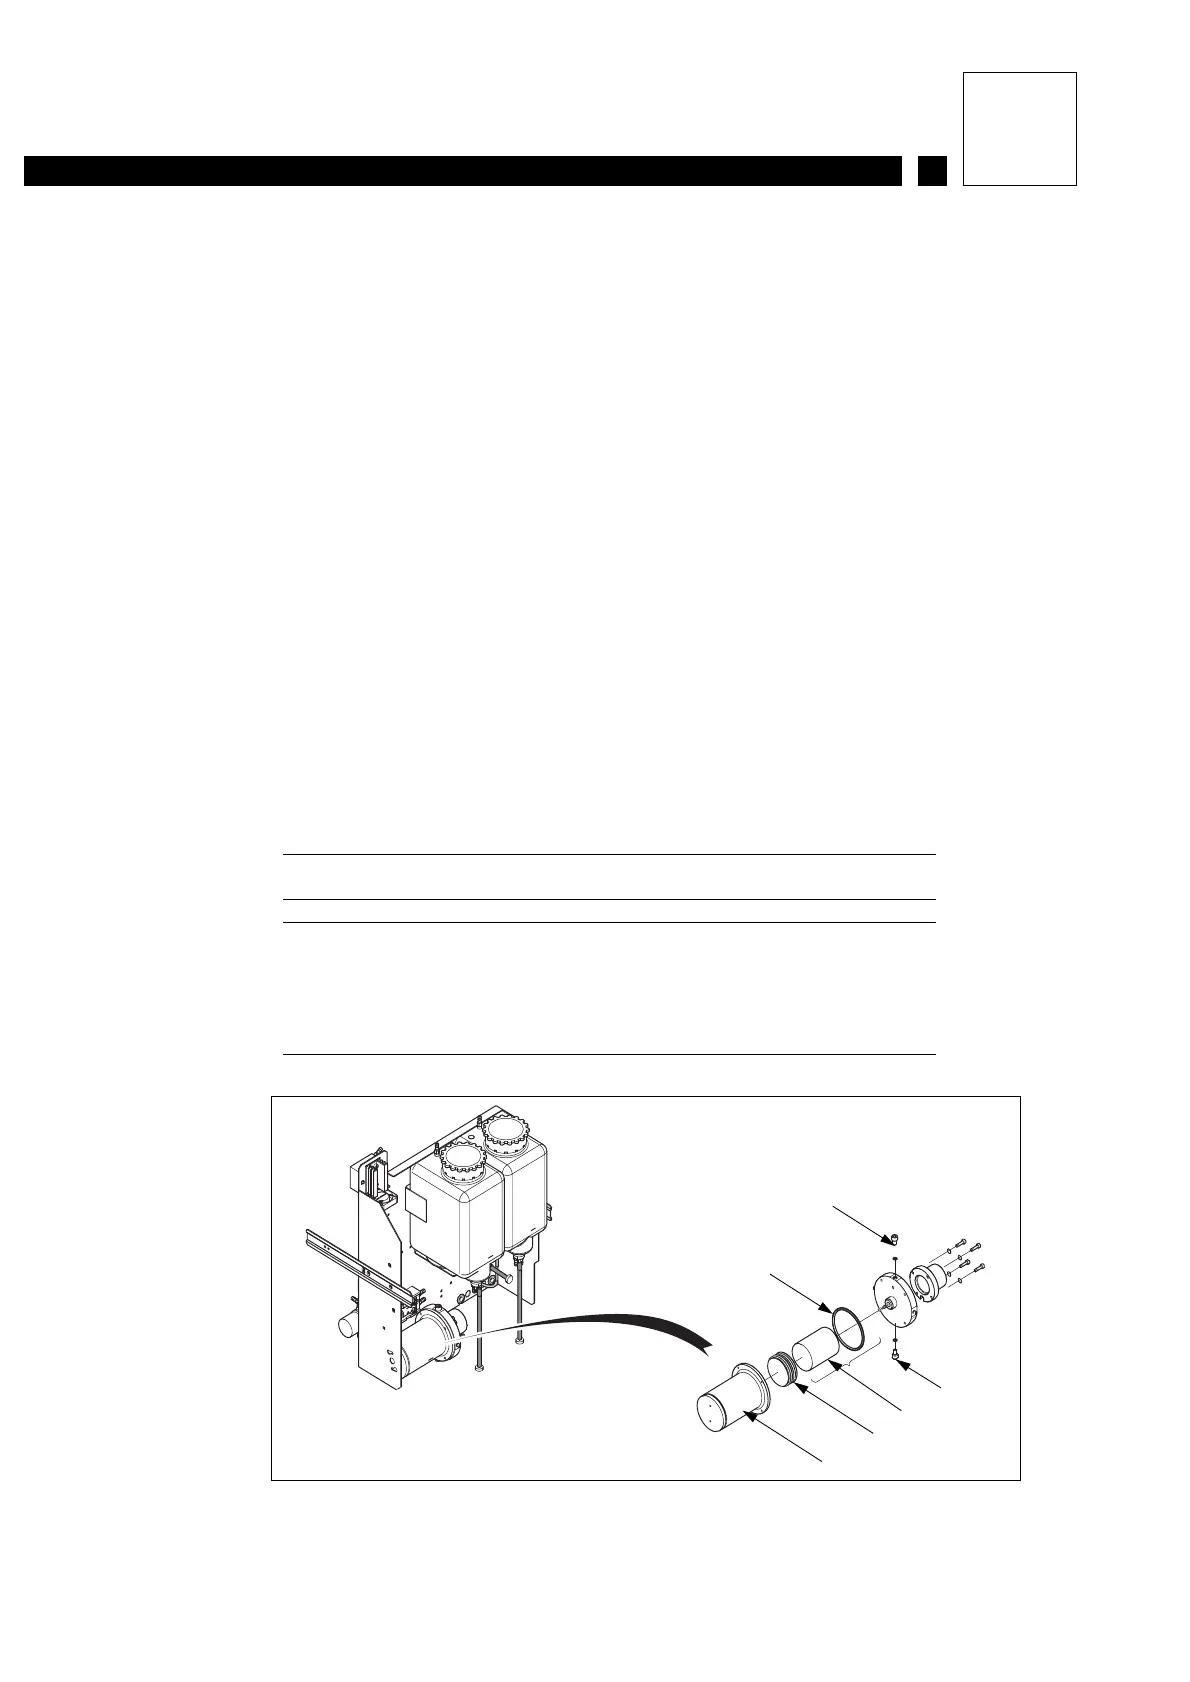
Figure 1:
1 Drain screw
2 Main filter
3 Metal anti-pulsing bellows
4 Filter cartridge
5 O-ring
Figure 1
1
5
1
4
3
2