38/53 IMET - M550 ALL1-EN
8. CHANGING THE OPERATING FREQUENCY
Nearby radio devices transmitting on the same frequency channel may cause interference. To check
for interferences, turn off the transmitter and check the “RF-busy” LED on the receiver: if the LED
stays on it means that other devices are using the same frequency. If disturbances occur during
operation, the “Data Error” LED will turn off every time the system detects a data reception error.
Reception errors lasting more than 0.8 seconds will put the
receiver on passive emergency (see Chap. 8.2).
To change the operating frequency, choose another frequency
channel. There are 30 channels available.
8.1. Before changing frequency
Make sure transmitter’s battery is charged and insert the
magnetic key (or, if you are using a G4 transmitter, turn the key to
ON). Make sure the receiver is powered and bring the transmitter
as close to the receiver as possible.
8.2. Changing frequency
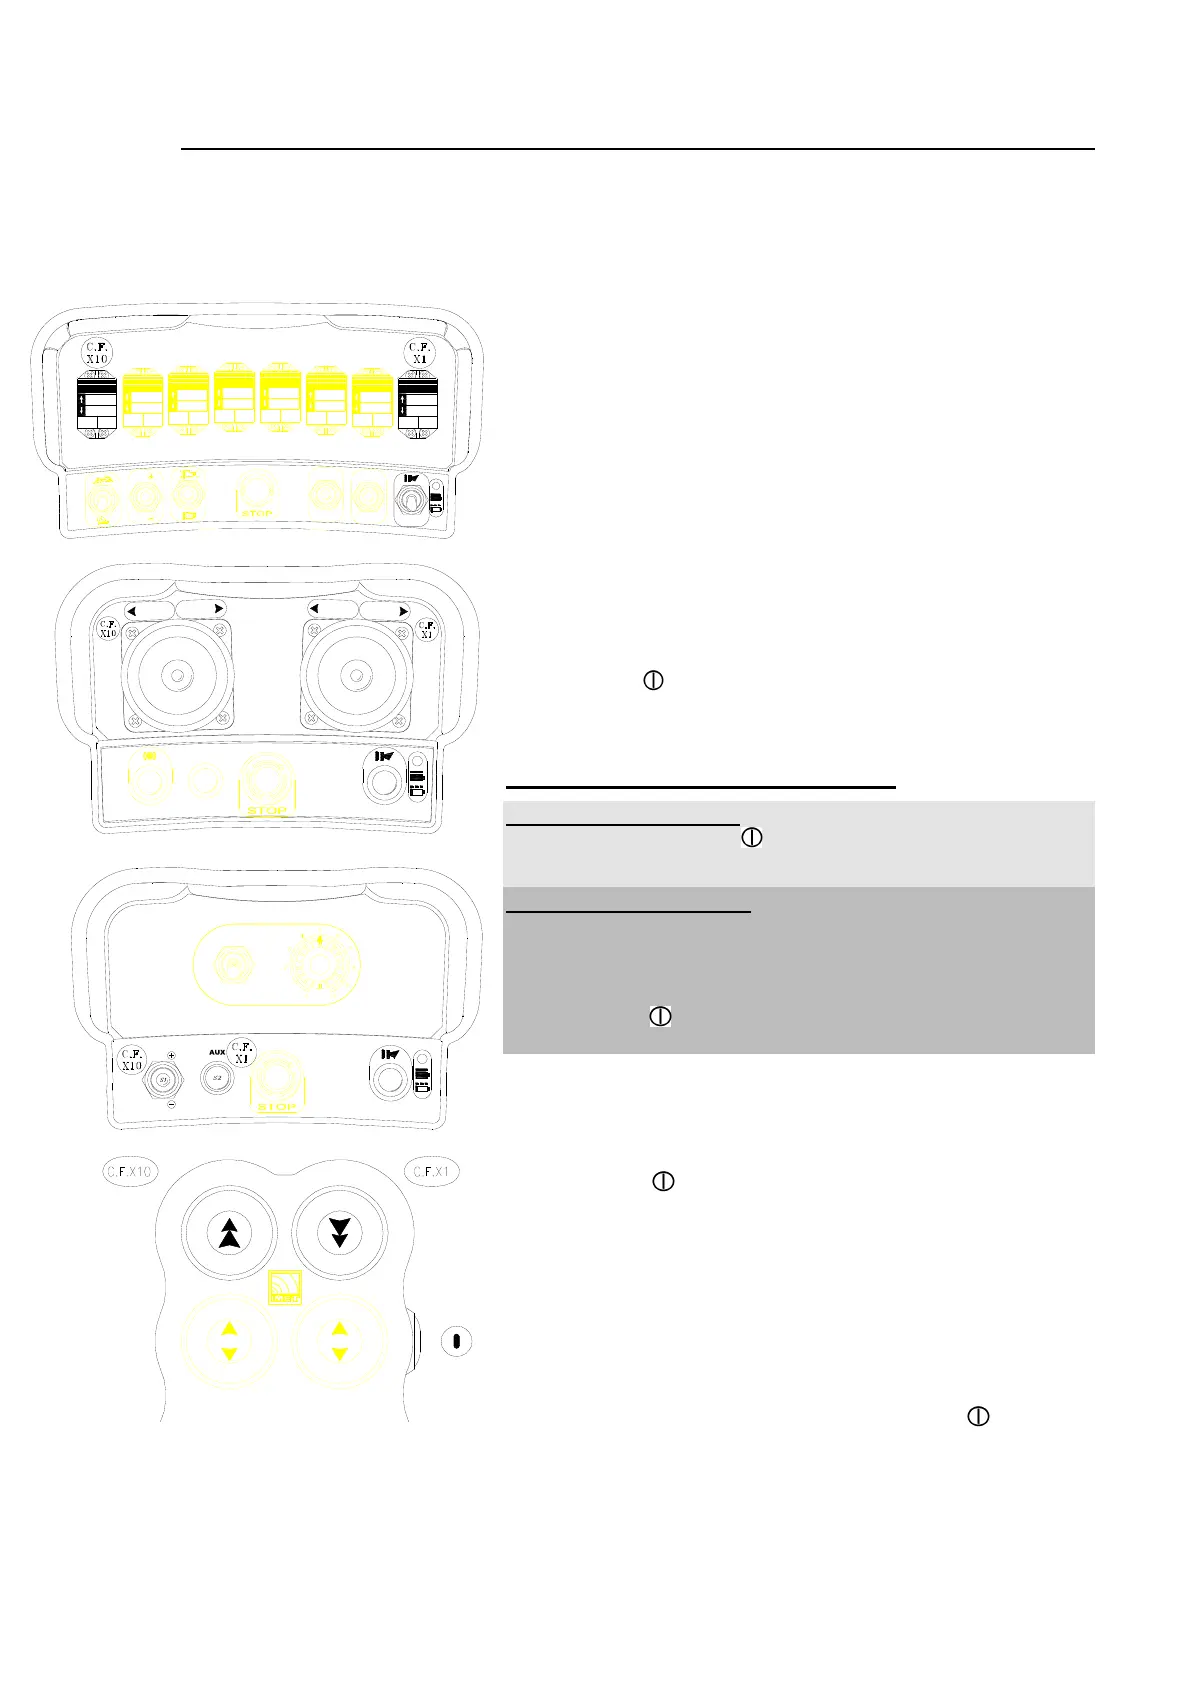
Press the two frequency change controls (CF) at the same time
(see Annex A for identification), and press and release the
START button
. The green ON light on the transmitter should
flash 4 times and pause, repeatedly.
Release the two controls (CF).
Follow one of the two procedures below:
“Two step” procedure: Moving to the second upper channel.
Press the START button and make sure the LED flashes at
regular intervals.
“Any step” procedure: Choose one of the 30 channels
available using first the control for the tens (C.F.x10) and then the
control for the units (C.F.x1) (see Annex A). Example: To select
channel 26 on a WAVE transmitter, press control P1 (for the tens)
2 times and press control P2 (for the units) 6 times. Press the
START button and make sure the LED flashes at regular
intervals.
At the end of either procedure wait for about 5 seconds. The
transmitter will turn off. The device is now ready to operate using
the new channel. The red LEDs on the receiver will flash,
meaning the frequency change procedure is being executed.
Press START
to begin the command sequence. If the
command sequence does not begin the frequency change
procedure was not executed correctly. Turn off all devices and
repeat the entire procedure.
NOTE on the “Any Step” procedure. If you press the tens
control (C.F.x10) more than 3 times or the units control (C.F. x1)
more than 9 times the count will restart from zero.
To select 0 tens or 0 units you do not need to press the
respective controls. For example, to select channel 20, press the
tens control (C.F.x10) 2 times, then press START
to execute
the procedure.
If you select 3 tens, the units will be 0 whatever number you choose.
If the selected channel is disturbed by interferences, change the frequency again. Interference-free
channels are indicated by the “RF Busy” LED on the receiver. The LED is off when the receiver is
powered and on when the transmitter is on.
RPM
RPM
ON
OFF
PRESSION
RPM
RPM
AUX
RESET
P4P3
P2P1
START
III III