Setting Up the Chassis
Intel® Server Chassis SC5300 User Guide 23
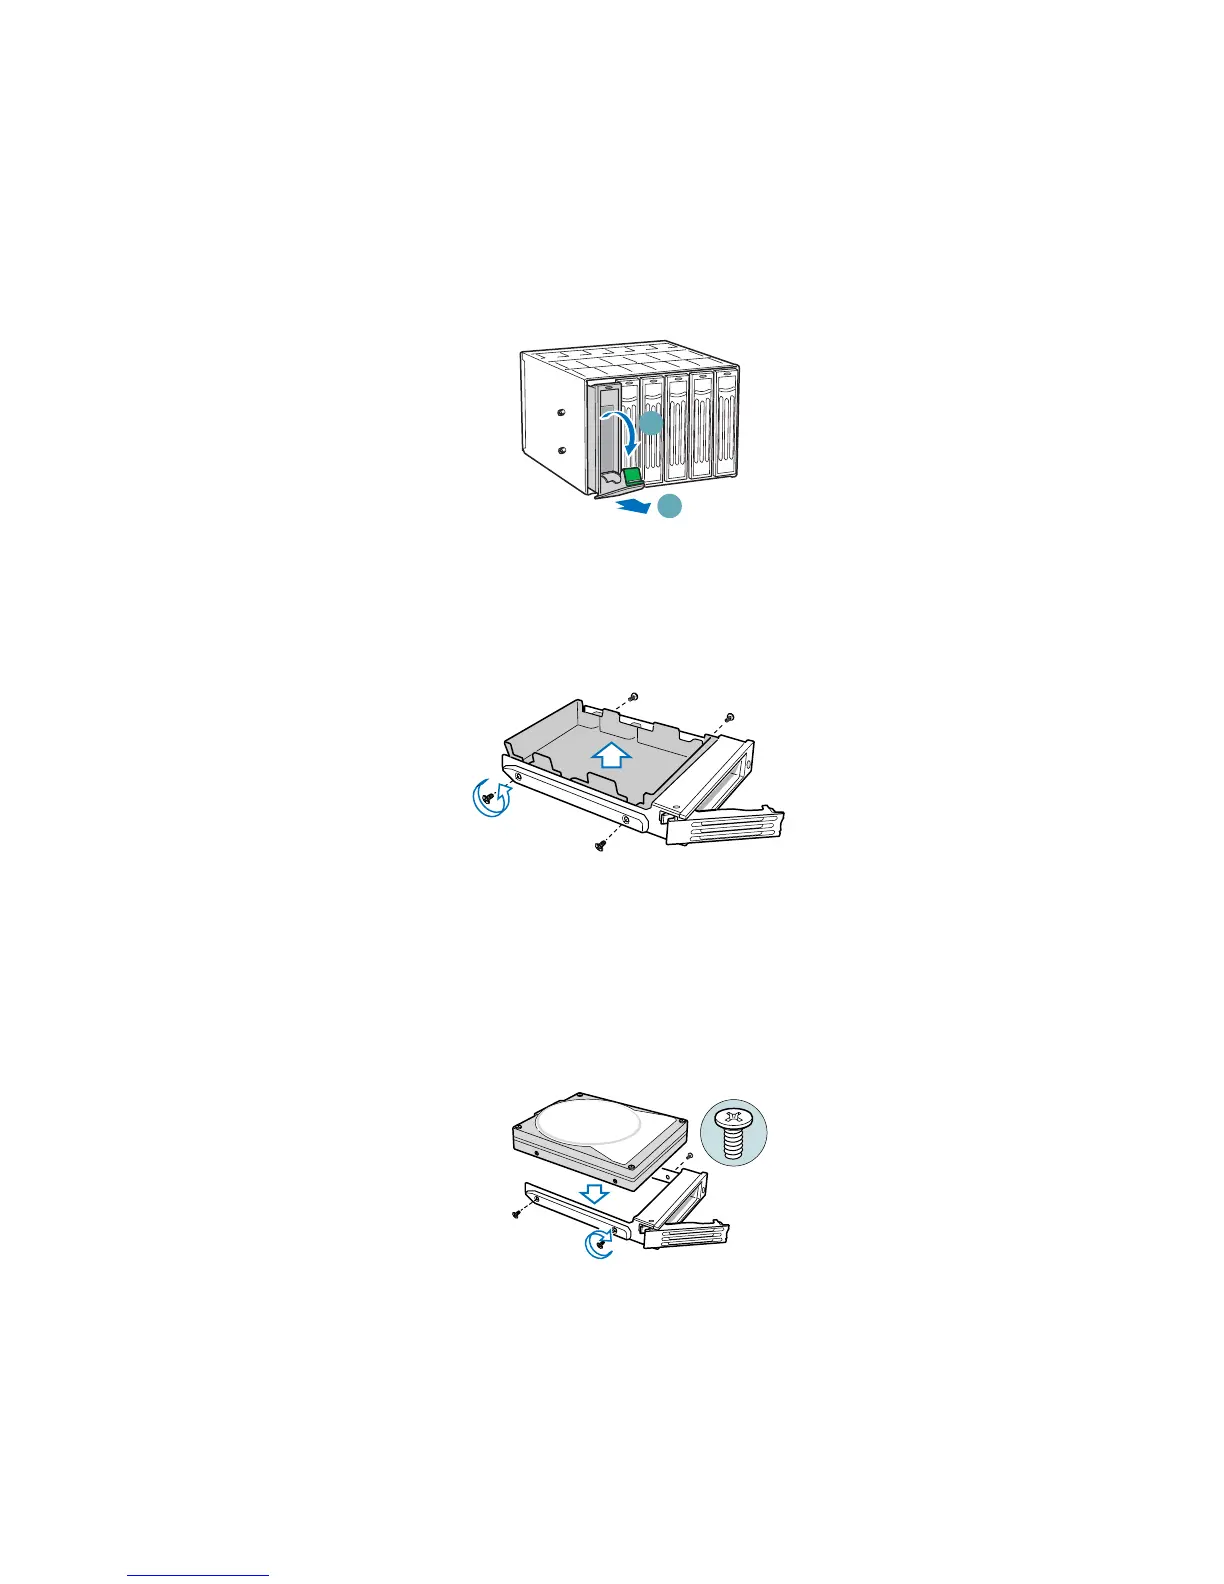
Install Hot Swap Drive(s)
1. Press in on the green latch (letter “A”) at the end of the drive carrier to disengage it from the
hot swap drive cage. Pull out on the black lever (letter “B”) to fully open the drive carrier.
When the lever reaches a fully opened position, it will push the drive carrier out from the hot
swap drive cage.
A
B
TP00918
Figure 28. Releasing Drive Carrier from Hot Swap Cage
2. Slide the drive carrier out of the drive cage.
3. Remove the four screws that secure the plastic retention device to the drive carrier. Remove the
plastic retention device.
TP00928
Figure 29. Removing Plastic Retention Device
4. Secure the hard drive to the drive carrier using the four screws that were formerly attached to
the plastic retention device. Ensure that the connector end of the hard drive is facing the back of
the drive carrier. The label side of the hard drive should be facing up in the drive carrier.
TP00929
Figure 30. Securing Hard Drive to Drive Cage