LP600 Users Manual
Rev E, February 2017
Page 29 of 43
Caution: Avoid directly touching any exposed circuitry. Use cotton gloves or similar
protection. Oils from the fingers will cause unacceptable performance in high humidity
conditions. This degradation may not be obvious at the time of contamination. If the
circuitry becomes contaminated it must be cleaned using isopropanol or an equivalent
cleaner.
Caution: The following procedure must be performed at a static controlled workstation.
The main printed circuit board is subject to damage by electrostatic discharge.
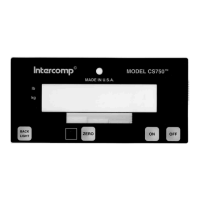
1. Turn scale ON.
2. Press the PRINT / ACCUMULATE button. The display should show “”. If not
return to the Cal Enable Switch Access section and press the cal enable switch.
Press the PRINT / ACCUMULATE button.
3. The display shows “” with the most right digit flashing. Increase the number with
the Lb/Kg button until the display shows “”. This will access the Load Cell
Balance routine. Press the PRINT / ACCUMULATE button.
4. The display shows “.”. Press the PRINT / ACCUMULATE button and the
display will show one digit flashing. This is the number of load cells in the scale.
Increase the number with the Lb/Kg button or decrease the number with the Zero
button until the display shows “”. This is the number of load cells in the LP600. If
the number was changed the scale will save and restart. If this happens go back to
step 2. If the number isn’t changed the display will show “”.
5. Press PRINT / ACCUMULATE to read the zero load. For this step it doesn’t matter if
there are loading blocks on the scale or not.
6. The display will show “”. Prepare load cell 1 using the loading block and the
rubber pad as per figures 1 and 2 above. With no weight on the scale except the
loading block fixture, press the PRINT / ACCUMULATE button.
7. The display will show “”. Apply ¼ of the capacity of the scale to load cell 1
using the same loading fixture. Once the load is applied press the PRINT /
ACCUMULATE button.
8. The display will show “”. Prepare load cell 2 using the loading block and the
rubber pad as per figures 1 and 2 above. With no weight on the scale except the
loading block fixture, press the PRINT / ACCUMULATE button.
9. The display will show “”. Apply ¼ of the capacity of the scale to load cell 2
using the same loading fixture. Once the load is applied press the PRINT /
ACCUMULATE button.
10.The display will show “”. Prepare load cell 3 using the loading block and the
rubber pad as per figures 1 and 2 above. With no weight on the scale except the
loading block fixture, press the PRINT / ACCUMULATE button.
11.The display will show “”. Apply ¼ of the capacity of the scale to load cell 3
using the same loading fixture. Once the load is applied press the PRINT /
ACCUMULATE button.
12.The display will show “”. Prepare load cell 4 using the loading block and the
rubber pad as per figures 1 and 2 above. With no weight on the scale except the
loading block fixture, press the PRINT / ACCUMULATE button.