PUSH
LCD display
Intermec EasyCoder PD4—Service Manual 9
Chapter 2—Front Panels
2.2 Front Panel (with display)
Description
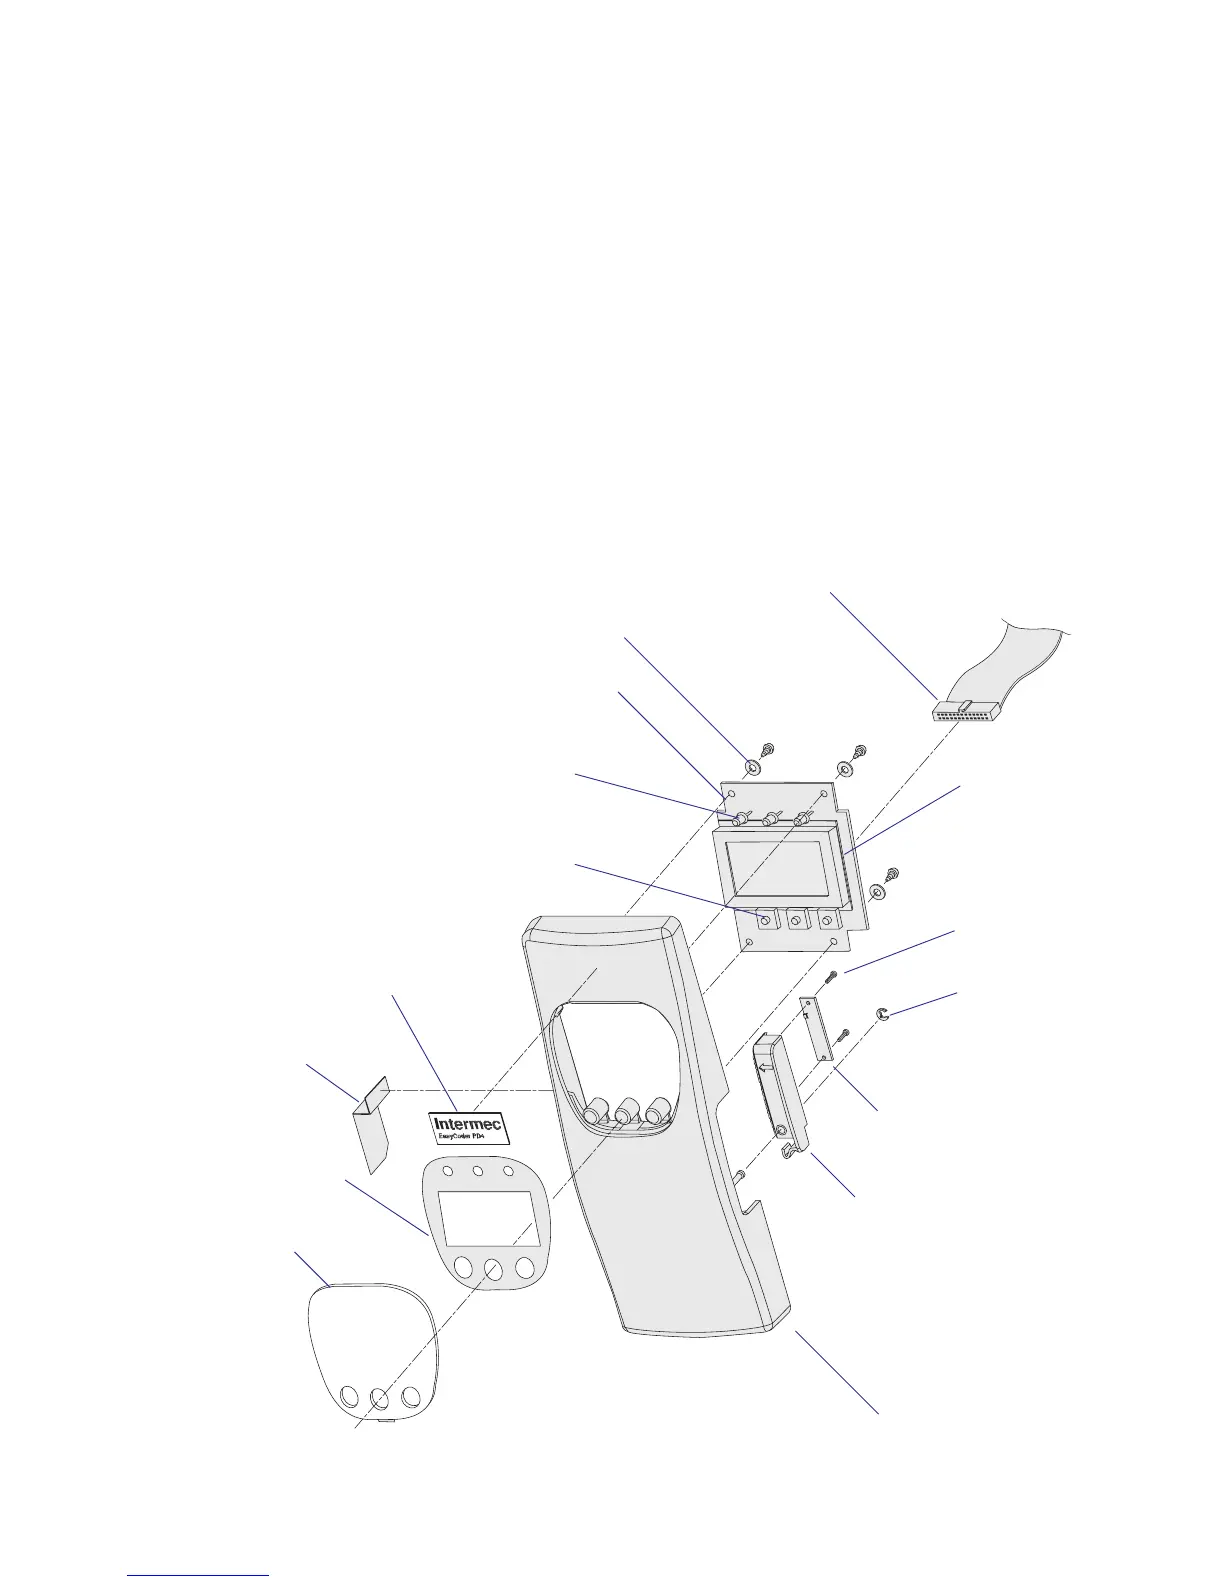
The display-equipped models of the EasyCoder PD4 have a front panel
moulding with three colored LED control lamps, three control keys, and a
large graphic LCD display.
The control lamp LEDs are fi tted on a console pcb which also contains
the LCD display, the switches for the control keys and a buzzer. An overlay
provides the designations for the LEDs and keys. The overlay is covered
with a transparent plastic window. The console pcb is connected to CN22
on the main board via a separate fl at cable.
Refer to Chapter 2.3 for replacement instructions.
As opposed to the displayless model, there is a working strip sensor, that
can detect whether labels have been removed from the outfeed slot or not.
The strip sensor is further described in Chapter 9.
Flat cable
Console pcb
Strip sensor housing
E-ring
Screw and washer (x4)
Front panel moulding
Label
Overlay
Clear window
LEDs (green-green-red)
Control keys
(Feed-Pause-Cancel)
Strip sensor pcb
(cable not shown)
Screw (x2)
Dust protection