20
ALS 4.0 XE
PRODUCT MANUAL
EN
1. SAFETY SENSORS – This area shows the status of
all the Operator Safety sensors .
2. PROXIMITY BOARD SENSORS – This area shows
the status of all the Lumber sensors.
3. DRIVE AXIS STATUS – This area shows the status of
all the drive axes.
4. AXIS POSITION SCREEN –
This area shows the current
positions of all the axes,
touching any of the
individual boxes will show
the corresponding axis on area “5”.
5. AXIS SELECT – This area will show the
position of the selected axis from area
“4” with additional functions to JOG,
HOME, CALIBRATE OR MOVE functions.
6. OUTPUT STATUS – This area will show
the various status of machine components such as
the saw, trash conveyor, pusher clamps, live deck
and infeed and outfeed conveyors.
7. L1/L2 CLAMP ICONS-
• L1/L2-CLAMP-UP/DOWN – These
control clamp rollers that grip the
top of the board on each drive.
• L1/L2-PUSHER-IN/OUT – These
control the pusher fence that
locates and maintains the location
of the board against the back-
fence rollers.
• L1-Clamp_Pusher Hold/Release –
These controls both clamp and pusher
Up/Down and In/Out.
• L2-Clamp_Pusher Hold/Release –
These controls both clamp and pusher
Up/Down and In/Out.
8. Z1 AXIS – These are short cuts for moving
the Z1 axis. UP moves the blade to its normal
up position. DOWN moves the blade to its
maximum down position. FULL causes the
blade to make a full stroke down and back
up like it does when cutting lumber. All these
moves are performed at full system speed.
9. HOME Function – These buttons will
cause a single axis to Home. Normally, you
should Home the entire system, but certain
diagnostic procedures may require homing a
single axis.
NOTE
When settings have been completed the bevel section, check the
remainder of the Semi-Automatic screen to make sure all the other
data is correct. Then click or touch SETUP to cut the piece.
NOTE
SAVE a bevel piece in the same manner described above.
Just make sure all the data entered correctly before starting the
SAVE process.
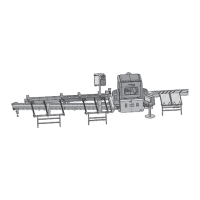
3.5 Manual Control
3.5.1 Manual Axis Control
Figure 26
The primary purpose of this screen is to provide manual
control of all the axes as well as some other parts of
the machine. There are a number of system functions
available from this screen as well. The manual controls
are on the right and across the bottom, and the system
controls are on the left side.
Before we discuss the manual controls, note the
red and green checkmark above them. This
array of checkmarks gives the status of all sensors on
the machine. Red means o, green means on. This
information may be useful if you are diagnosing certain
problems. It is normal for these checkmarks to change.
It is also normal for some of them to be red during
operation of the machine.
If you think you may be having trouble with one of
the sensors on the machine, call Alpine. We will help
you diagnose the problem with a combination of the
manual controls and this status bar.
 Loading...