25
ALS 4.0 XE
PRODUCT MANUAL
EN
3.6.8.1 Ink Jet Setup
Click or touching SETUP in the Ink Jet Setup section
(Figure 34) will bring up the following screen:
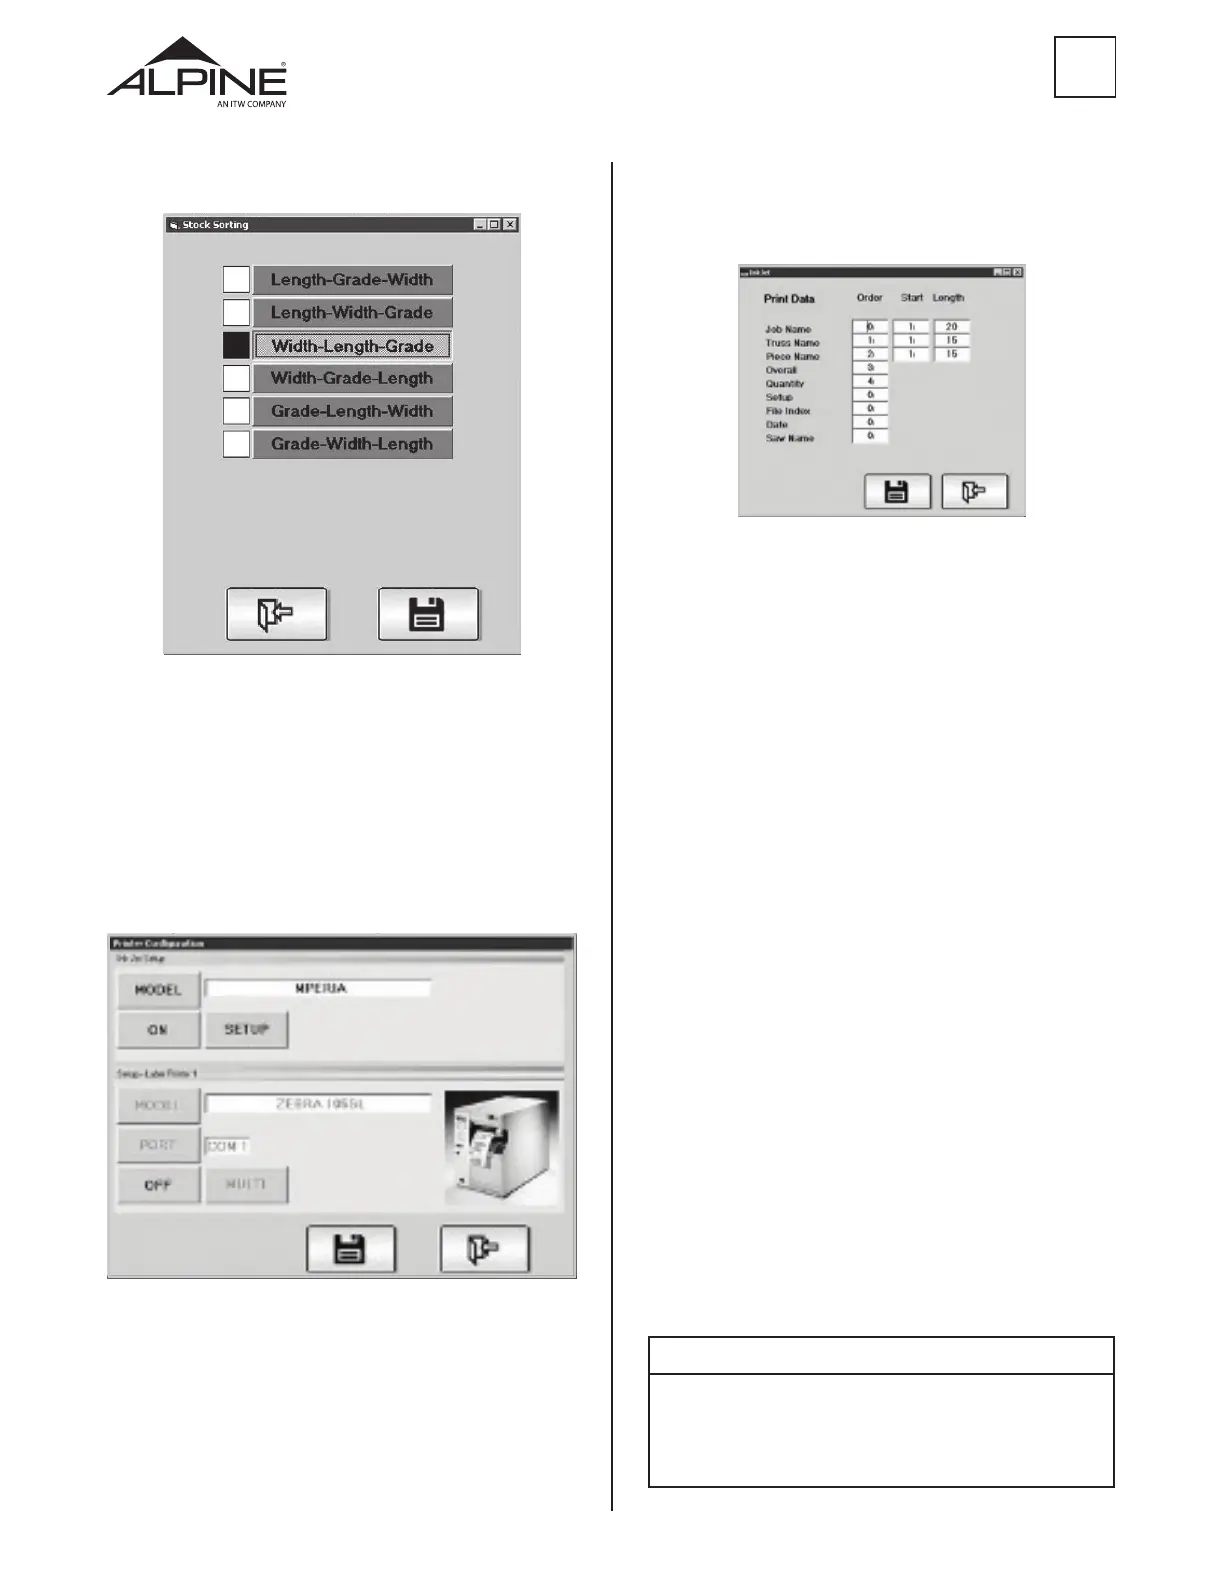
Figure 35
The Print Data information on the right side of this
screen allows customization the information that is
printed. Up to ve of the items in the list under Print
Data can be selected. Each time the white box next to
each item clicked or touched, the Order number will
cycle from 0 to 5. The number determines the order in
which the items will print from left to right by the ink
jet printer. On the screen above, four items will print
in order from left to right, they are Truss Name, Piece
Name, Overall Length and Quantity (of that piece for
that truss).
Repetitive, redundant or unnecessary information in
these categories can be eliminated from the message
that is printed.
The columns labeled Start and Length control what
part of the job, truss and piece names are printed. The
information printed on the board will begin with the
character number in the Start column and end with the
character number in the Length column. In the example
above, the printed Job Name will start with the rst
character and print up to the 255th character if the Job
Name is that long.
For example, if the full message for Job Name is
“A123456” but the only information that is necessary for
identication is A123, set the Start to 1 and Length to 4.
1. RESET – Will reset all print Order L-R numbers to 0,
all Start numbers to 0 and all Length numbers to
255.
2. FLUSH – This button is used to purge ink from the
print head.
NOTE
It is important that to print only as much information as is needed.
Very long messages will often not be completely printed on short
pieces as they come out of the machine. Experiment with all these
settings when planning to print more than 15 characters
(spaces count as characters).
3.6.7 Pick List Sort Options (7)
Figure 33
3.6.8 Printer Setup (8)
The inkjet or label printers can be setup by clicking or
touching Printer Setup on the Options menu shown
in Figure 28. Select the model printer by clicking or
touching MODEL in either section of this screen. The
model name is located on the front face of the print
controller as well as in the included documentation for
the print controller.
Figure 34
 Loading...