Section F - Transmission
F-9 F-9
9803/9390-2
Driven Pulley
Removal and Replacement
1 Park the machine on firm level ground. Apply the
parking brake and chock the wheels.
2 The load bay needs to be raised to gain access to the
engine bay. Ensure that the load bay is properly
supported while working beneath it - refer to the
Handbook.
3 Disconnect the battery to prevent the vehicle being
started.
4 Remove the CVT drivebelt, easing it off the pulleys.
Rotate the pulleys if necessary to aid removal,
K
Fig 2. ( T F-8)
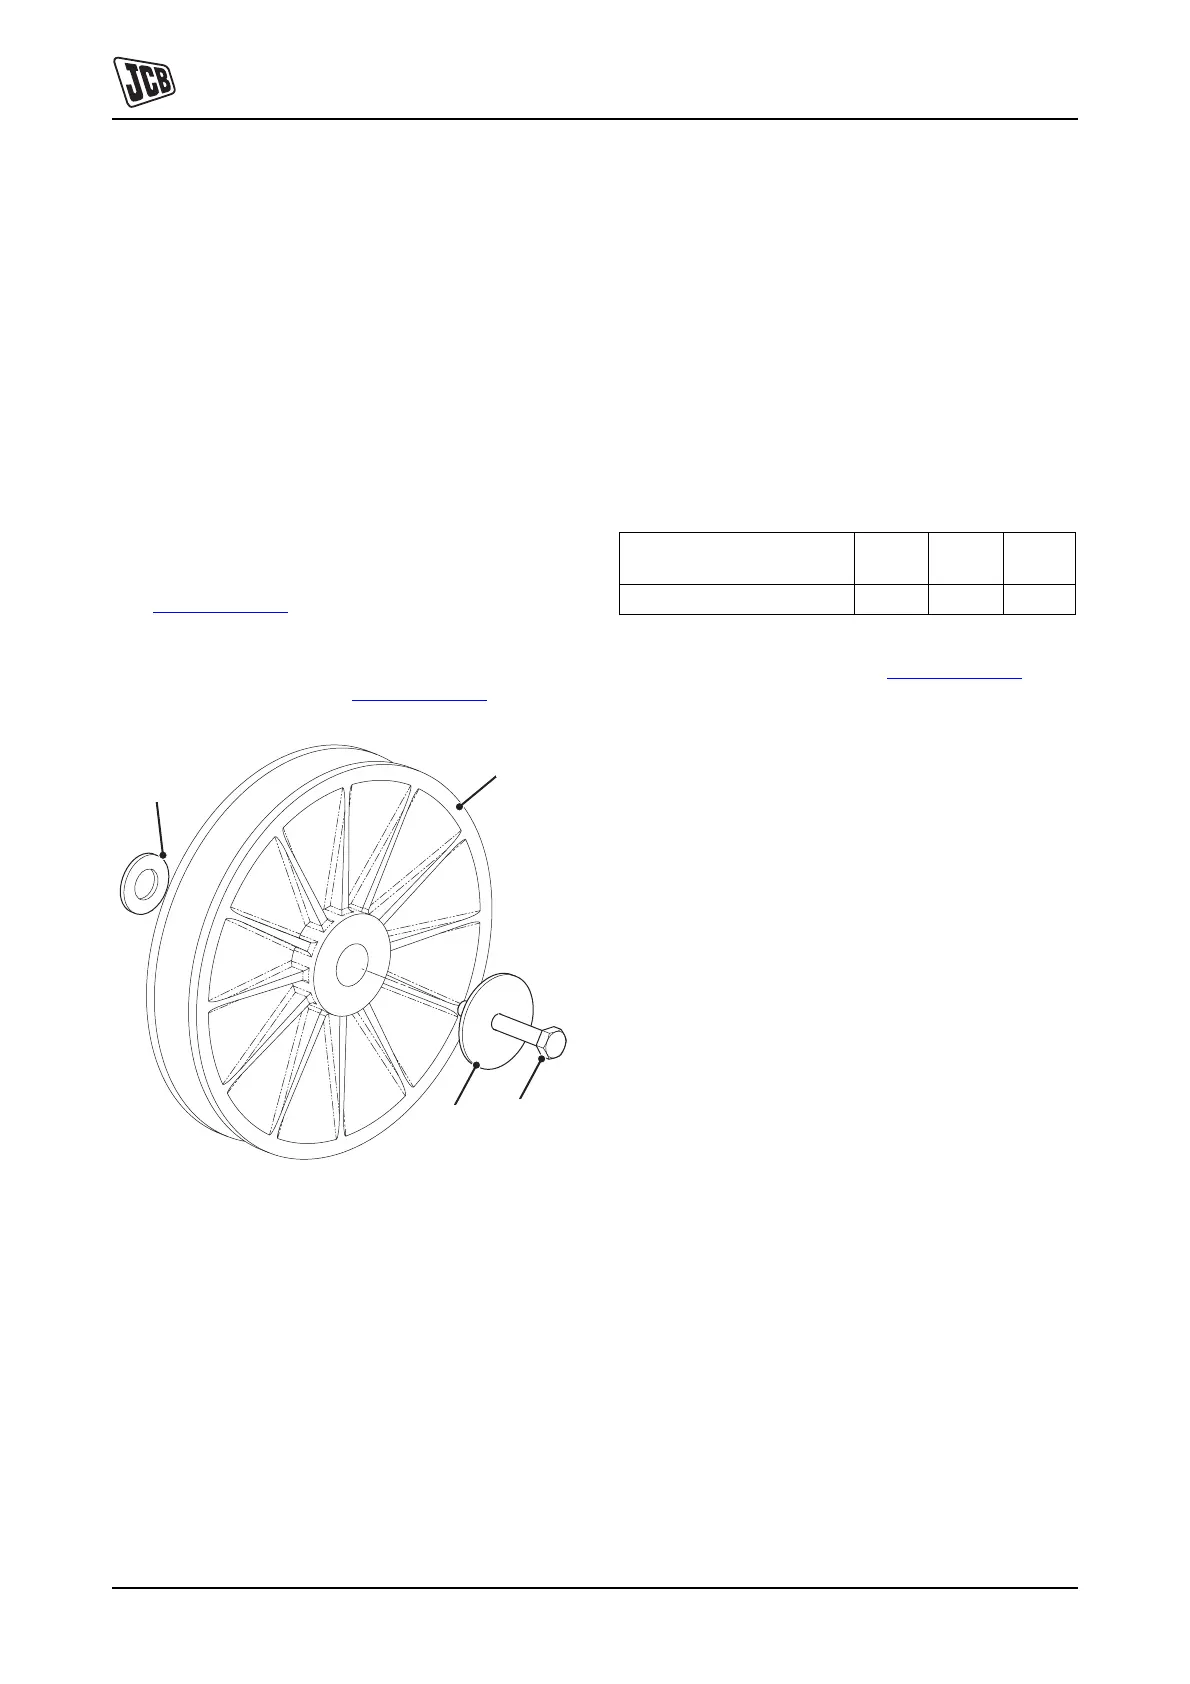
5 Remove the bolt B and washer C and withdraw the
pulley from the splined shaft of the transaxle. Note the
location of the spacer D, K Fig 1. ( T F-9)
Fig 1.
Replacement
Replacement is the reverse of removal, but note the
following:
1 Ensure that the spacer 1-D is fitted.
2 Correctly torque tighten fasteners:
Table 1. Torque Settings
3 The Driver + Driven Pulleys must be correctly aligned
- see setting dimension A K
Fig 2. ( T F-8) which
shows the minimum offset from the engine block
(measured from back face of both pulleys). Note this
is not adjustable, but instead is dependent upon
accurate installation of the engine, transaxle and CVT
components.
Note: Poor belt alignment will lead to premature wear of
the belt and excessive wear to the edges. In extreme
cases, the belt may ride off the pulleys.
4 The drivebelt is self-tensioning. Renew worn belts.
C025100
D
A
C
B
Item Bolt
Grade
Nm lbf ft
Driven Pulley Bolt 43 32



 To Next Page