18 Installation—Installing the FC-2000
cabx3aa2
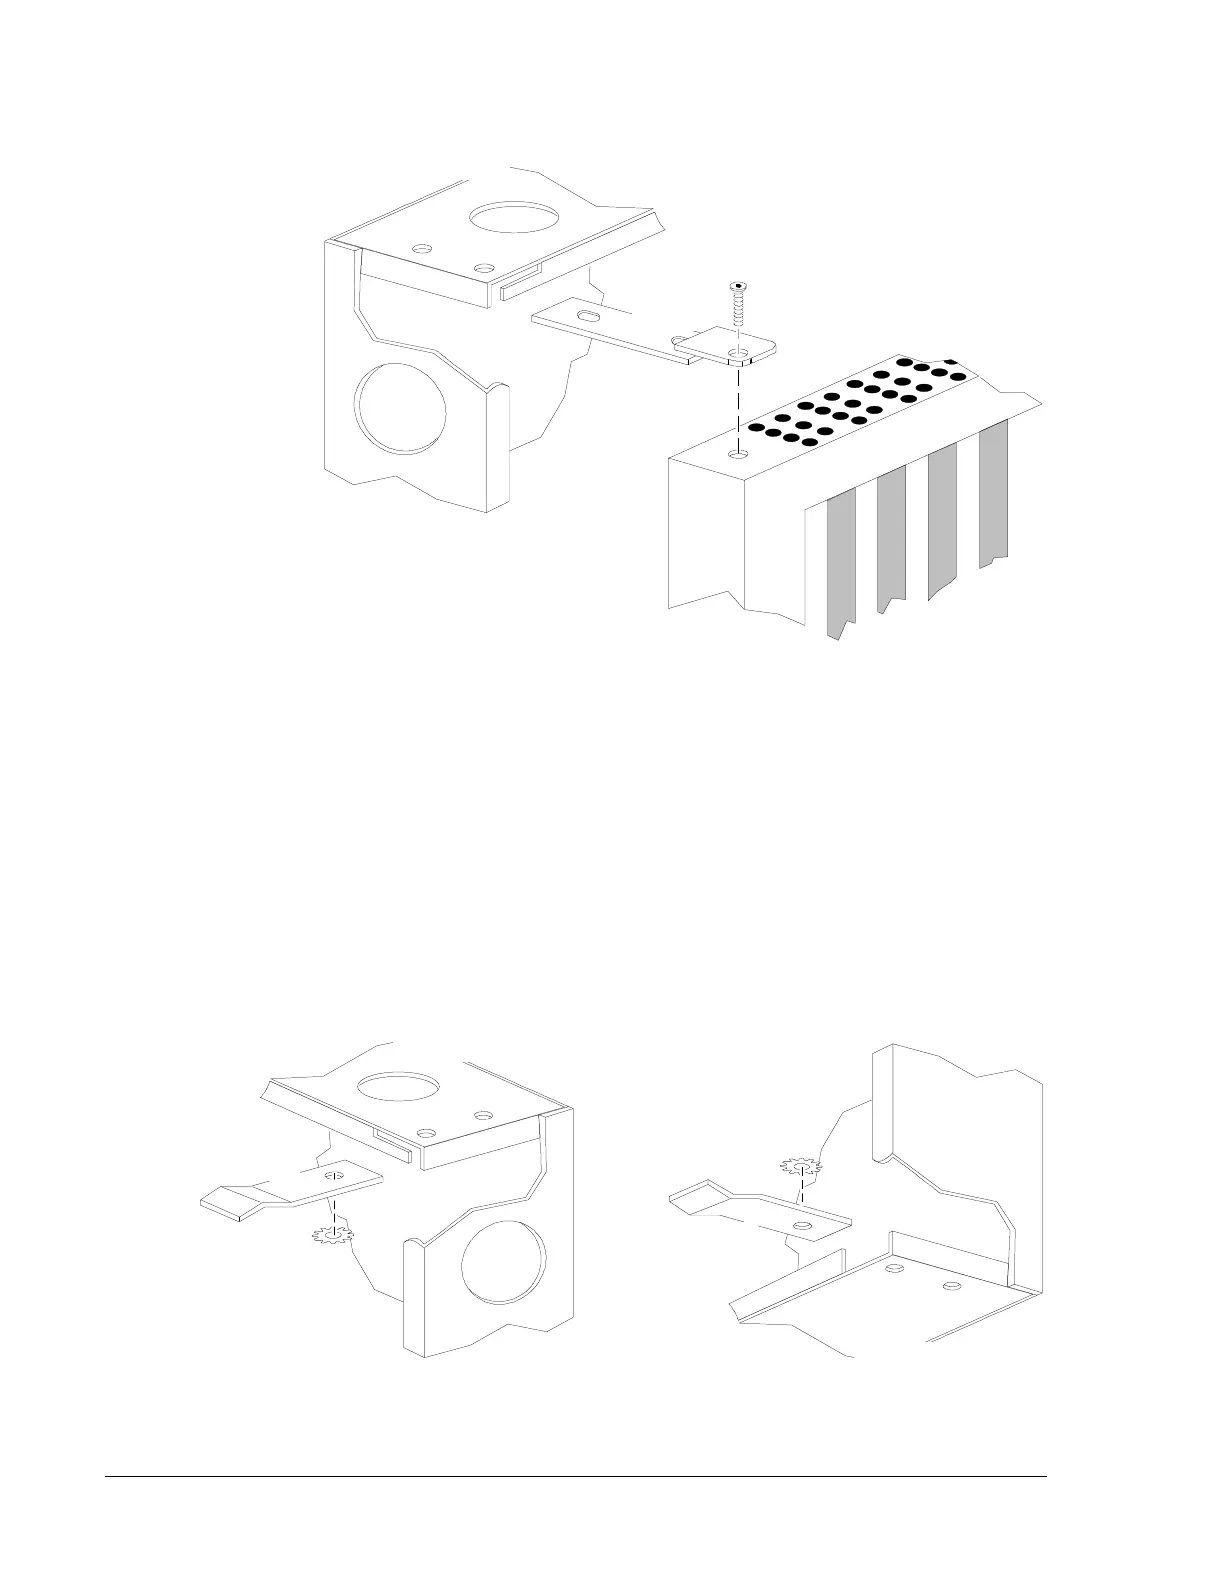
Threaded
Stud
Door Hinge
Small hole
faces outward.
Top
Left Corner
Figure 9: Top Door Hinge Insertion
3. Align the door on the backbox, so that the door sits directly under the
top hinge. Thread the remaining stud into the top hinge and through
the hole in the top of the door, as shown above. The door should now
swing freely.
4. Install the door alignment tabs in the unused slots on the backbox (top
and bottom). In the example below, the door was mounted on the left,
leaving the unused slots on the right. Secure the alignment tab to the
top PEM stud with the nut provided. These tabs align the door
correctly with the backbox and prevent the door from being “skewed”
open.
Figure 10: Door Alignment Tabs
Top
Right Corner
Door Alignment Tab
Bottom
Right Corner
Door Alignment Tab
cabx3aa3
 Loading...