DP350 User's Manual
- 27 -
3.1.4 Loading Labels
The installing ways of label and tractor paper are the same. Keep these tips in mind:
1. Set the gap adjust lever to “1” position.
2. Make sure the printing stays entirely within the printable area. (See the Appendix for specifications.)
3. Because labels are especially sensitive to temperature and humidity, so please use them only under
normal operating conditions.
4. Do not leave labels in the printer while doing other jobs, or they would curl around the platen and
may jam when you resume printing.
5. Remove the labels from the printer, tear off the fresh supply at the rear of the printer; and then press
LF/FF key to advance the remaining labels out of the printer.
Caution: Never feed labels in and out through the printer; they can easily peel off the backing
and jam the printer. If a label does become stuck in the printer, contact your dealer.
3.1.5 Loading Envelopes
The method of loading envelopes is basically the same with that of the cut sheet. Just pay attention to
the following tips:
1. Before loading an envelope, set the gap adjust lever to position 4 or 5.
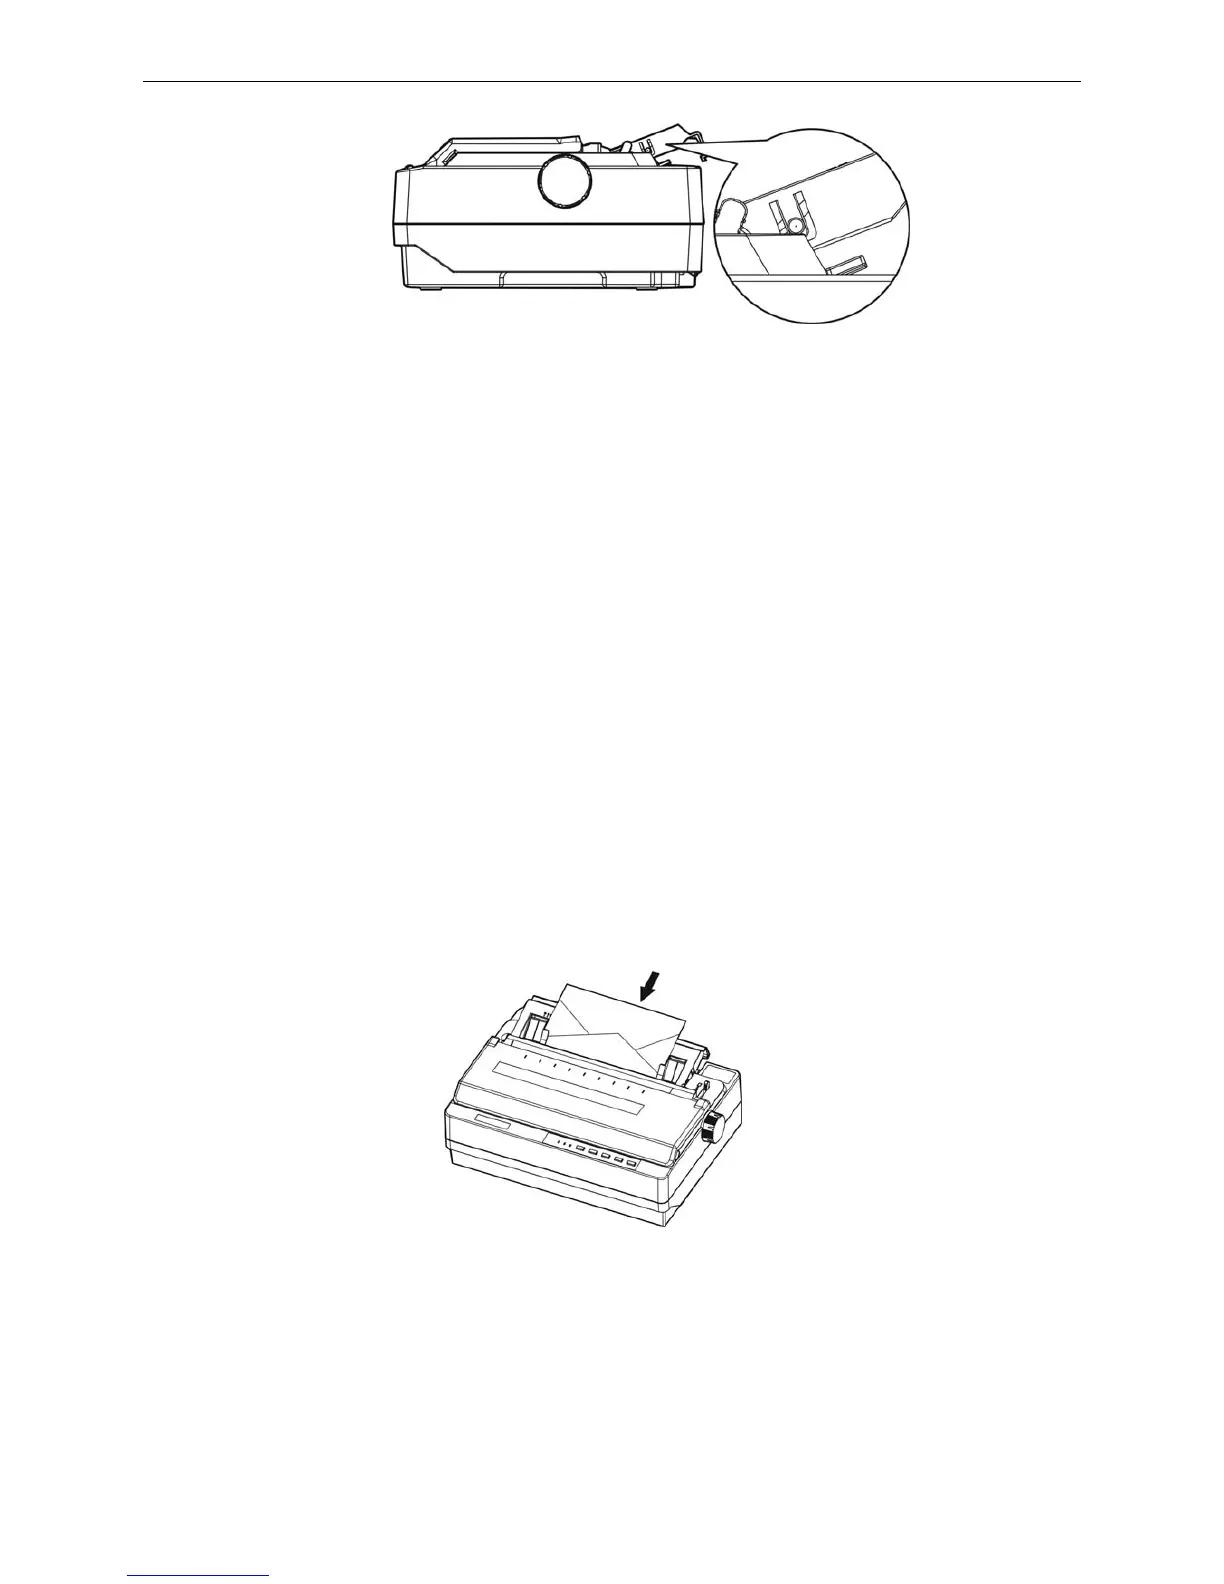
2. Insert the envelope into the printer back cover (as shown below), push it down gently until it feeds
into the printer.
3. Make sure the printing stays entirely within the printable area. The print head must not go past the
left or right edge of the envelope or other thick paper. (See the Appendix for specifications.) It’s a
good idea to print a test sample using a normal single sheet of paper before you print on the
envelopes.
4. Use envelopes only under normal temperature and humidity conditions.
Figure 3-11 Raise the back cover
Figure 3-12 Loading the envelope