DP350 User's Manual
- 30 -
Note:1. The items printed in shadow are the current settings.
2. When select the compress printing in the setup menu, high speed printing is invalid.
3. Black mark function is optional. It can be set up according to the customers’ requirement.
If the fittings of black mark do not install, the black mark item should be closed.
4. Printer would print out the menu according to the selected interface.
1. Make sure the printer is in online mode. (ONLINE LED is on), at the same time, holding the
LOAD/EJECT + FF/LF keys for 3 seconds.
z The PAPER OUT LED and ONLINE LED would blink twice simultaneously which indicates
that the printer enters the menu setup system.
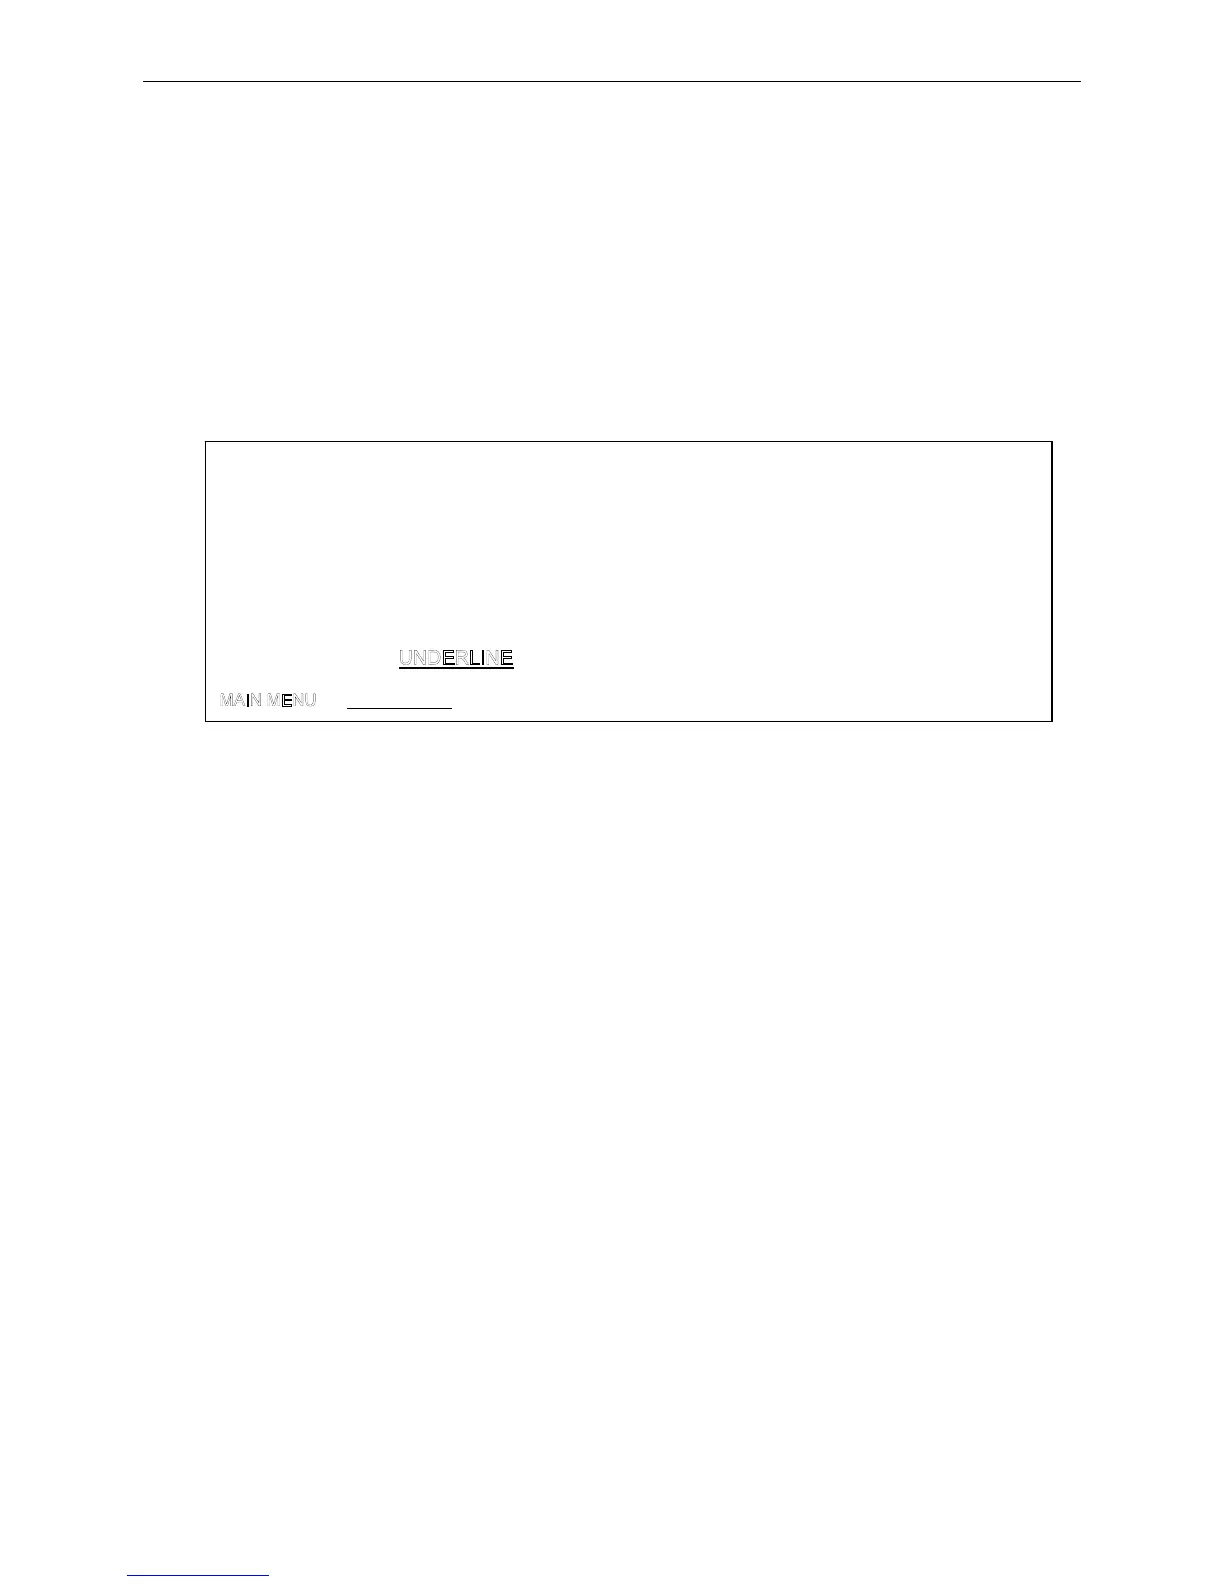
z The title and main menu are printed out firstly (as the following figure shown), the default
settings are underlined. Print head stays under the current default item.
2. Using the following keys to modify the menu setting:
LOAD/EJECT Select the menu option or menu setting value.
LF/FF Enter into submenu or confirm menu setting value.
Note: Newly setting option would be shown in FILLED.
ONLINE Return to upper menu (Hold on pressing ONLINE key would return to main
menu directly).
TEAR Save and exit the menu setup system.
3. Give up the settings just modified, just turn off the printer directly. If you need to save the newly
setting, hold on pressing TEAR key to save and exit the menu setup mode.
4. Turn off and restart the printer, newly settings are in operation.
3.2.2 Online-aptitude Parameter Settings
DP350 supports the function of online-aptitude parameter settings, which can be set in the PC with the
driver installed in.
The concrete setting steps are shown as follows:
1. Make sure that the computer and the printer are connected with USB cable and both the computer
and the printer are turned on, the printer should be in normal working condition as well.
2. Under the operation systems of WIN 2000/WIN XP/VISTA/WIN7, Click “Start” → “Settings” →
“Printers”.
Under the operation system of Windows 8, click “Desktop” in the main panel firstly, and then double
click and enter into the window of “Control panel”, click “Hardware and Sound” to find “Devices and
printers”, at last, open the window of “Devices and printers”.
3. Right click “DP350”, select “Properties”.
4. Click “Printer settings” in the property page.
Figure 3-14 Menu setup system
JOlimark DP350
SETUP MENU SYSTEM
Use the LOAD/EJECT key to point the print head to the desired setting.
Use the LF/FF key to confirm the current setting.
Use the ONLINE key to go back the previous menu (Press and hold the ONLINE key to go
back the main menu).
Press and hold the TEAR key to save settings and exit.
Current settings are
New settings will be FILLED.
CHARACTER PAGE LAYOUT SYSTEM SETUP SERIAL I/F PIN TEST