DP350 User's Manual
- 26 -
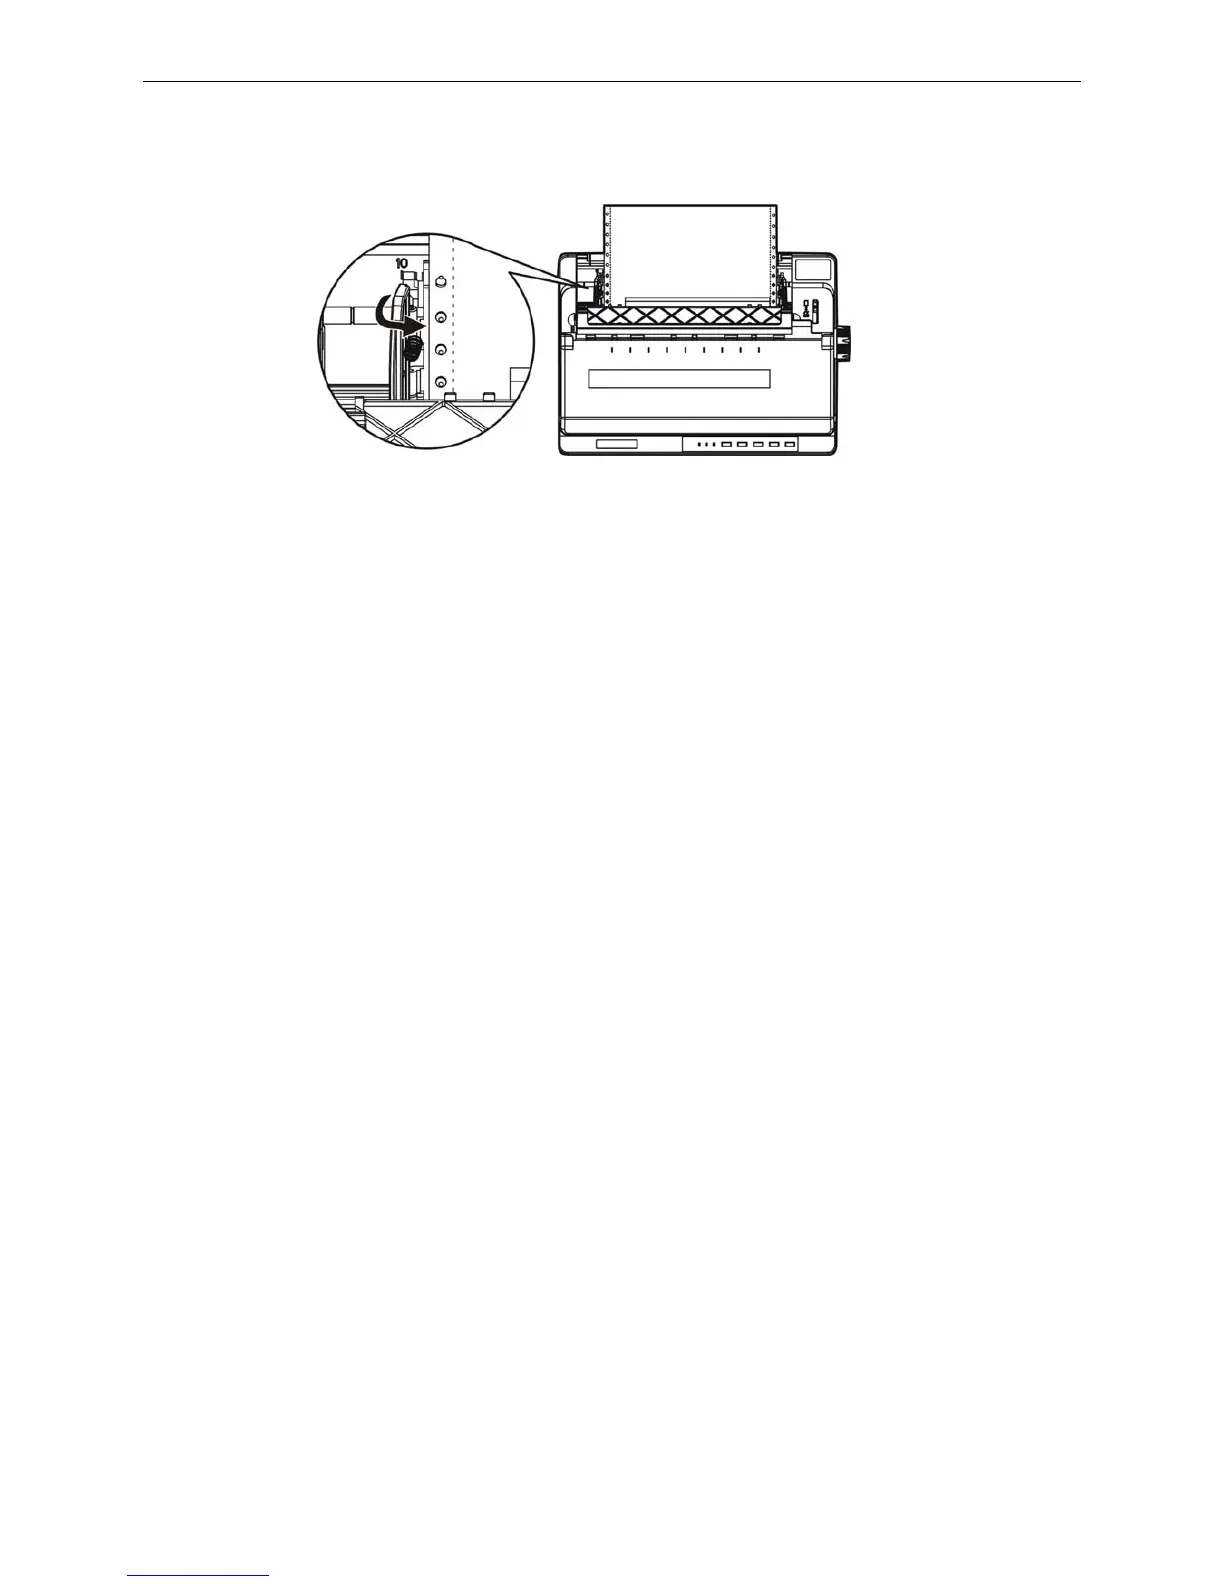
5. Make sure your paper has a clean, straight leading edge. Open the right and left tractor covers. Fit
the first holes of the paper over the tractors pins and then close the tractors covers. Slide the left
tractors to remove any slack in the paper and lock it in place. Now the paper is in the ready position.
(Shown as below)
Note: Only to clean the paper jams when the printer is turned off, can use the paper feed
knob on the right side of the printer. Otherwise, you may damage the printer or
change the printing home position.
6. Make sure the printer window is closed. Turn on the printer, and press LOAD/EJECT key to feed
paper. You can adjust the printing home position according to chapter 2.2.5. When the printer
receives data, it begins printing automatically.
Note: Do not use the paper feed knob to adjust the paper-in position due to the micro-range
is limited. When the adjustment exceeds the up-limit or down-limit, the beeper beeps
and the position can not be adjusted further. The position is in effect before next
adjustment. (The margin set in the software can cover this adjustment, so you had
better adjust the printing home position with the software.)
7. When you finish printing (the printer receives no data for several seconds) the printer feeds the
perforation of the tractor paper to the edge of the printer cover so that you can tear off easily.
Note: Set the auto tear off function ON in the Menu Setup Mode. Otherwise, the printer does
not feed the perforation to the edge of the printer cover.
8. If the perforation and the edge of the printer cover do not match, you should adjust the tear off
position following the steps in chapter 2.2.5, after adjusting, tear down the paper. When you send
print data again, the paper automatically feeds back to the printing home position and begins to print.
How to switch tractor paper to cut sheet paper
Firstly, tear down the tractor paper which is having been printed, then hold LOAD/EJECT key down
continuously to eject the paper in the offline mode. Pull the paper-select lever to the cut sheet position,
and load the cut sheet according to chapter 3.1.1.
Caution: Make sure tractor paper which is having been printed is tore off before ejecting the
tractor from the printer, as too many pages ejected could cause paper jammed.
3.1.3 Loading Multi-ply Papers
The installing ways of multi-ply papers and tractor paper are the same. Just pay attention to the
following tips:
1. Must refer to the figure below to lift up the back cover, otherwise, it may cause paper jam during
printing.
2. Never load multi-ply papers joined by metal staples, tape, or continuous gluing.
3. Avoid printing beyond the printable area of multi-ply papers, or it may damage the print head (see
Appendix for details).
Figure 3-10 Install the tractor paper on the tractors