DP350 User's Manual
- 3 -
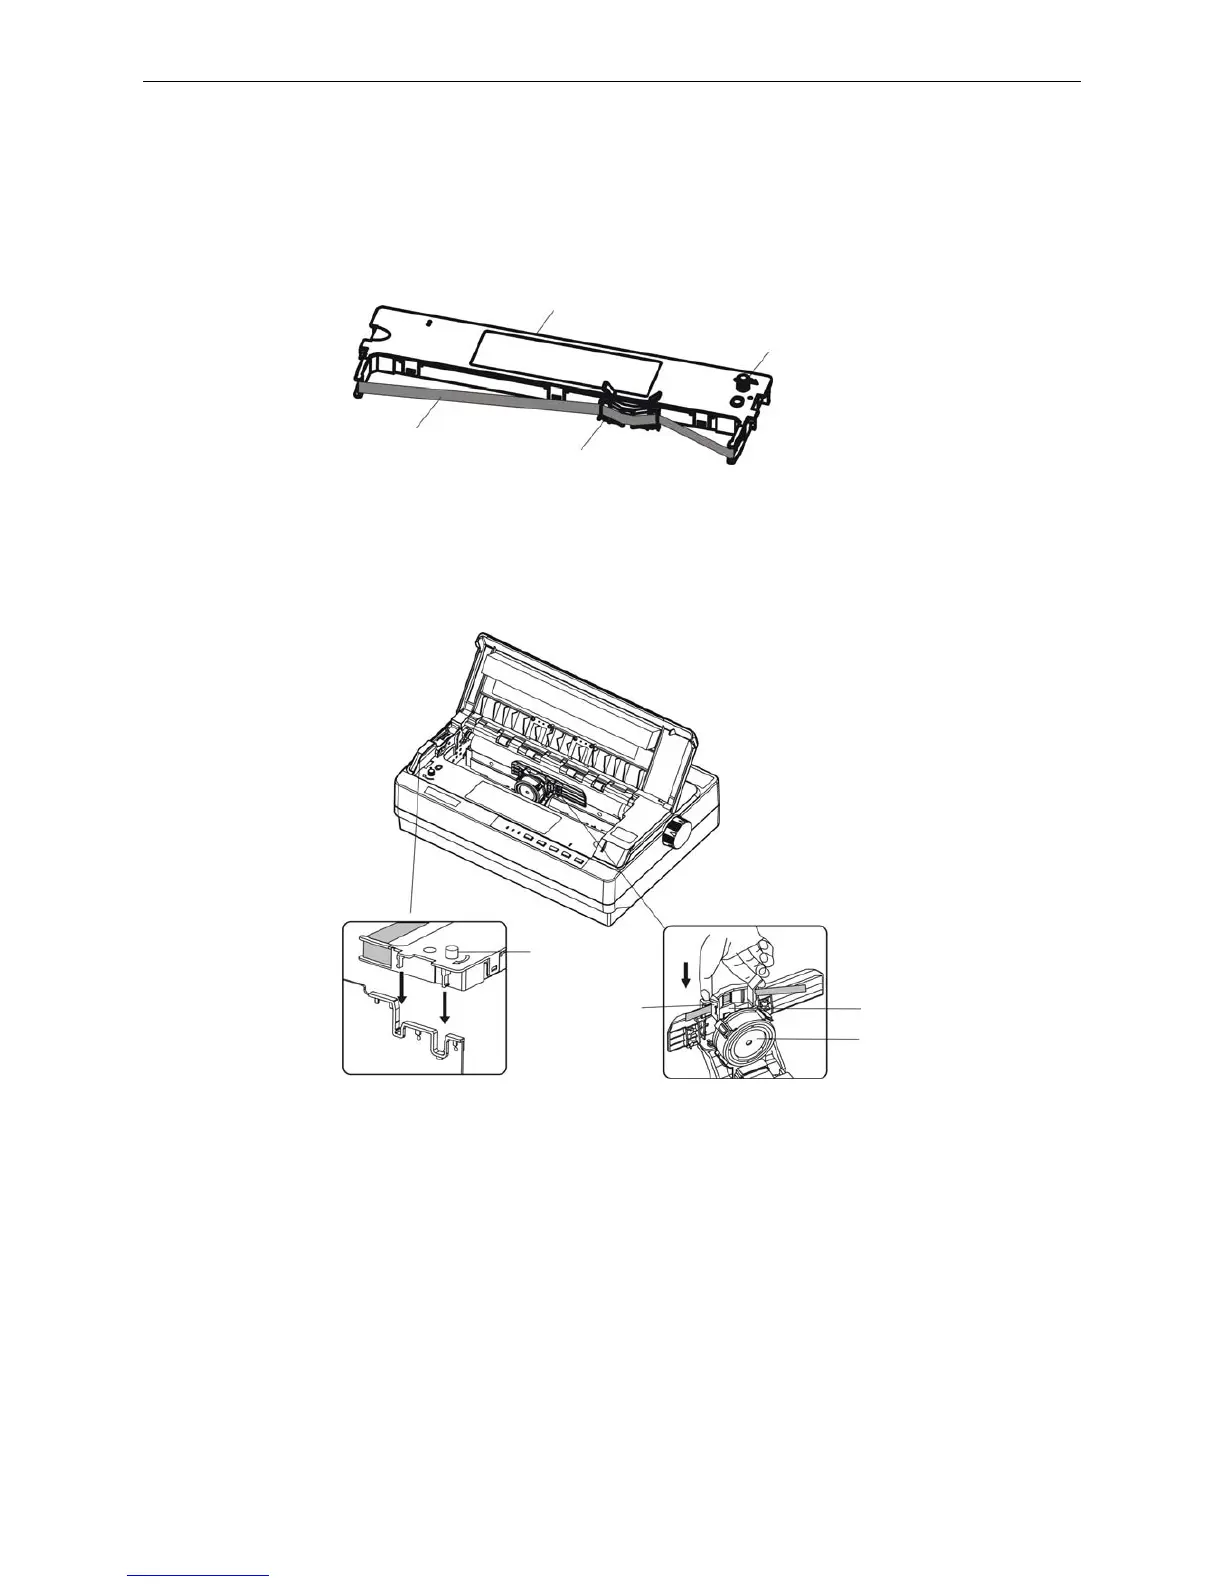
Ribbon knob
Ribbon nip
Ribbon guide slice
Print head
3. Put the gap adjust lever to the uppermost position.
4. Slide the print head to the middle of the printer.(shown as figure 1-4)
Note: Never move the print head while the printer is on, or it may damage the printer. Also, if
you have just used the printer, let the print head cool for a few minutes before you
touch it.
5. Please push out the ribbon nip according to the label on the ribbon cartridge.
6. Hold both sides of the ribbon down firmly to fit the plastic hooks into the printer slots. Then put the
ribbon nip between print head and ribbon guide slice, press it down until it click into place. (shown as
figure 1-6)
7. Turn the ribbon knob in the direction of the arrow to remove any slack from the ribbon so it is easier
to install.
8. Slide the print head from side to side several times to make sure it moves smoothly.
9. Please put the gap adjust lever to original place and close the window after the ribbon cartridge is
installed.
NOTE: 1. When your printing becomes faint, you need to replace the ribbon cartridge. Otherwise,
the print quality would be affected and the print head may be damaged.
2. To remove the old ribbon cartridge, first make sure the power is turned off, move the
print head to the center of the printer. Then grasp the ribbon cartridge handle on
either side and lift it out of the printer.
3. Please use the Jolimark JMR120 ribbon cartridge only. Manufacturer will not honor
warranty when using unauthorized ribbon cartridge.
Figure 1-5 Ribbon cartridge
Figure 1-6 Install ribbon cartridge
Ribbon nip
Ribbon cartridge (JMR120)
Ribbon core
Ribbon knob